

Sometimes you want to place a name above someone walking, or keep a label beside a moving subject. In this tutorial, we'll make text stay with a person as they move.
The idea is simple: move the text by the same amount as the person, then record each position as a keyframe. Let's start by finding the text's position controls.
First, get to know the workspace
We're starting with a text label, ‘The Explorer’, above the person in the video. The Program Monitor in the center shows the person and the text. In the timeline below, select the text clip above the footage. Effect Controls on the right is where you'll adjust its movement.
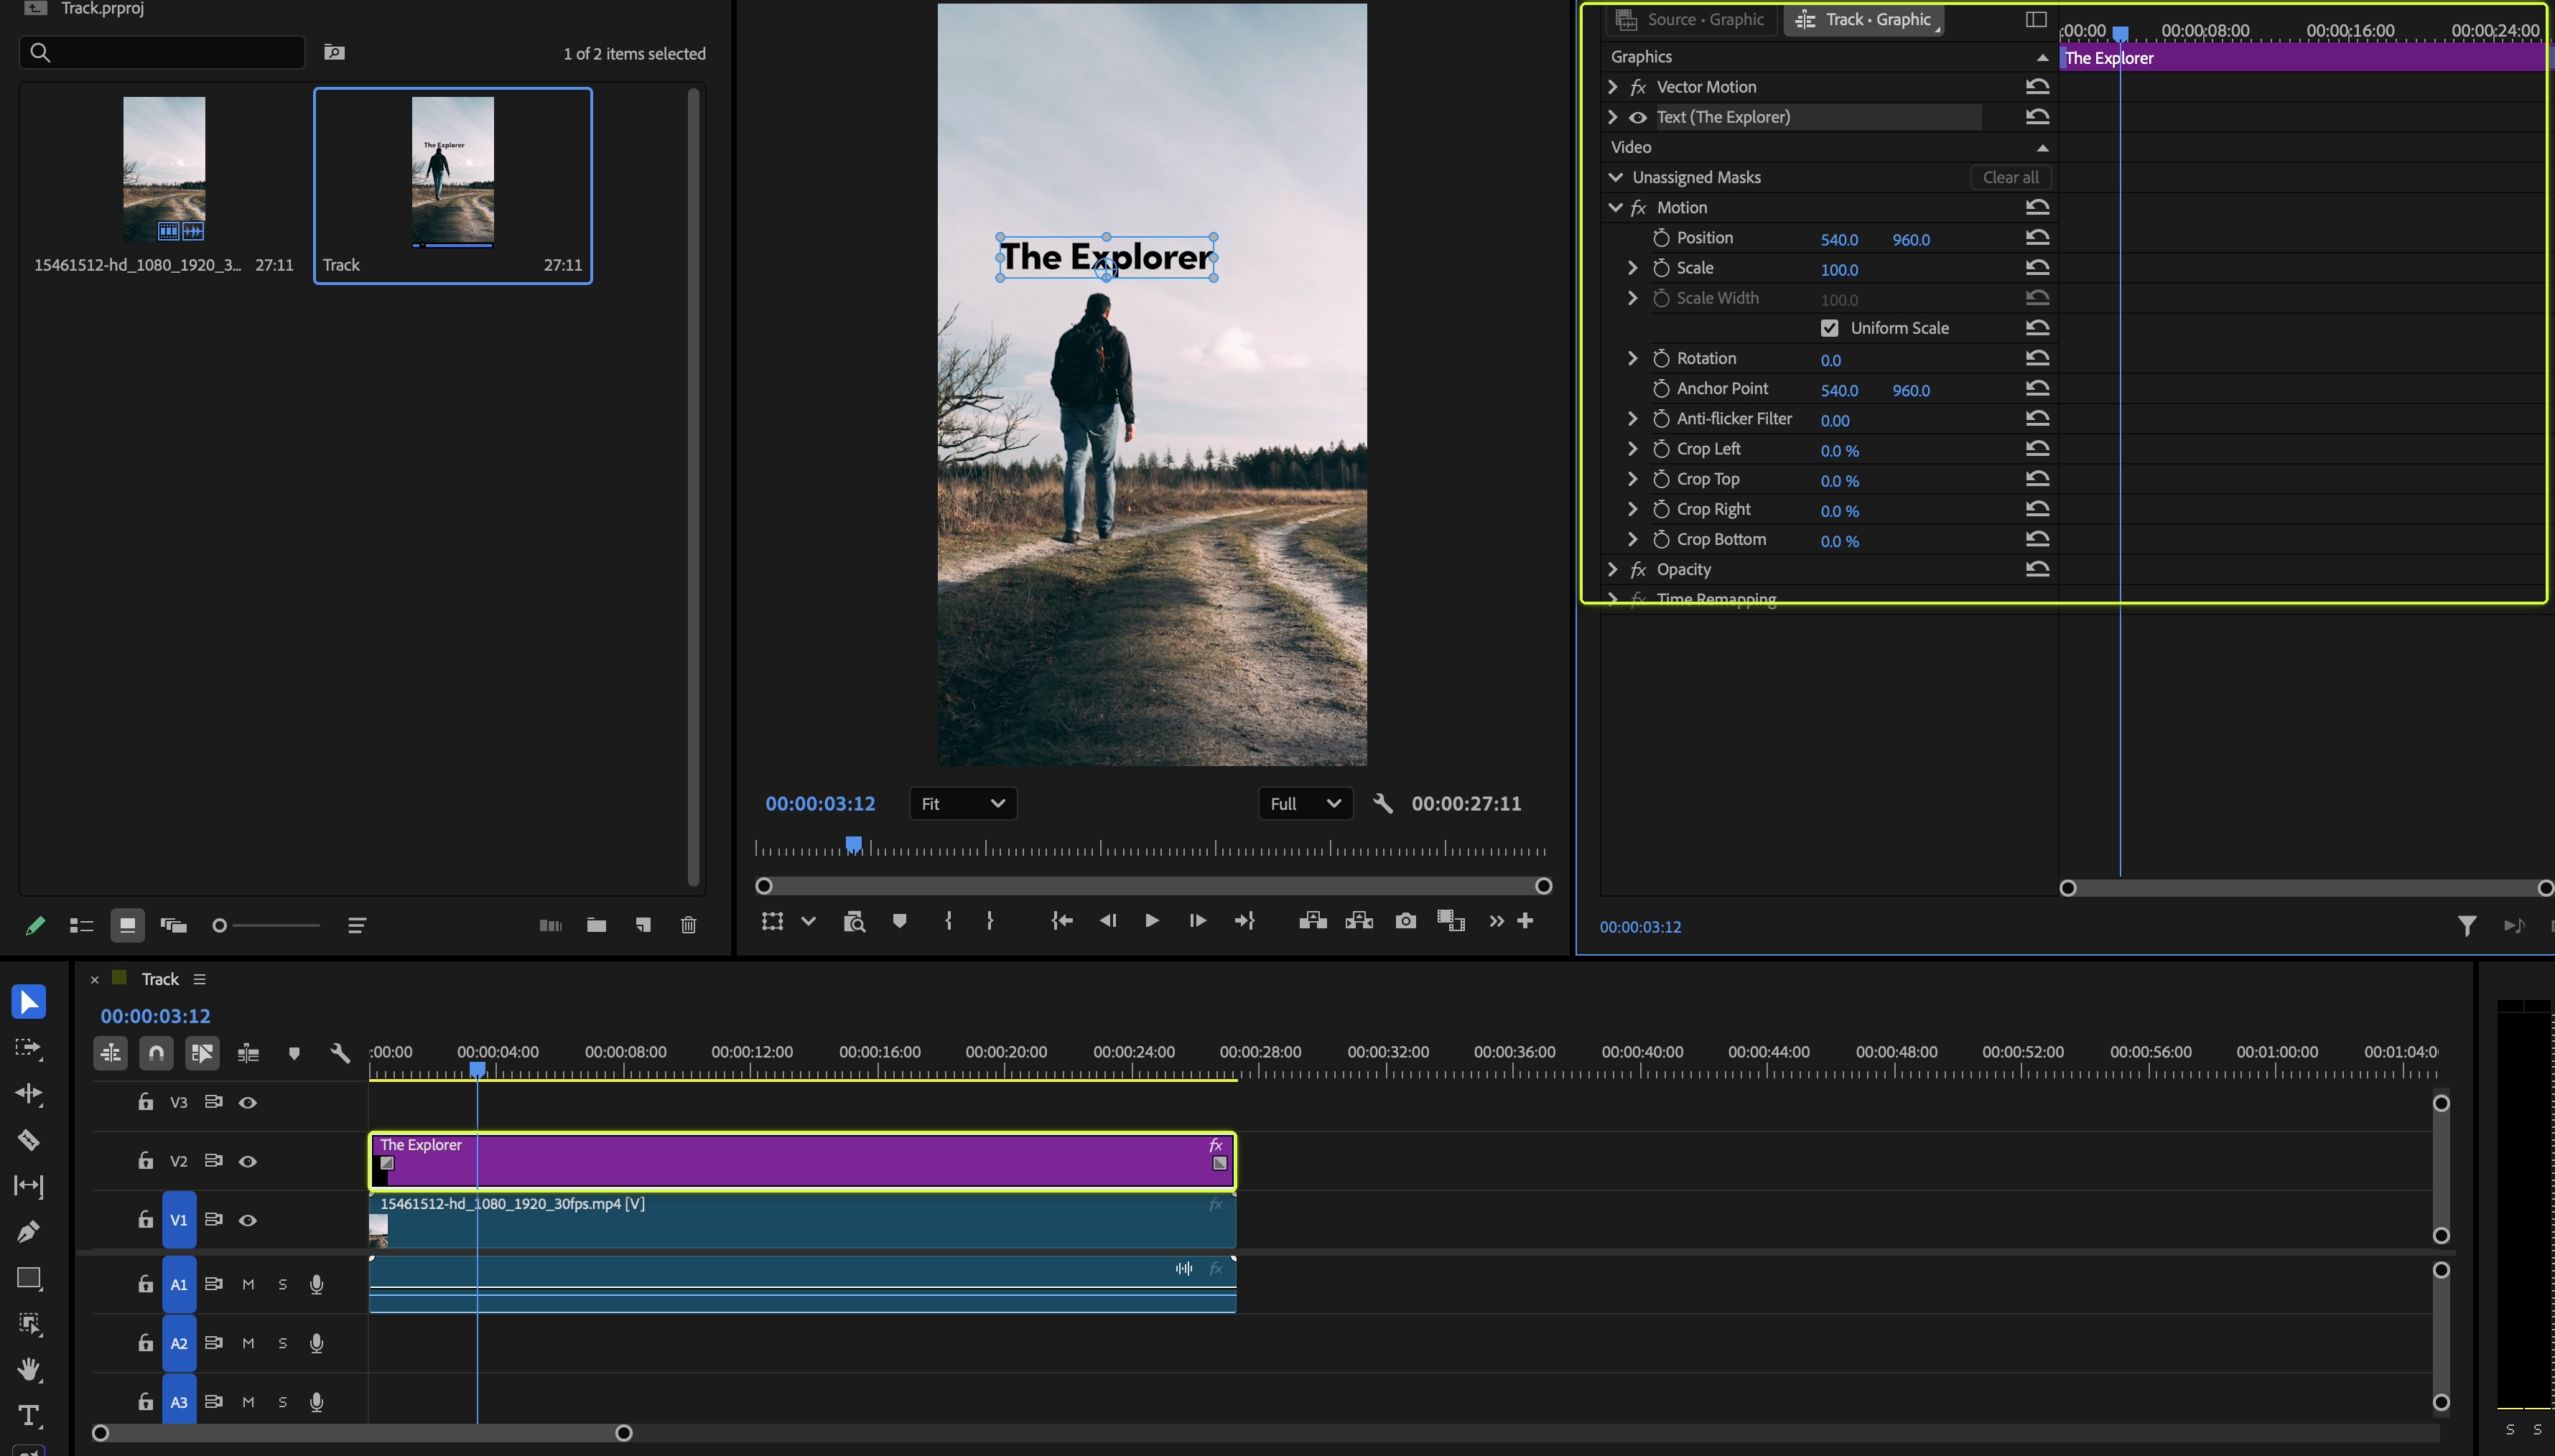
Now let's take a closer look at the panel on the right.
1. Find the text's Position control
In the timeline, select the text graphic clip above the footage. Open Effect Controls, then expand the Text entry under Graphics. In this example, it's Text (The Explorer).
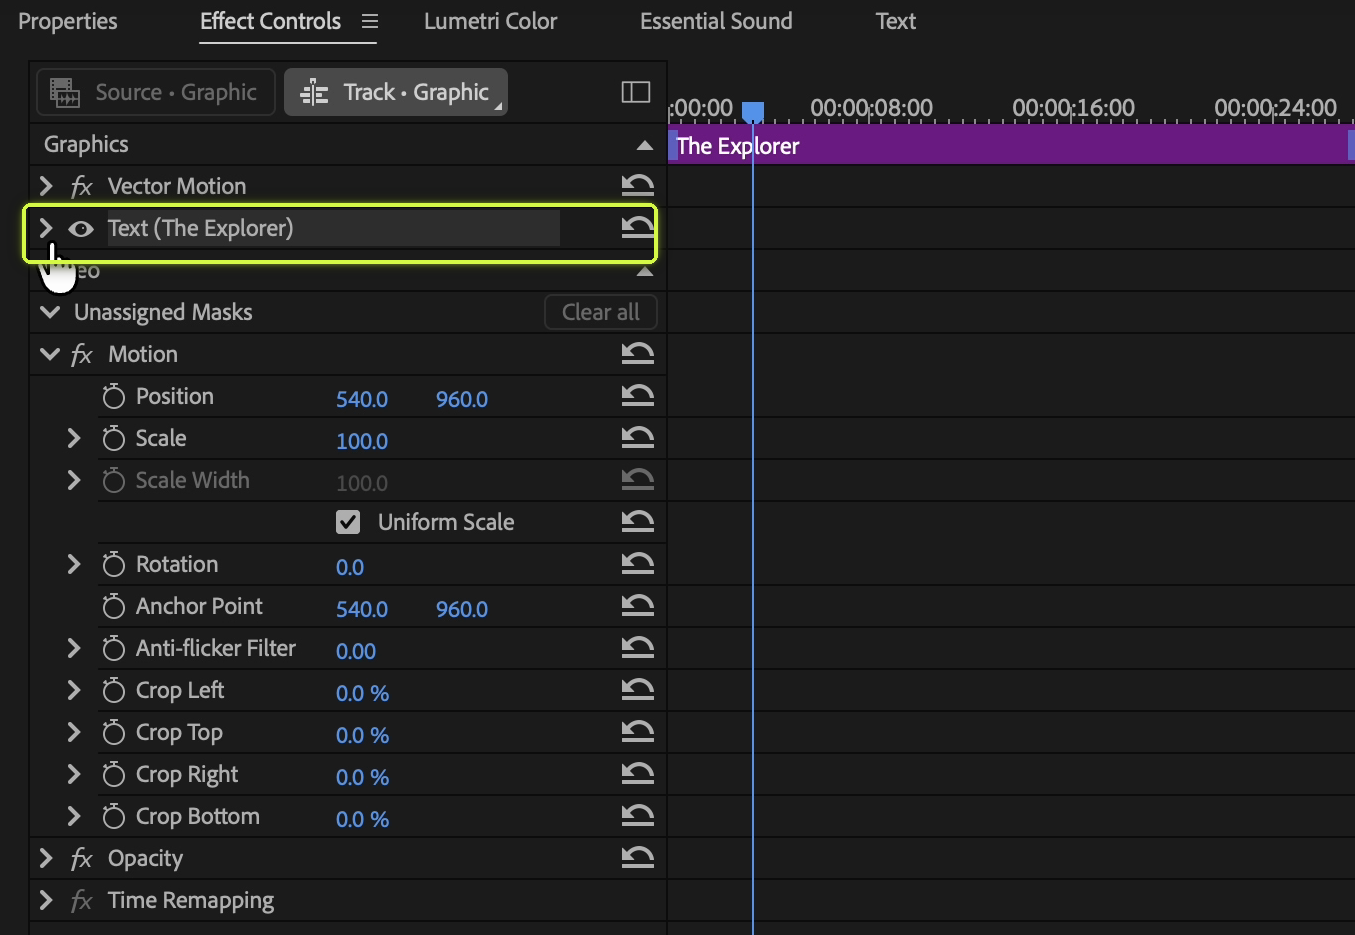
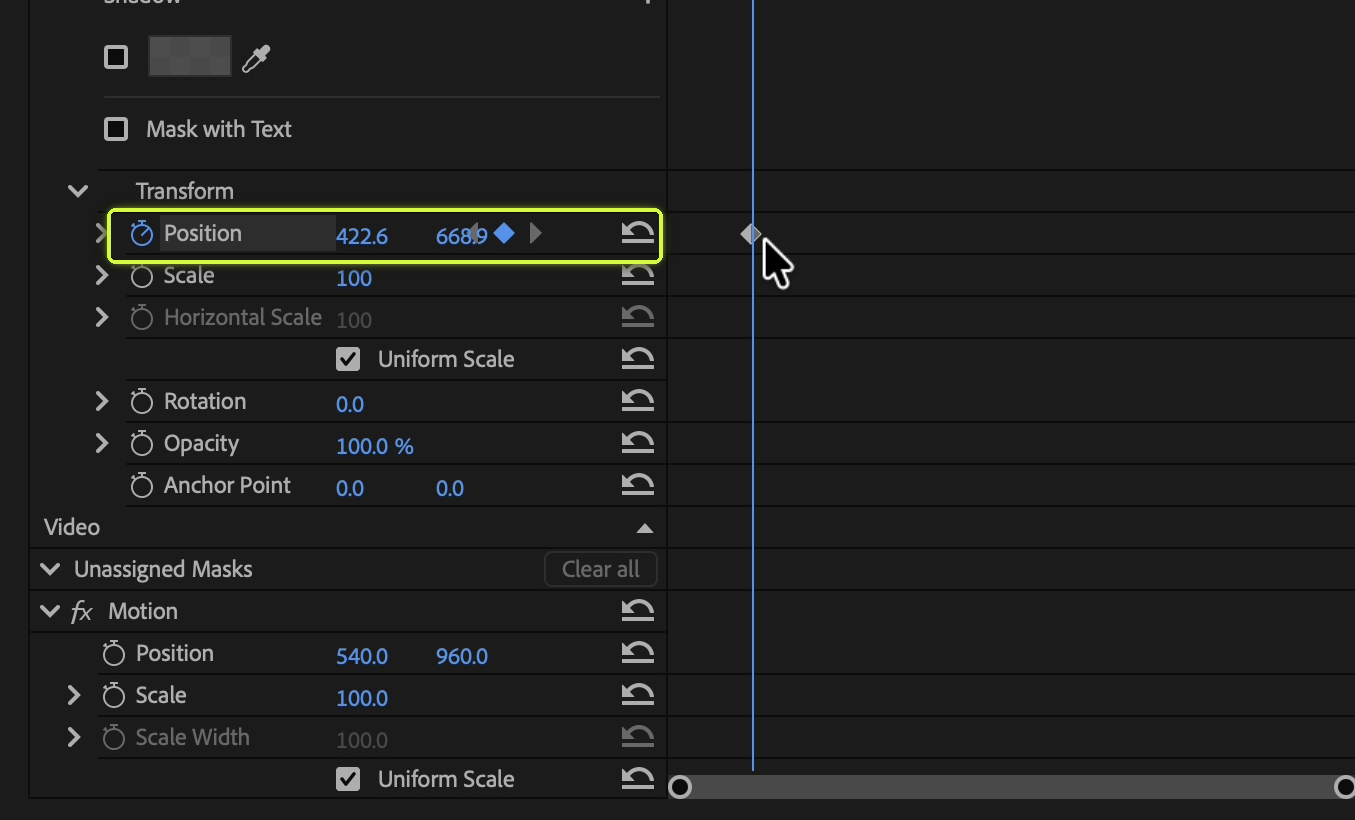
Scroll down to Transform → Position within the text layer. That's the property we'll use here. Check that you're inside the text layer, rather than the separate Video → Motion → Position section.
Place the playhead where you want the animation to begin, then click the stopwatch beside Position. The current position becomes the first keyframe.
2. Advance one frame and reposition the text
With the timeline focused, press the right arrow key to advance one frame. In the Program Monitor, move the text to match the person's movement. Because Position animation is enabled, changing the position adds a new keyframe.
Repeat ‘advance one frame → adjust the position’ to make the text follow the person. You can also use the left arrow key to go back and correct frames where it drifts.
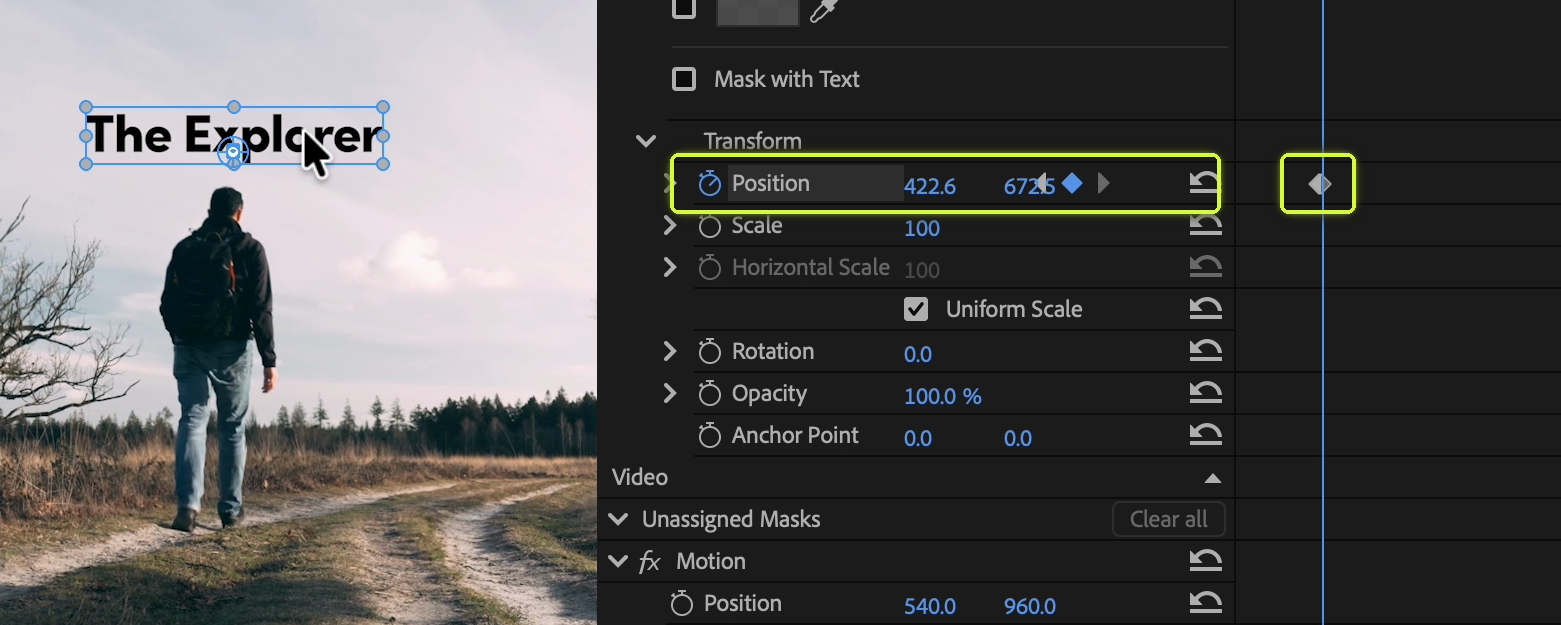
If you can't see the keyframe area, check the Show/Hide Timeline View button at the top of Effect Controls. You may need to widen the panel.
You don't always need a keyframe on every frame. A few keyframes and interpolation can handle simple movement. But when the person keeps changing speed or direction, following them precisely takes more position adjustments.
Isn't this getting repetitive?
Advance a frame, adjust the position, then advance again. The longer the clip, the more often you repeat the same adjustment.
One frame, then another
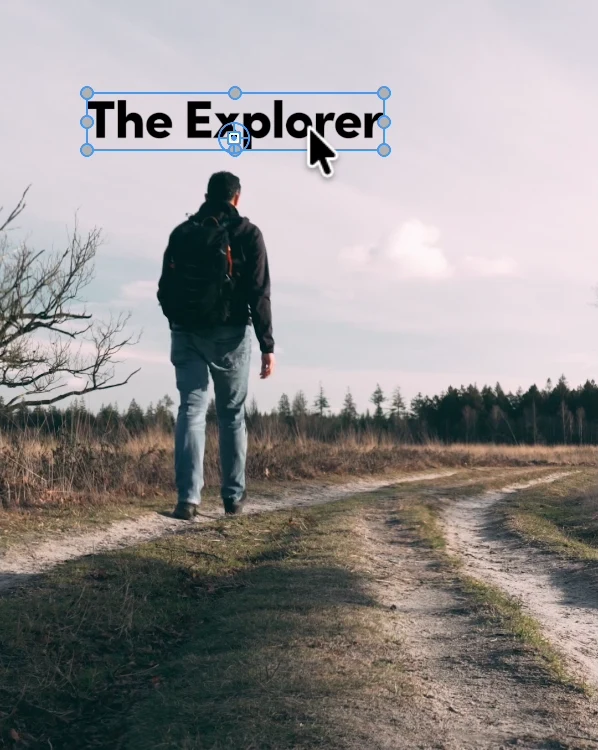
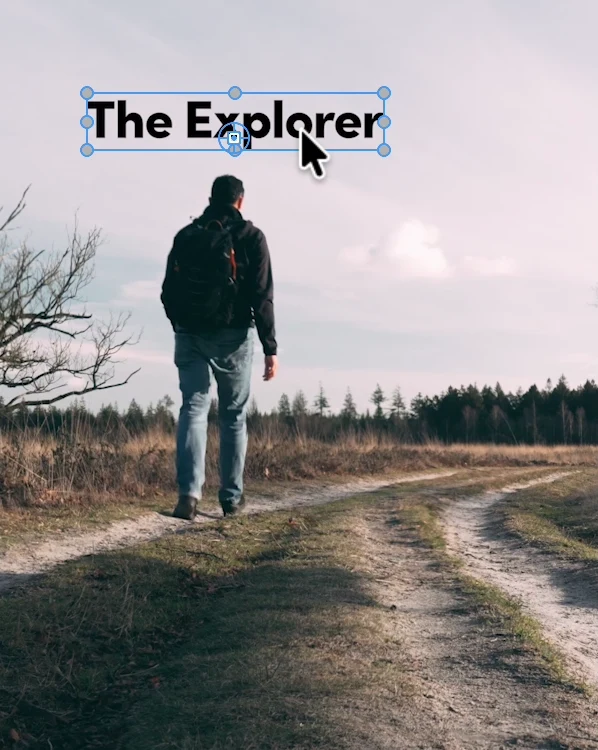
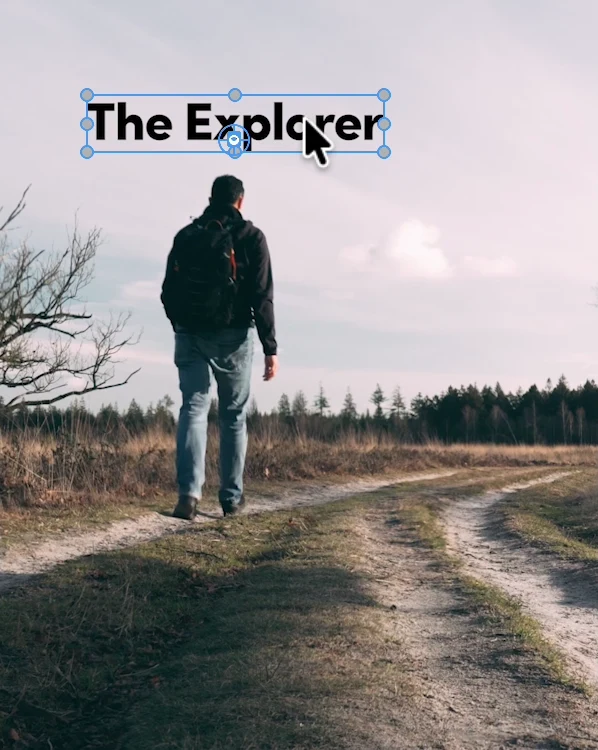
Advance → reposition → repeat
Apply the tracked path to text
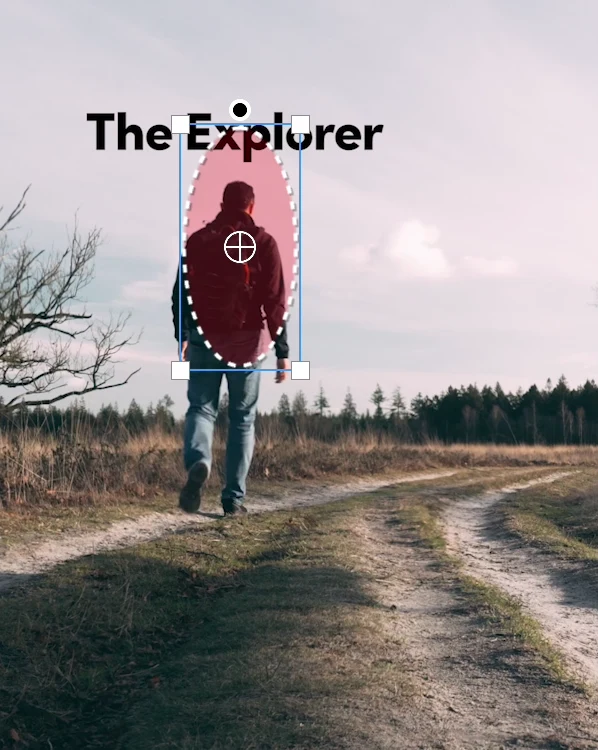
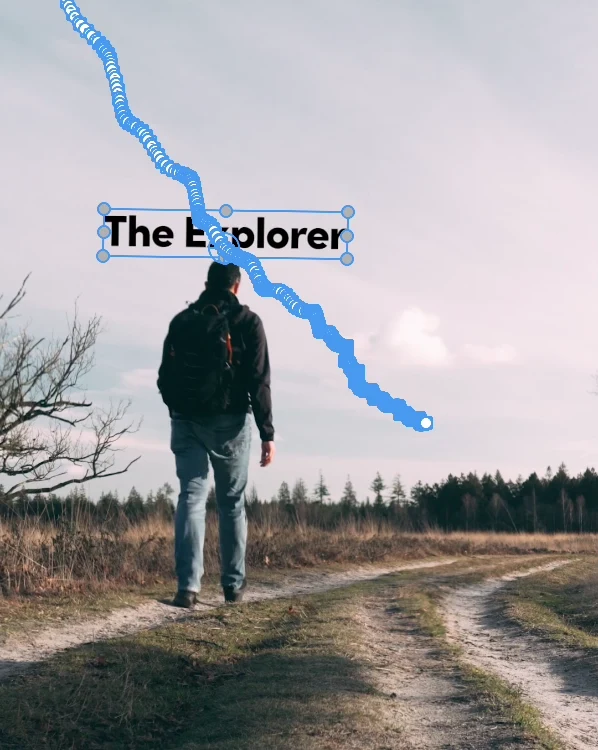
Track a mask → import → apply
Apply tracked motion to the positions you used to set frame by frame.
| Task | Manual workflow | Mask To Motion |
|---|---|---|
| Example work time | About 3 min | About 10 sec |
| Follow a position | Adjust the position frame by frame | Apply the tracked path as keyframes |
| Scale and rotation | Adjust keyframes for each property | Select the properties to apply together |
| Perspective changes | Adjust corner positions manually | Convert perspective tracking data to Corner Pin |
| Choose the placement | Adjust Position keyframes and offsets | Place at a reference frame, then apply motion |
| Reuse on other clips | Copy keyframes, then adjust them | Apply imported tracking data to another clip |
| Keep a subject in place | Build the opposite movement manually | Apply Reverse Stabilize |
These are illustrative work times for a 10-second clip. Actual time varies with footage, hardware, experience and tracking quality. Perspective conversion requires perspective tracking data; correct any tracking errors first.
Mask To Motion transfers a path tracked with a mask in Premiere Pro to the movement of your text. Let's recreate the same effect, starting with mask tracking.
3. Draw an elliptical mask on the video clip
This time, select the video clip whose movement you want to track, rather than the text.
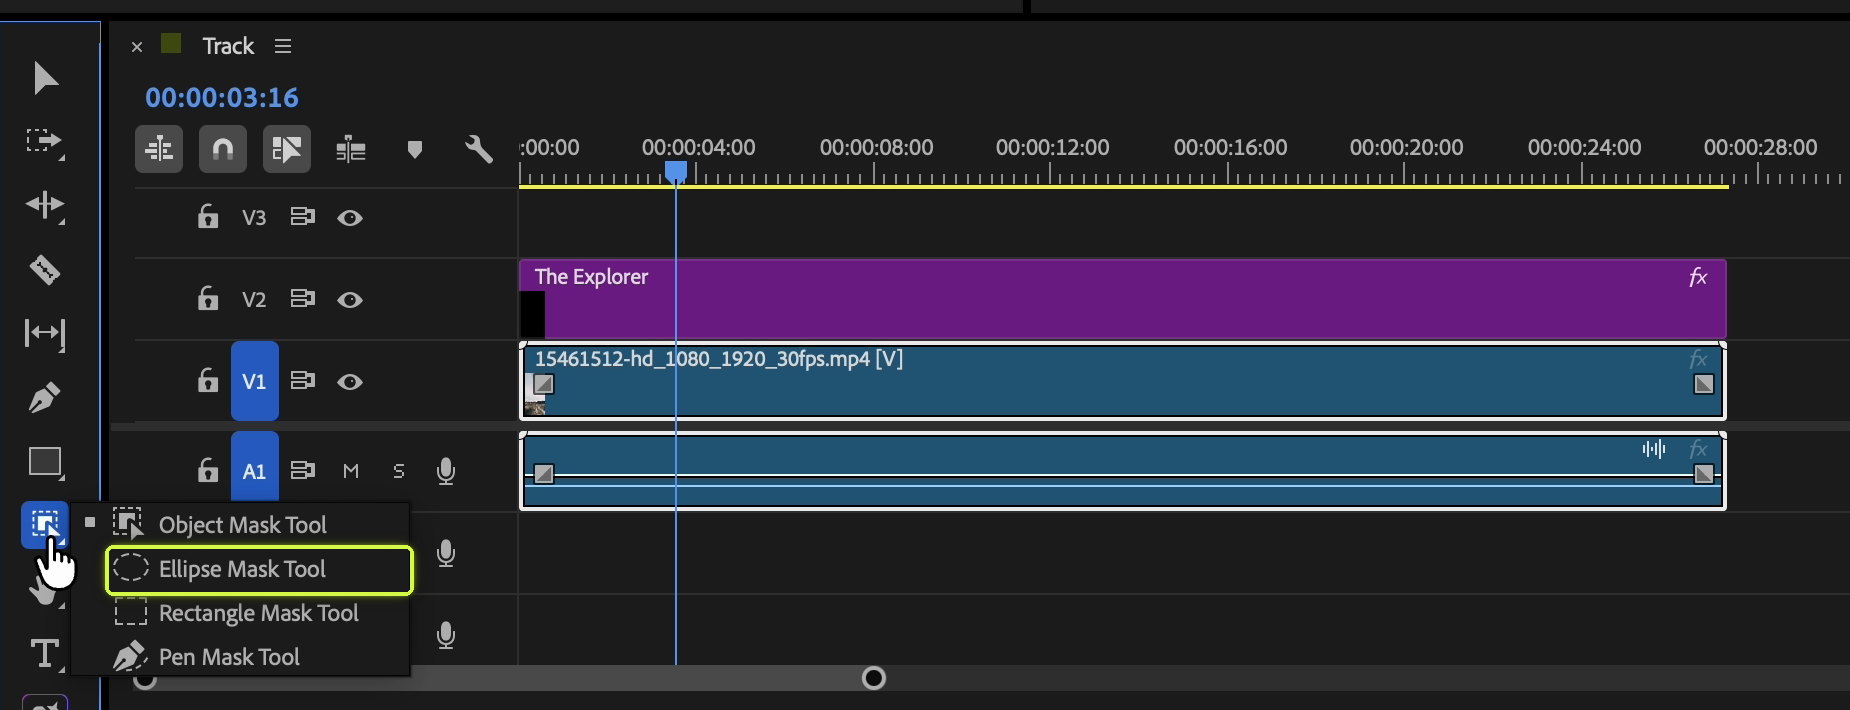
Press and hold the mask tool in the toolbar to open the tool list. The recording shows Ellipse Mask Tool, Rectangle Mask Tool and Pen Mask Tool below Object Mask Tool. We'll use Ellipse Mask Tool.
In the Program Monitor, draw an ellipse around the person. Adjust it to fit the subject without including too much of the background.
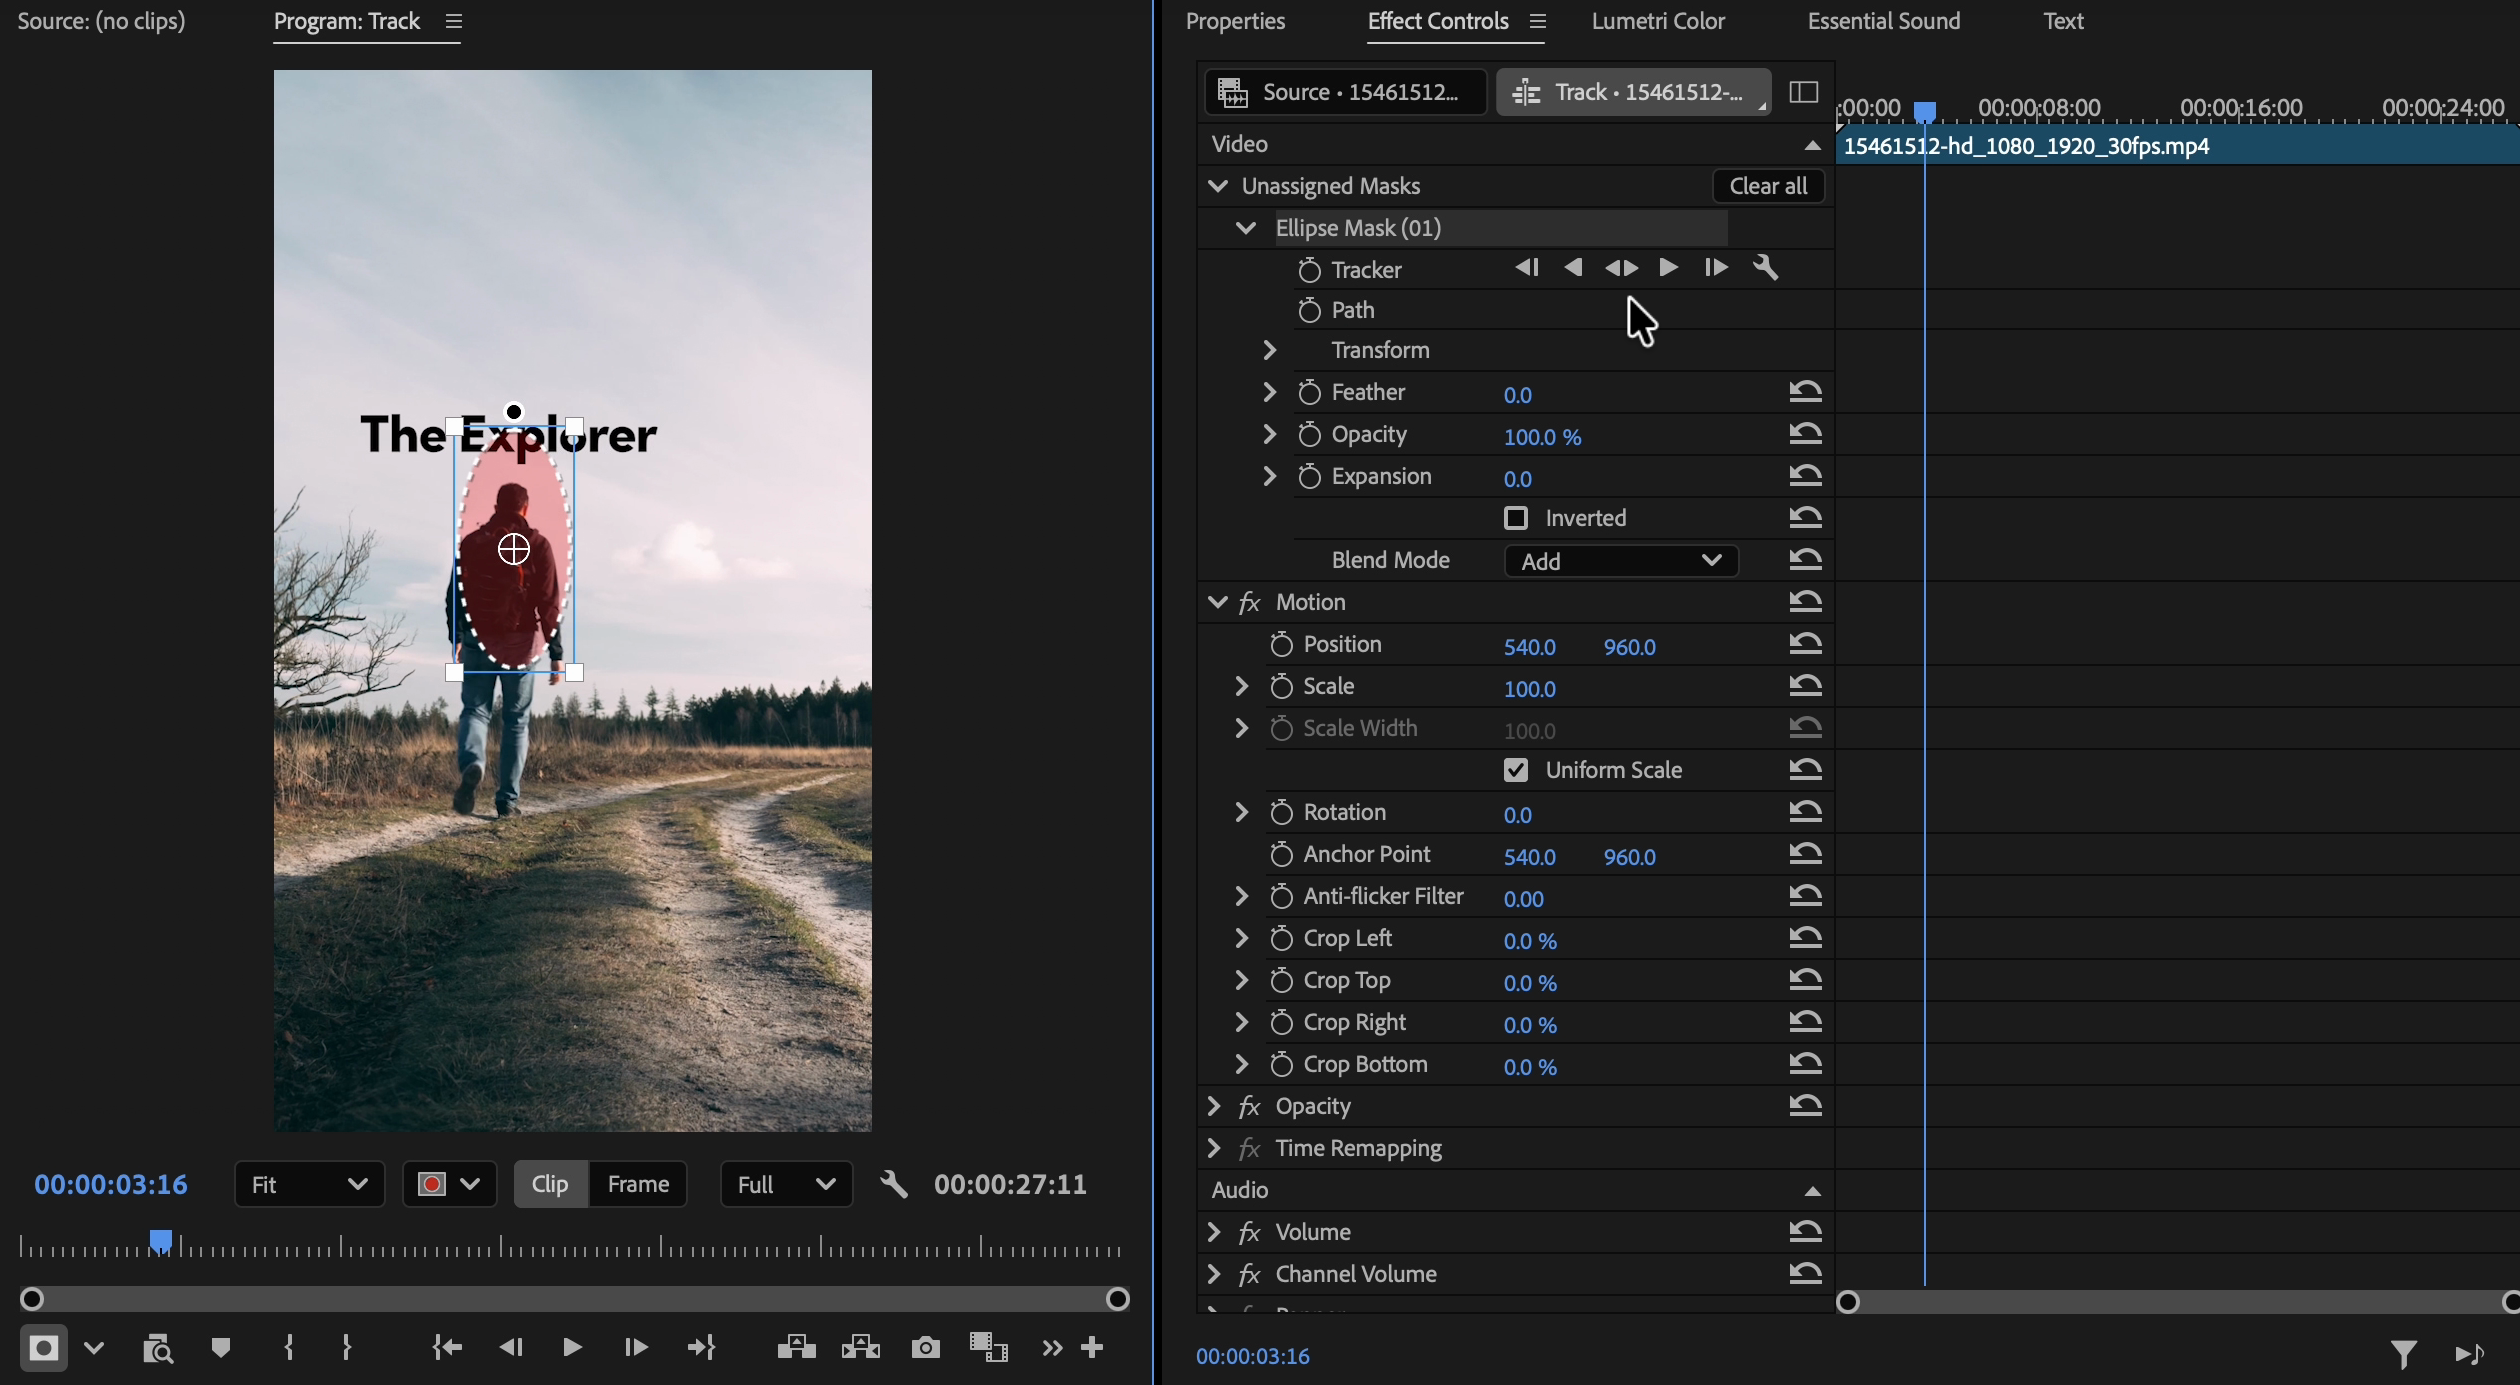
This tutorial uses masks created with the ellipse, rectangle or pen tools. Object Mask tracking is also supported starting with Mask To Motion 1.3.0.
4. Track the movement with Tracker
Return to Effect Controls and find the Ellipse Mask you just created. In the recording, it appears under Unassigned Masks → Ellipse Mask (01). If your mask is assigned to an effect, look under that effect instead.
Click the forward tracking button in the Tracker row to analyze the movement from the current frame. Use the backward tracking button if you also need the earlier part of the clip.
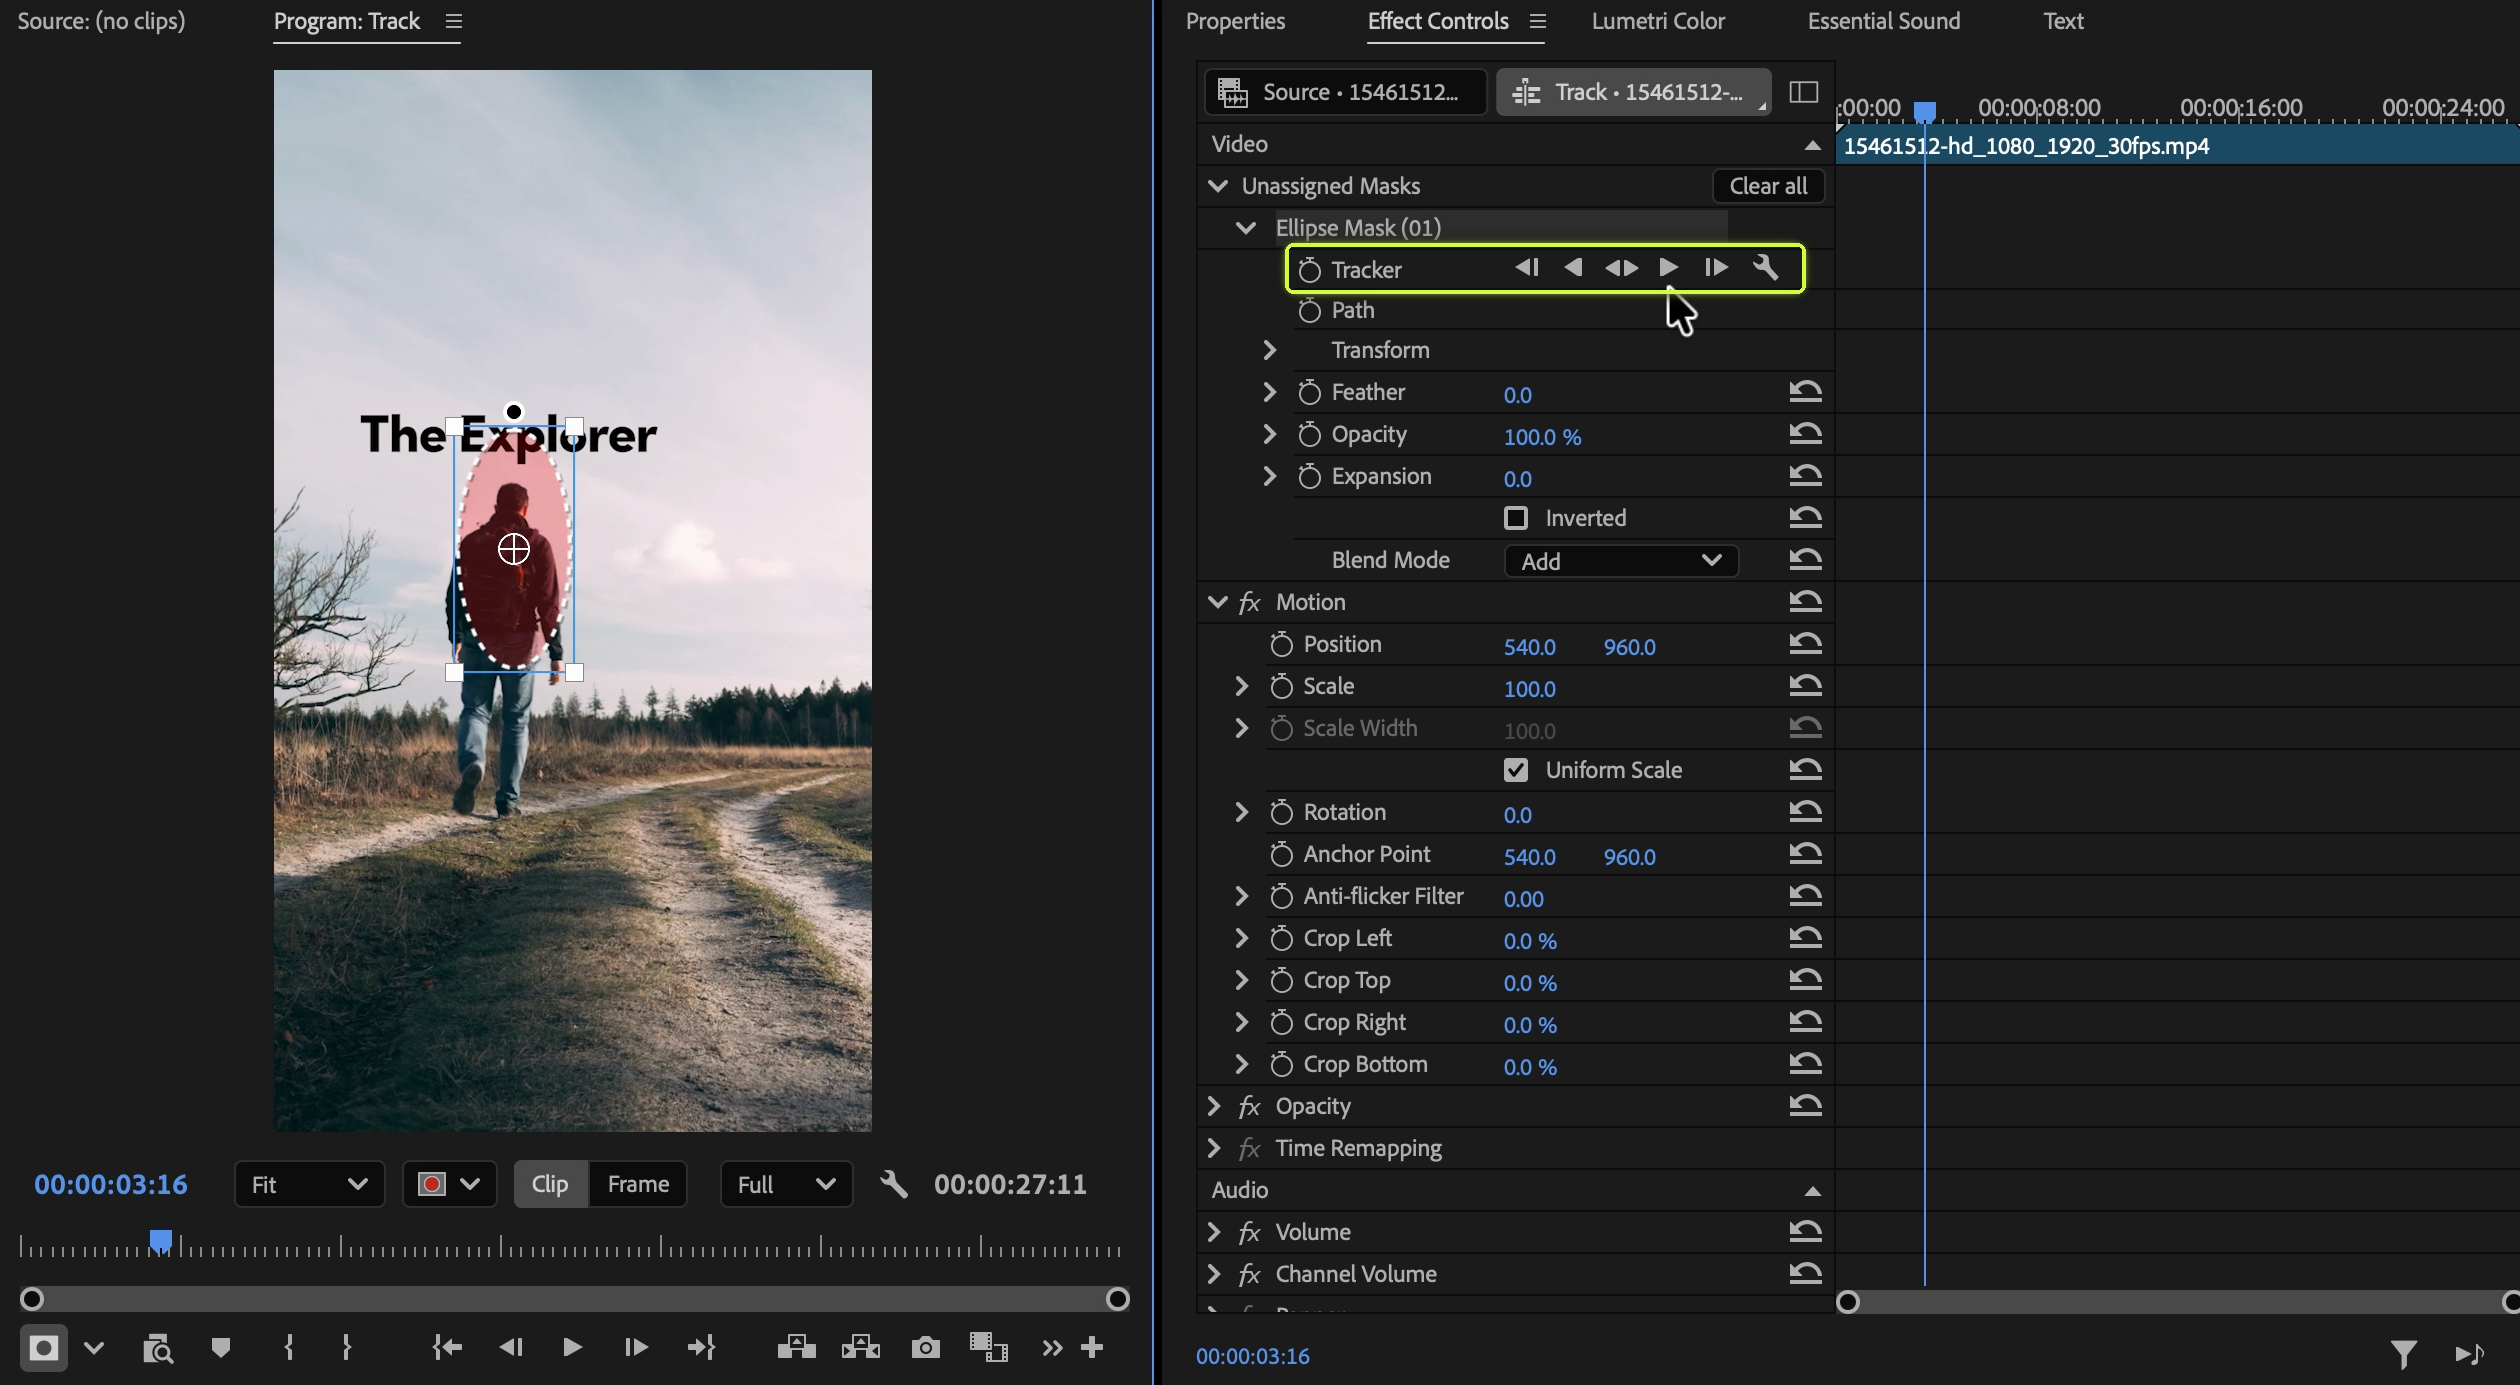
When tracking finishes, move the playhead back and forth to check that the mask keeps following the person. Tracking can drift when the subject gets smaller or becomes harder to distinguish from the background.
Mask To Motion transfers this tracking result to motion. It doesn't improve the accuracy of the tracking itself, so correct any drift before converting.
5. Bring in the tracking data with Import Mask
Keep the tracked video clip selected, open the Mask To Motion panel, and click Import Mask.
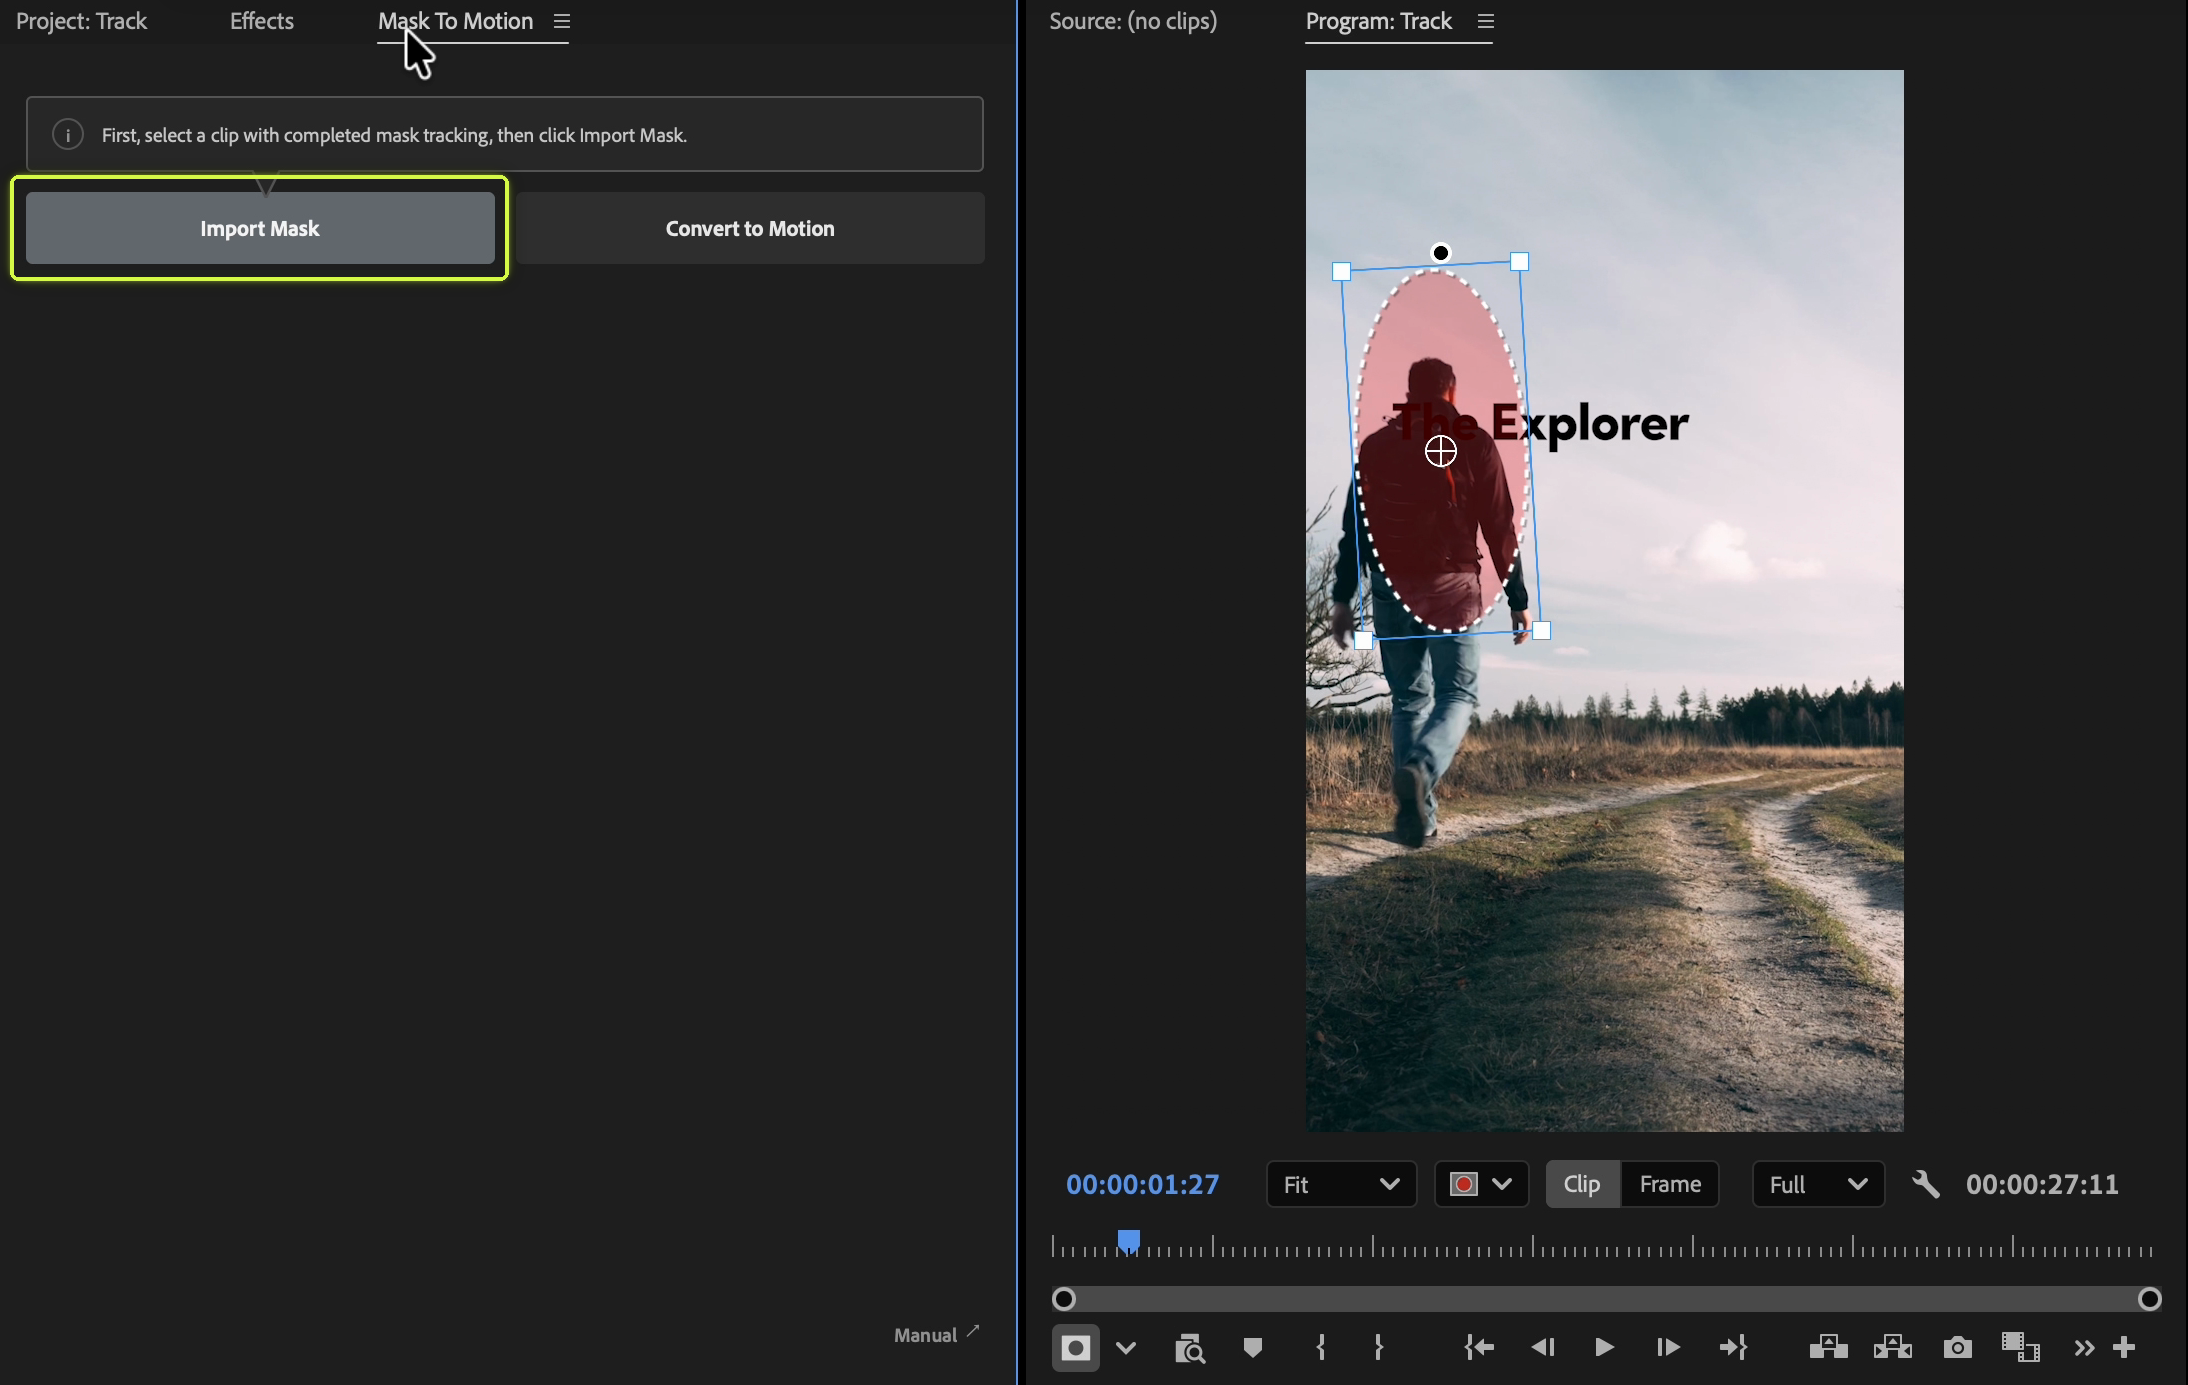
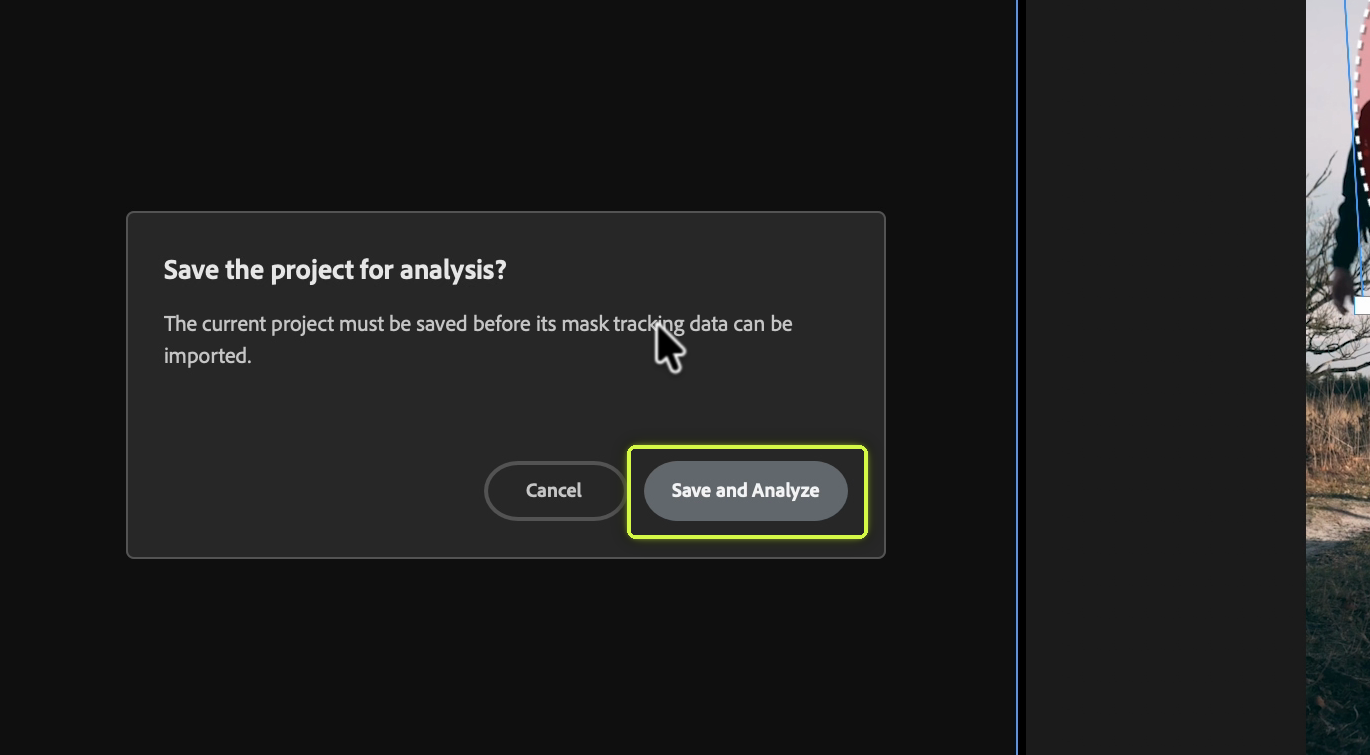
If you're prompted to save the project, choose Save and Analyze. The plugin saves the current project, then analyzes its mask tracking data.
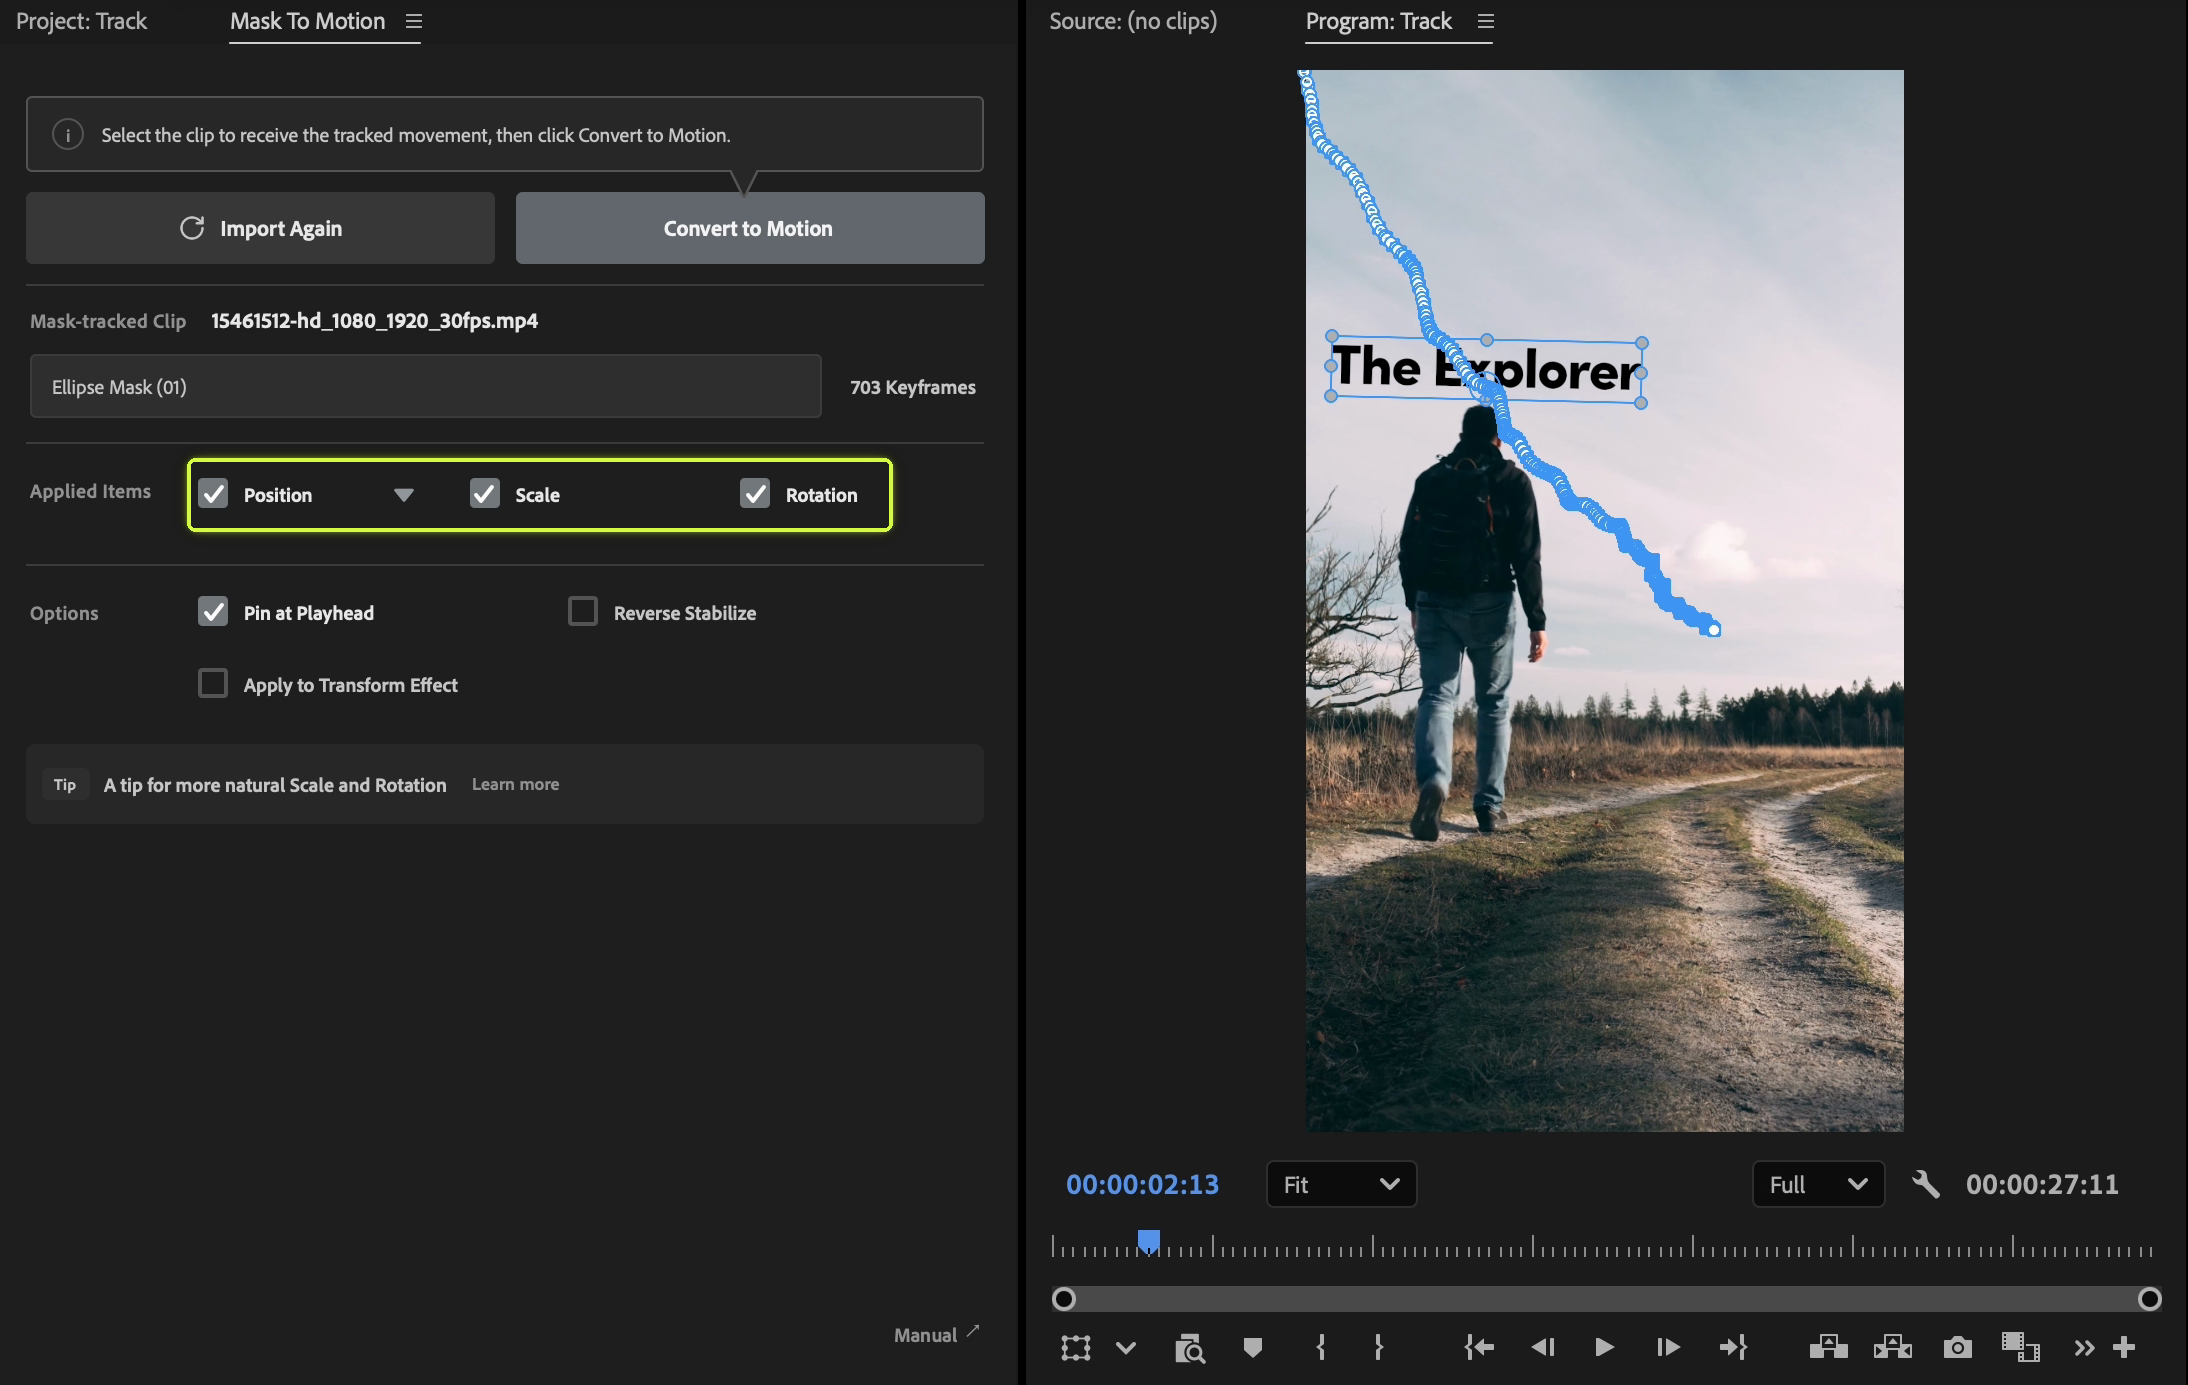
After importing, the panel shows the clip name, mask name and number of keyframes. This recording shows Ellipse Mask (01), 703 Keyframes. That count belongs to this example; it varies with your footage and the tracked range.
6. Place the text and click Convert to Motion
Now select the text graphic clip that will receive the movement in the timeline. You're switching from the video clip used for importing to the text clip you want to animate.
Put the playhead on the frame you want to use as a reference, then place the text where you want it in the Program Monitor. You can put it above the person's head or alongside them.
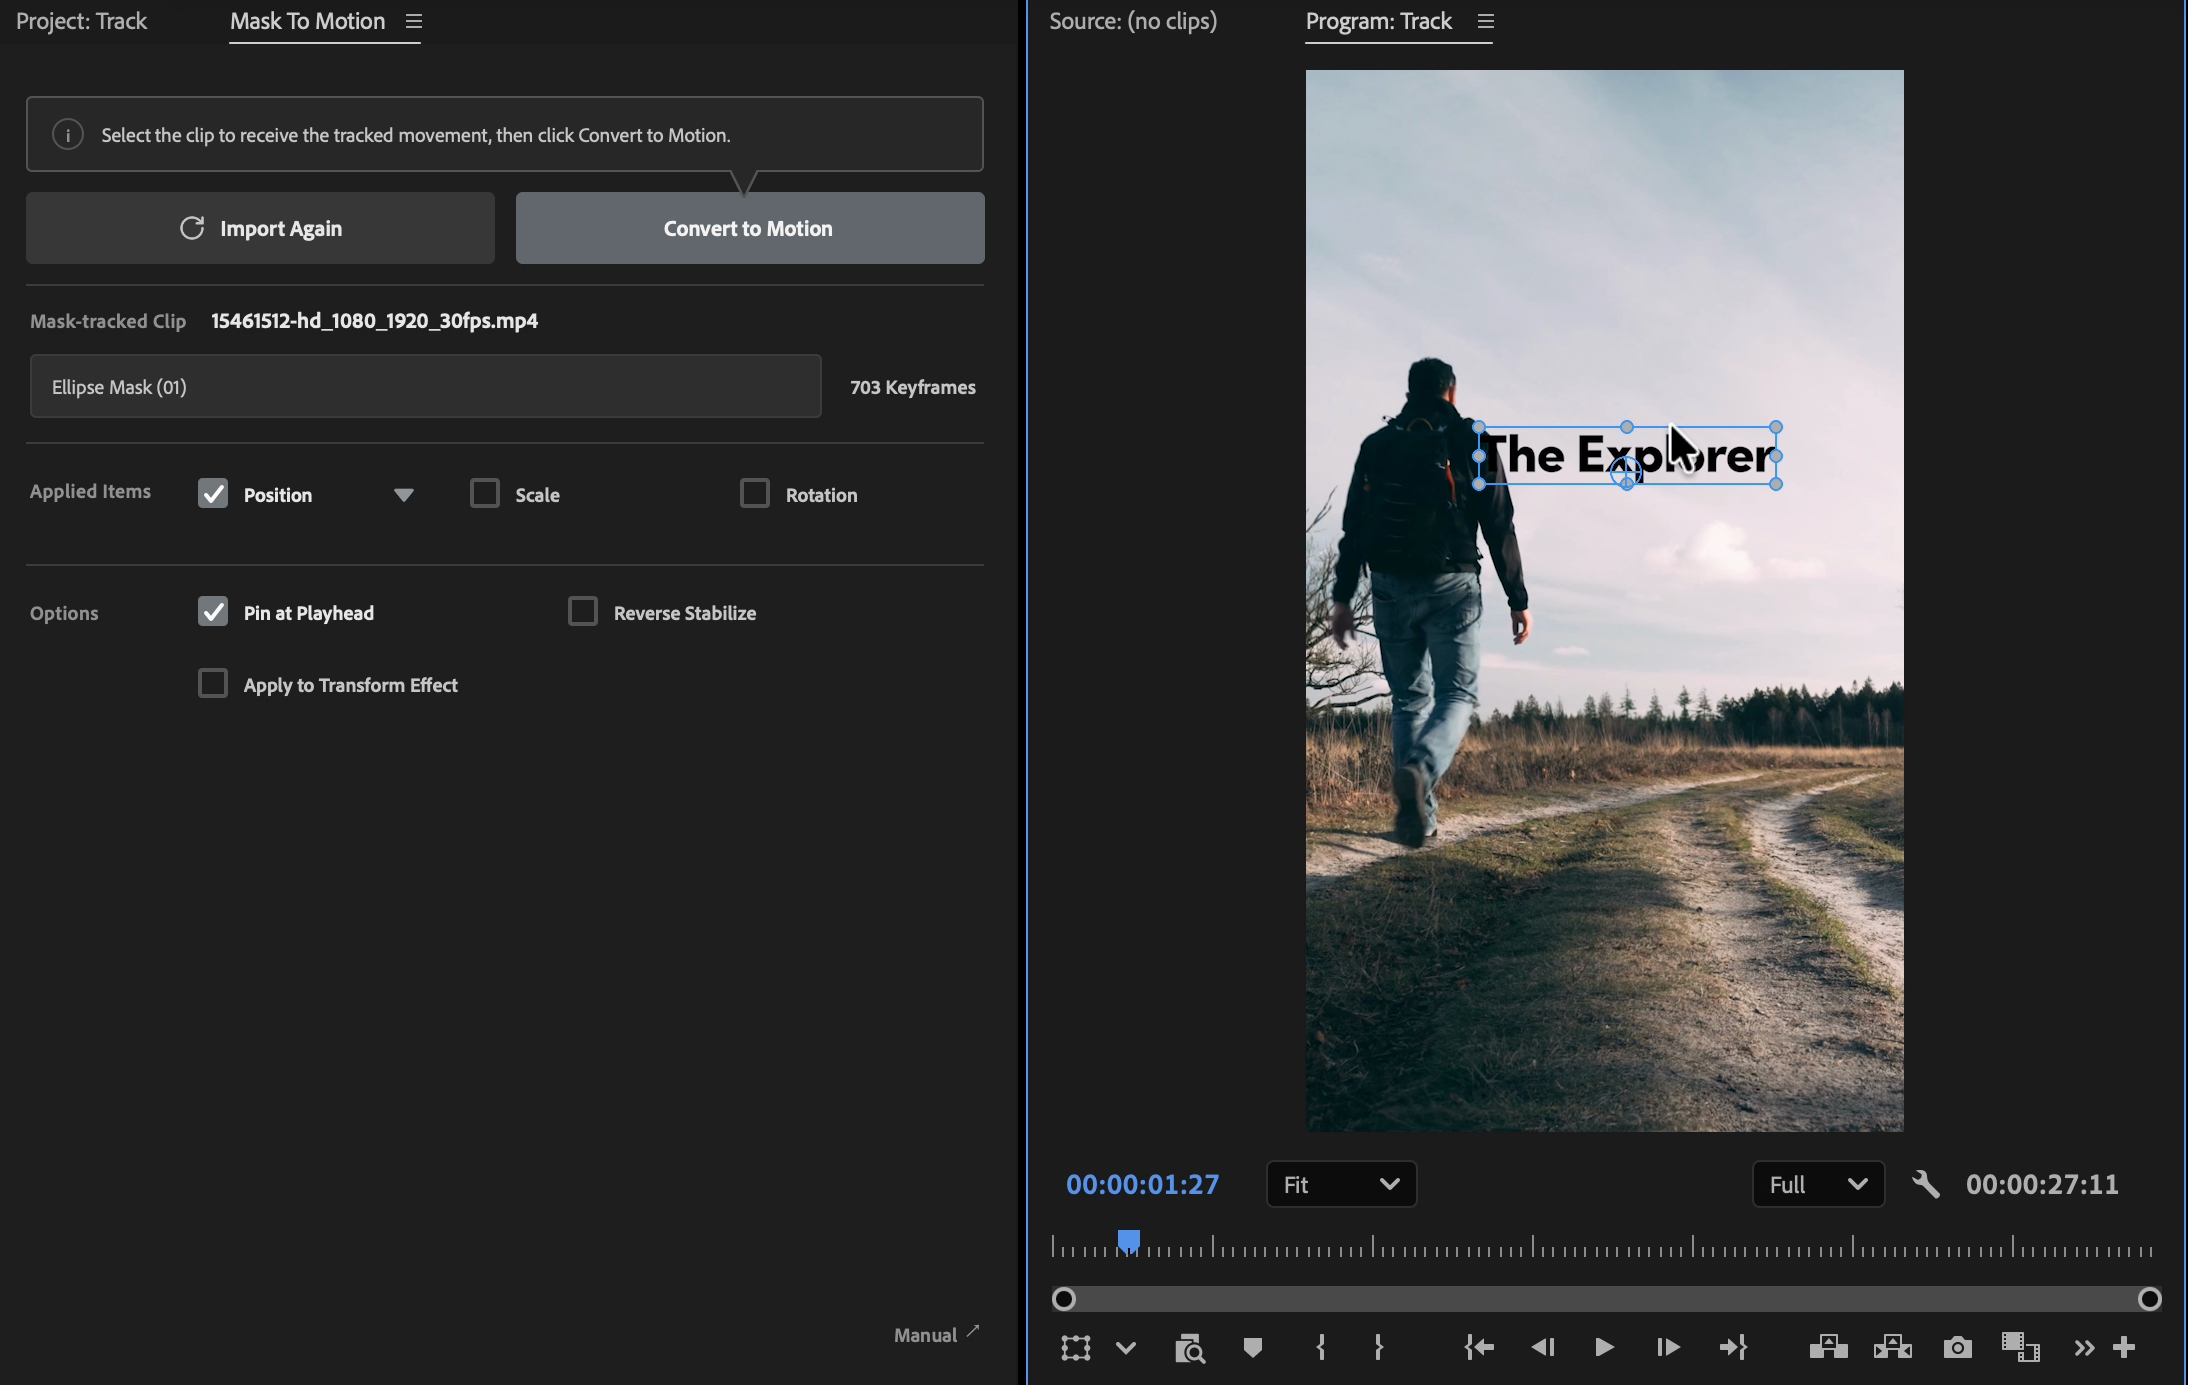
Check that Position and Pin at Playhead are selected, as shown, then click Convert to Motion. This setup applies the movement relative to the placement at the current playhead.
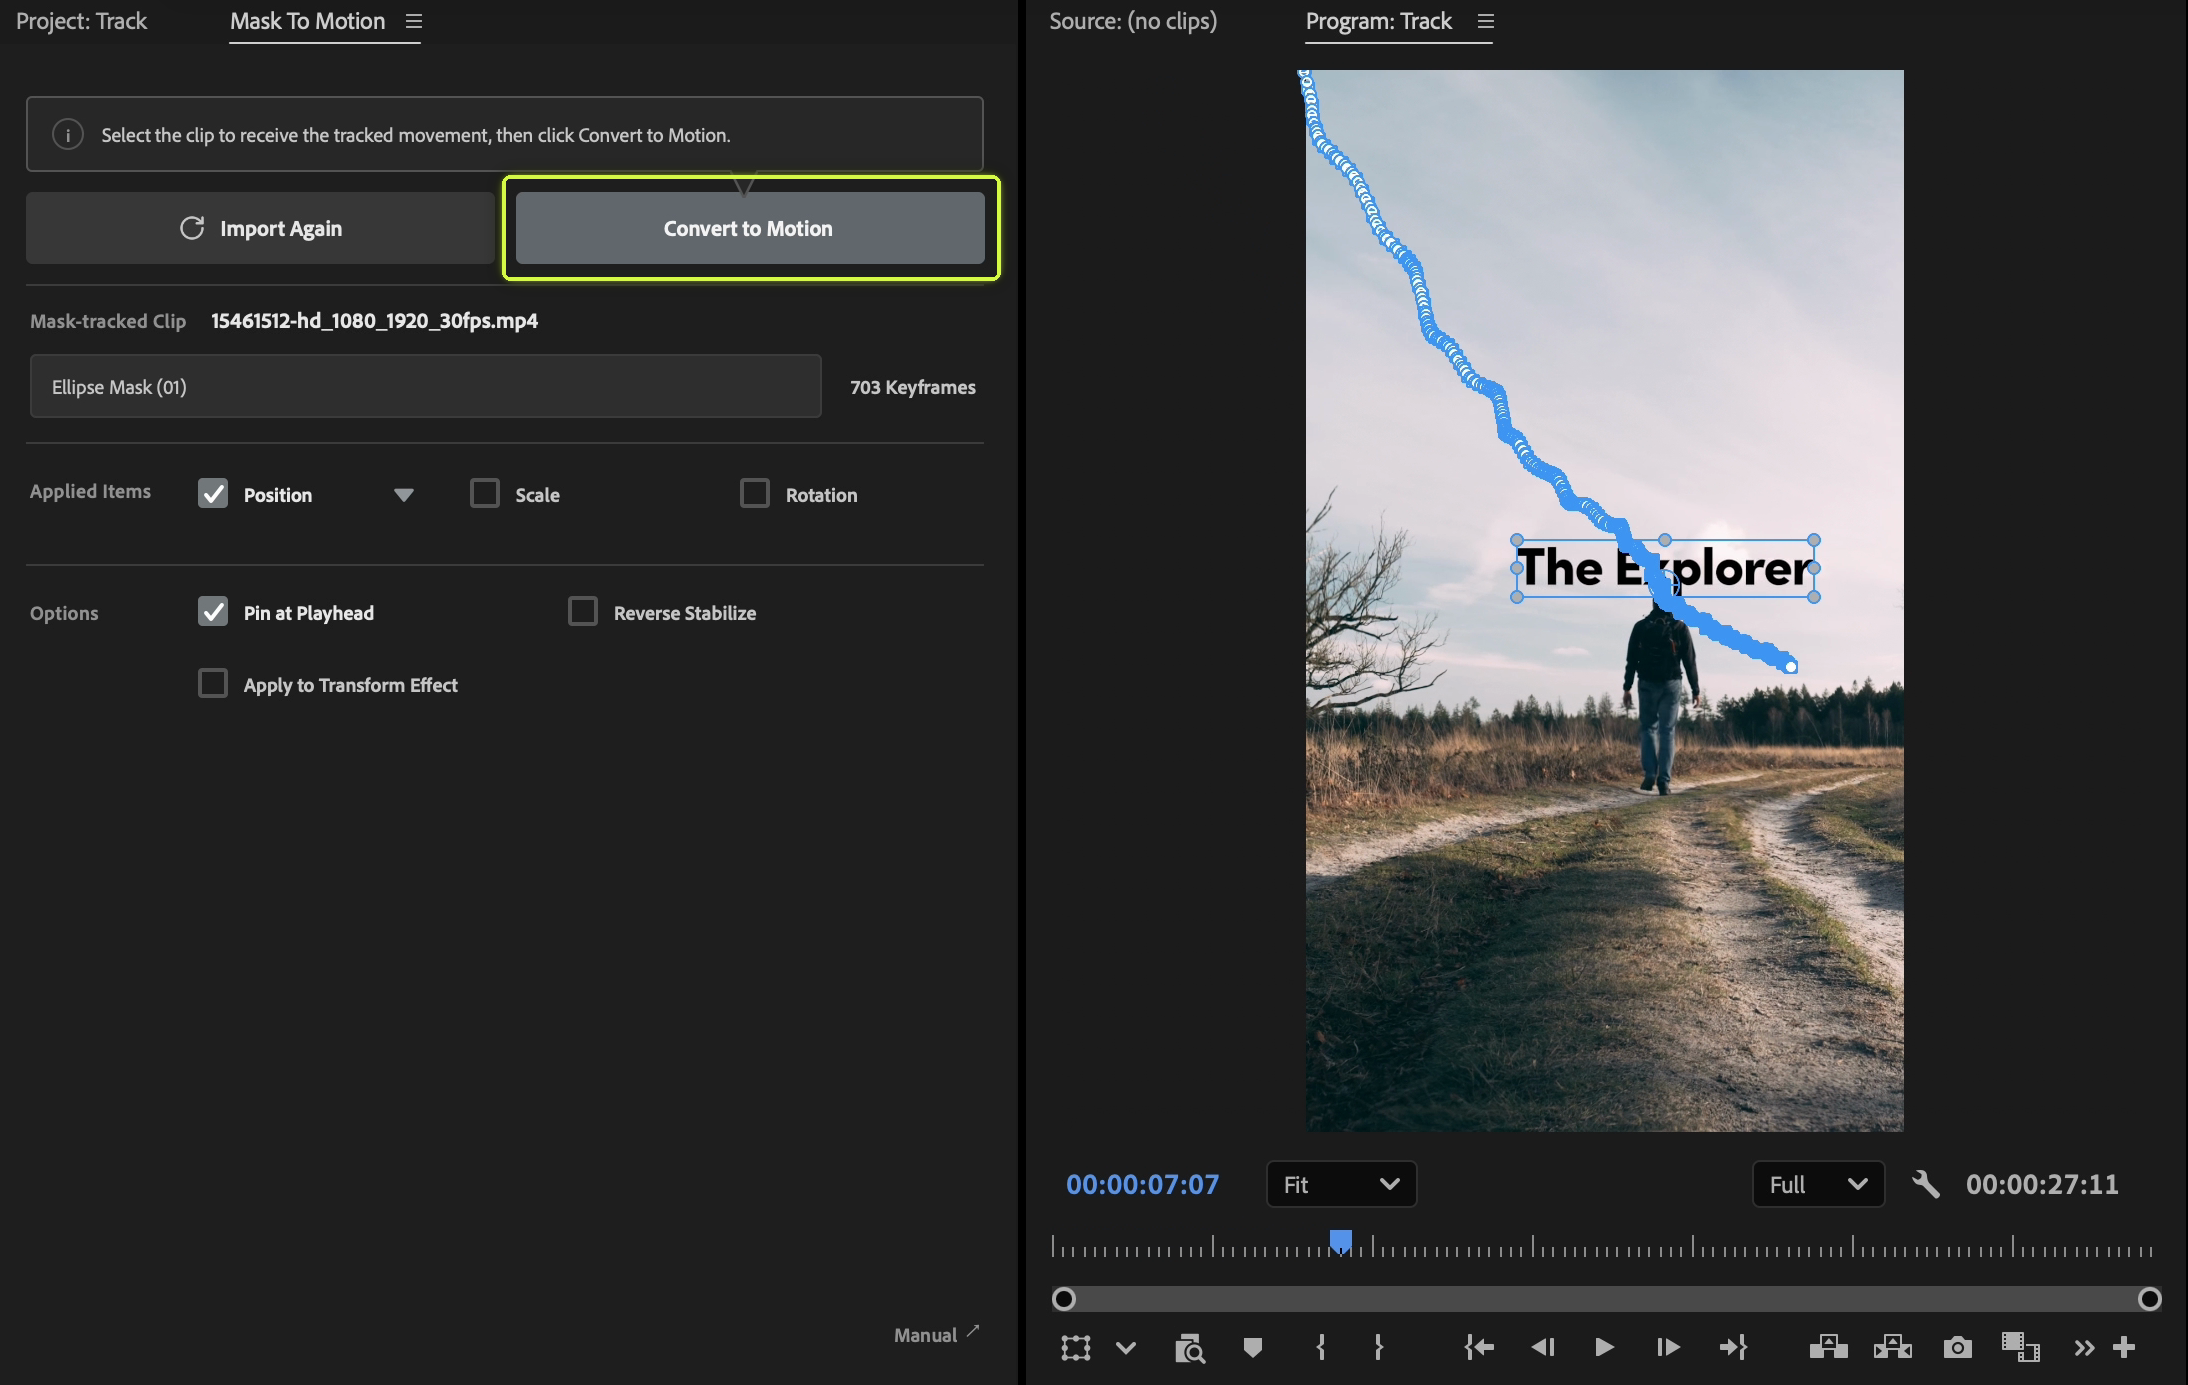
Play the clip back: the text follows the person. You've applied the position changes using mask tracking data instead of setting each frame yourself.
If you need to preserve the existing animation, duplicate the clip or sequence before applying the result. Existing keyframes within the applied range may be removed.
7. Try Scale, Rotation and Reverse Stabilize
Use Position on its own when you only need the text to follow the person's position. To include changes in size and angle, select Scale and Rotation, then convert again.
Another option is Reverse Stabilize. In this example, enable it, select the video clip you tracked, and click Convert to Motion. Instead of animating text, this applies the opposite tracked movement to the footage, making the person appear to stay in one place in the frame.
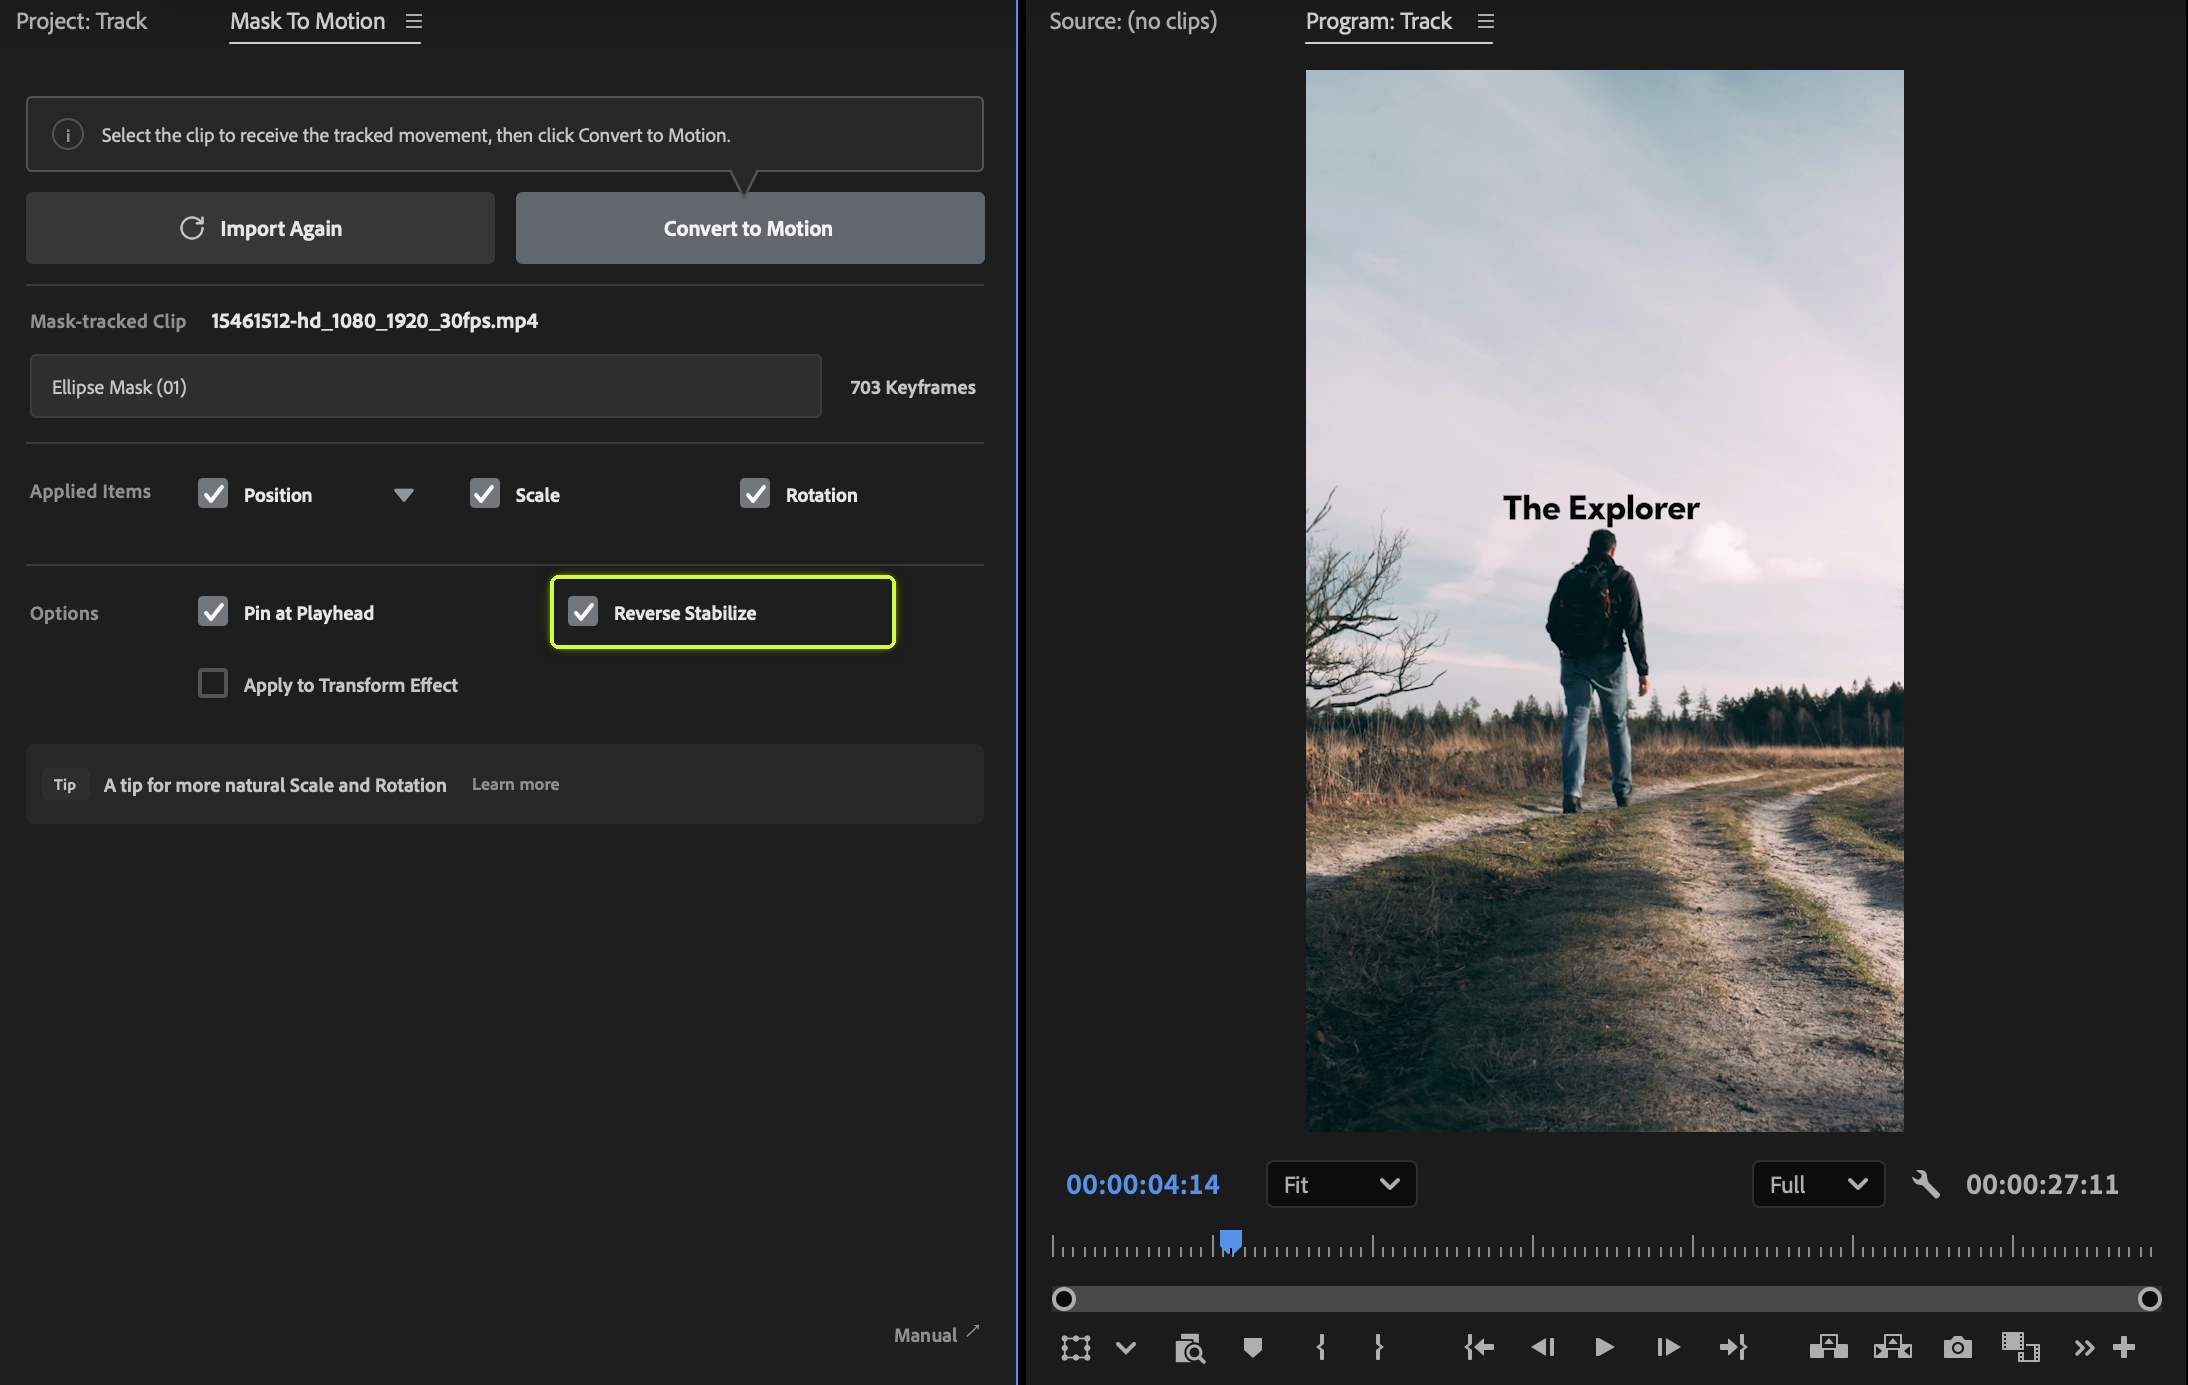
This produces a different result from making text follow a person. Try it on a separate duplicate clip so you can compare the two.
Spend less time positioning and more time creating
Learning to create Position keyframes helps you understand text animation and fine-tune the details. When you're transferring the same movement repeatedly, mask tracking gives you another way to work.
Mask To Motion lets you apply tracked mask movement to text, images or footage inside Premiere Pro. You don't need to move this example's effect into After Effects.
It's a one-time purchase without a monthly subscription. See the product information and manual below for supported environments and more detailed instructions.