

Before you start
Have Premiere Pro 26.0 or later, the Creative Cloud desktop app, and an internet connection ready. Follow the same steps on macOS and Windows.
Download the file
In My products in your LUCAMOTIVE account, download Super Pad. When the download finishes, find the file ending in .ccx.
Open My productsDouble-click to install
Double-click the downloaded CCX file to open the Creative Cloud desktop app. Complete its installation prompts. Do not unzip the file or change its extension.

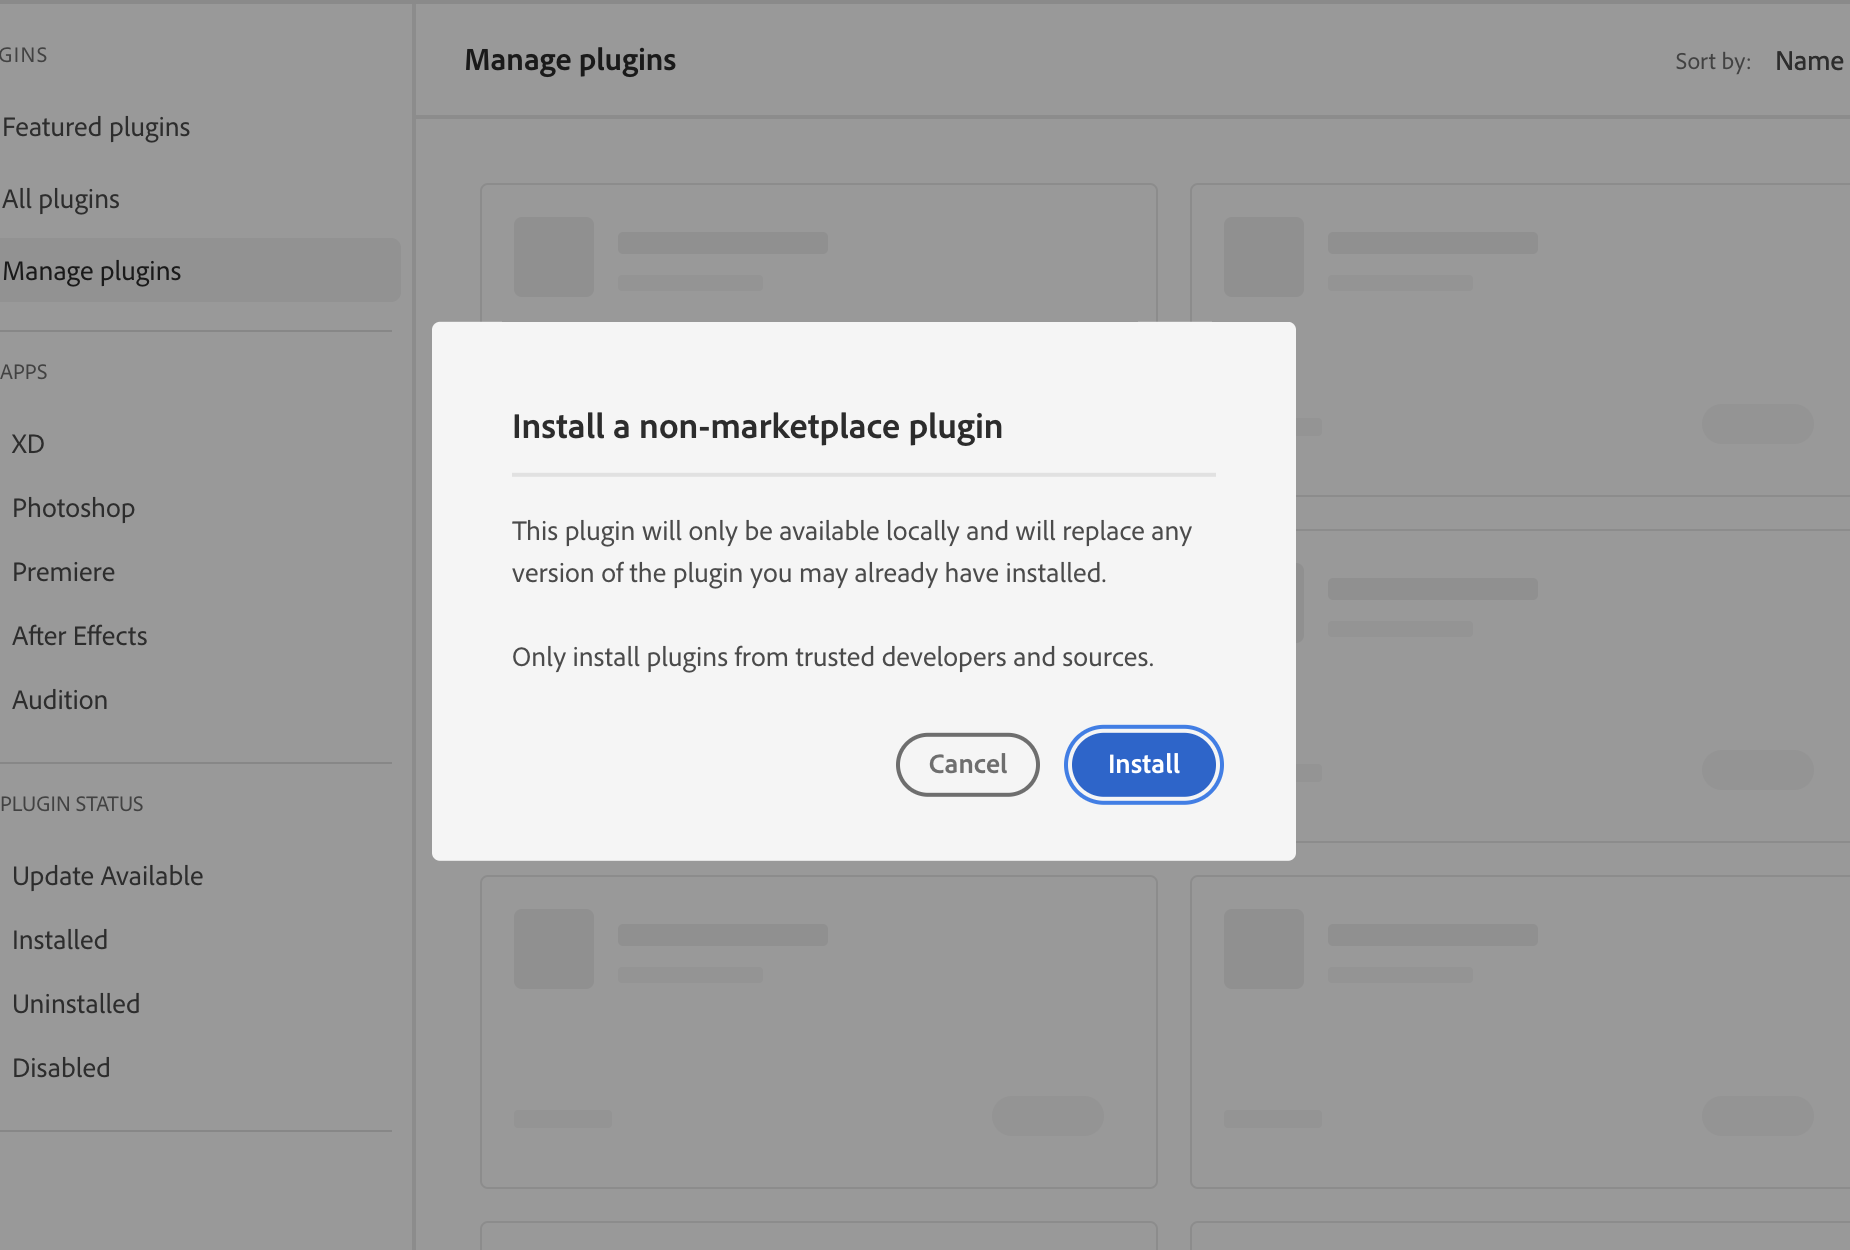
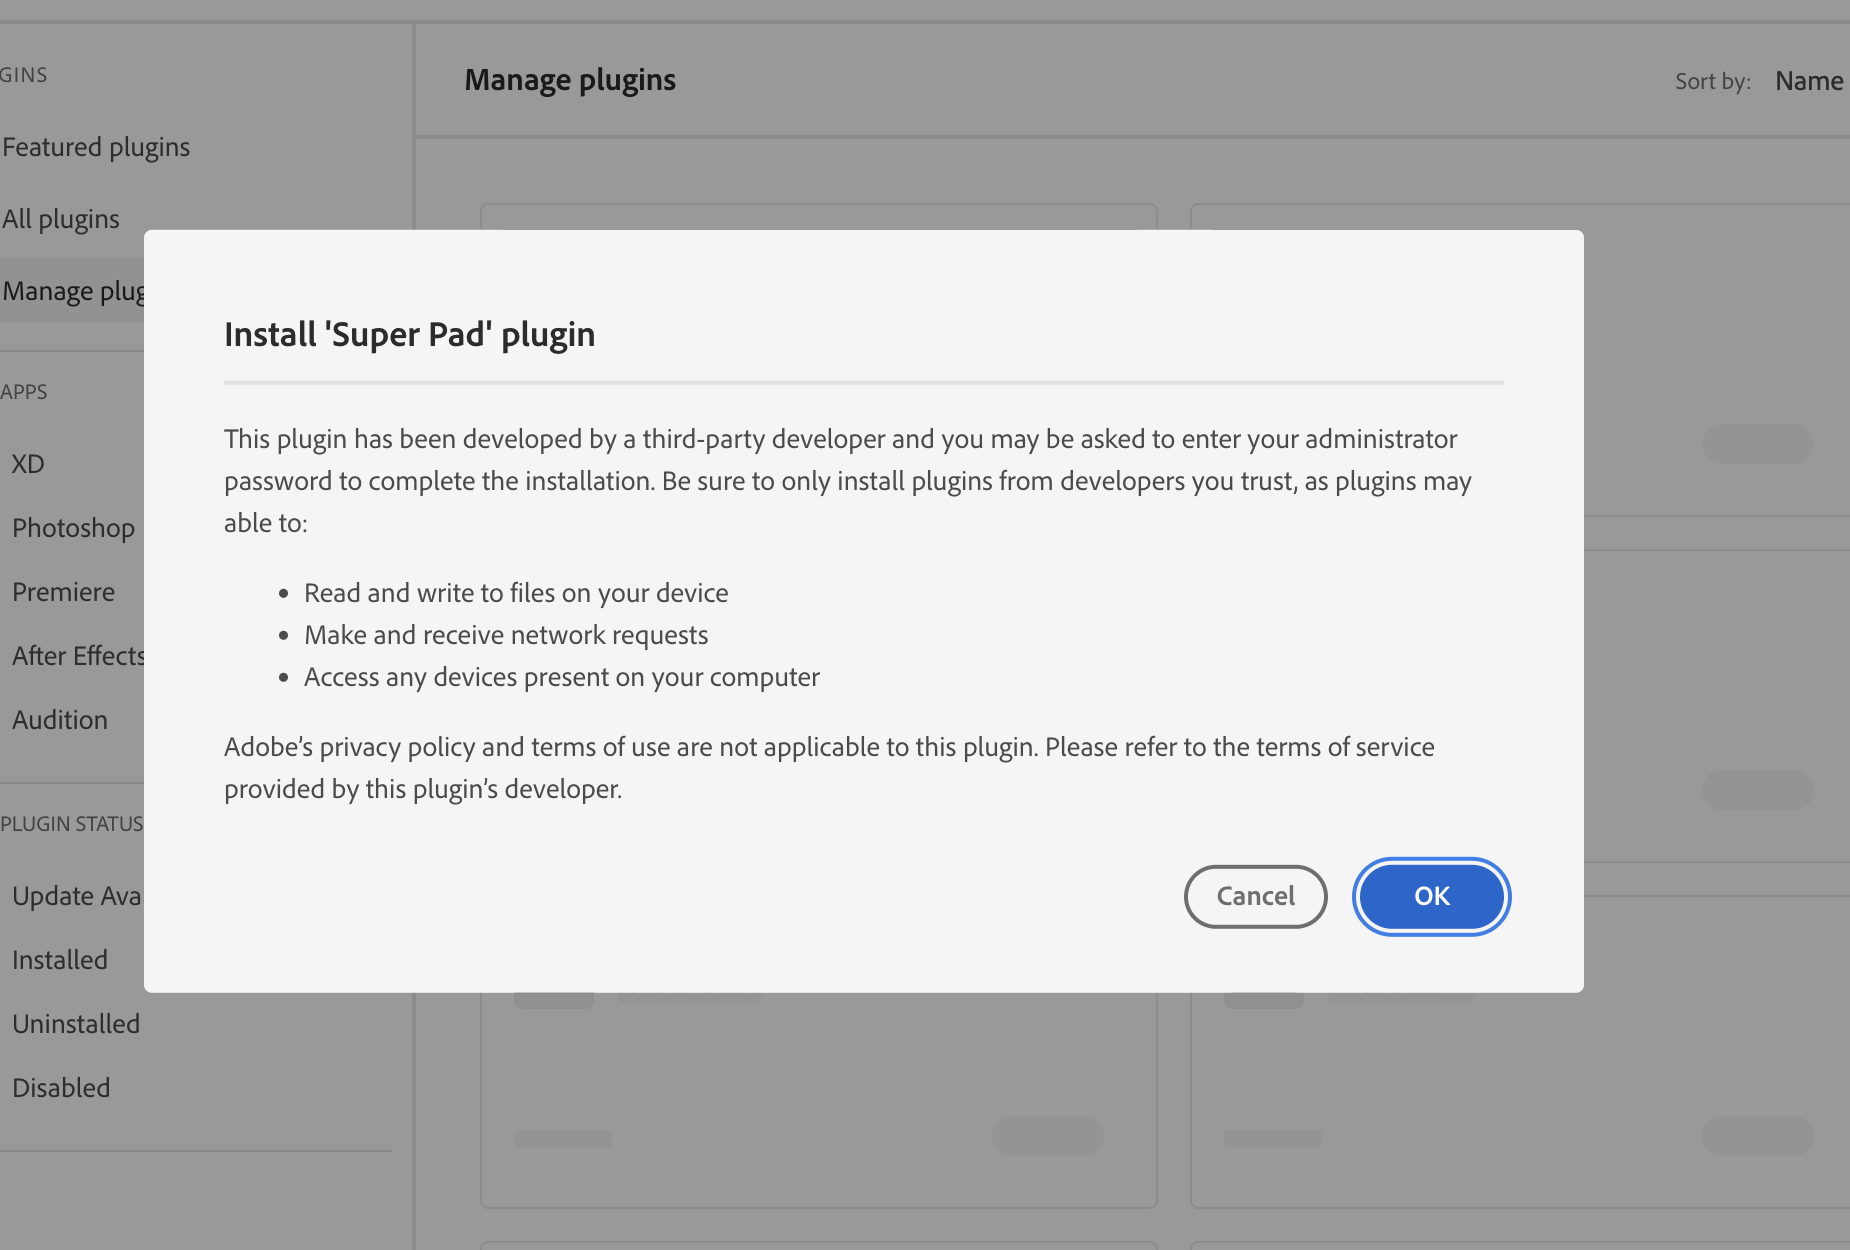
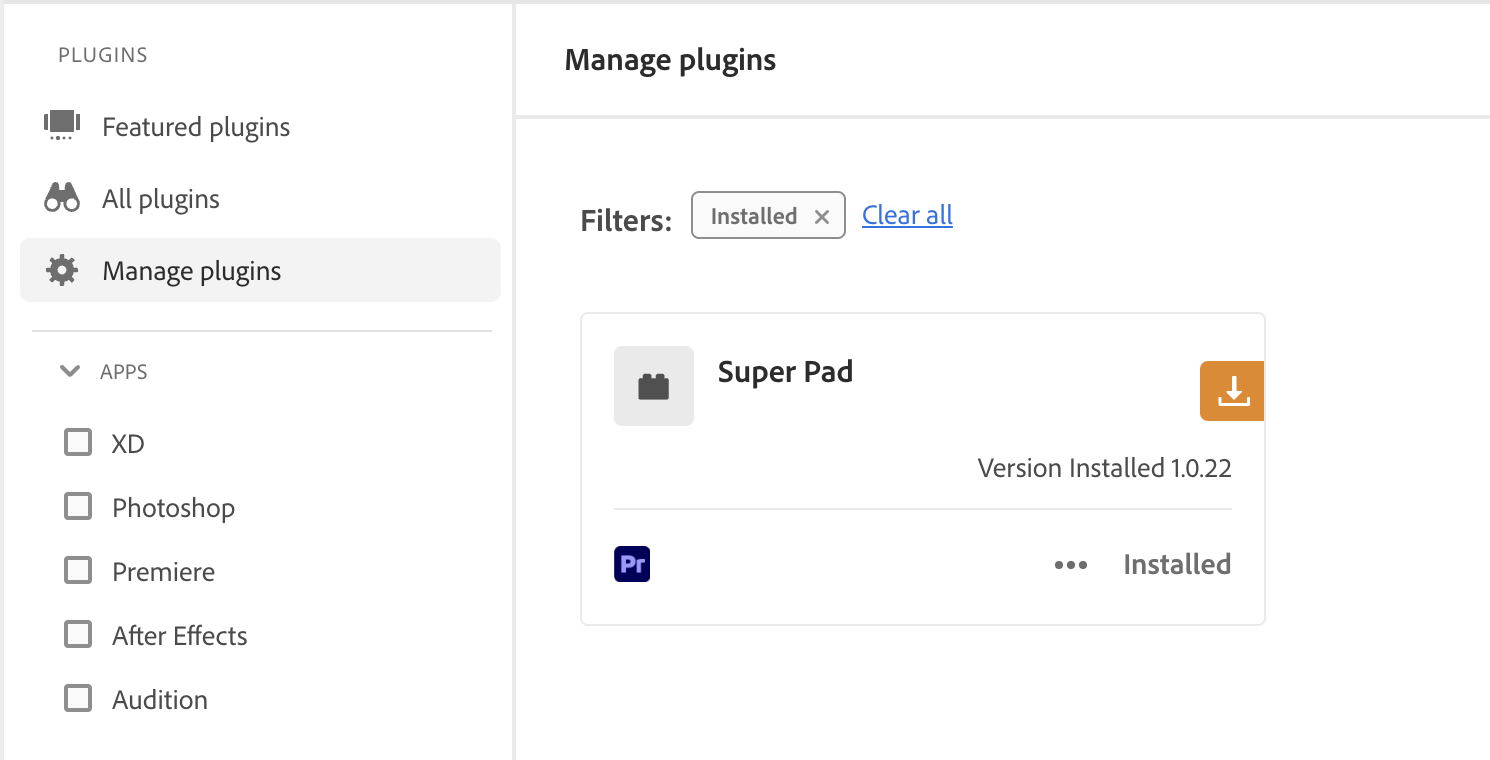
Open the panel in Premiere
Start Premiere Pro and open a project. Choose Window → UXP Plugins → Super Pad from the top menu. If Premiere was running during installation, save your work and restart it.
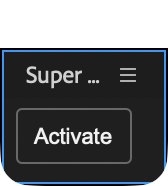
Get an activation code
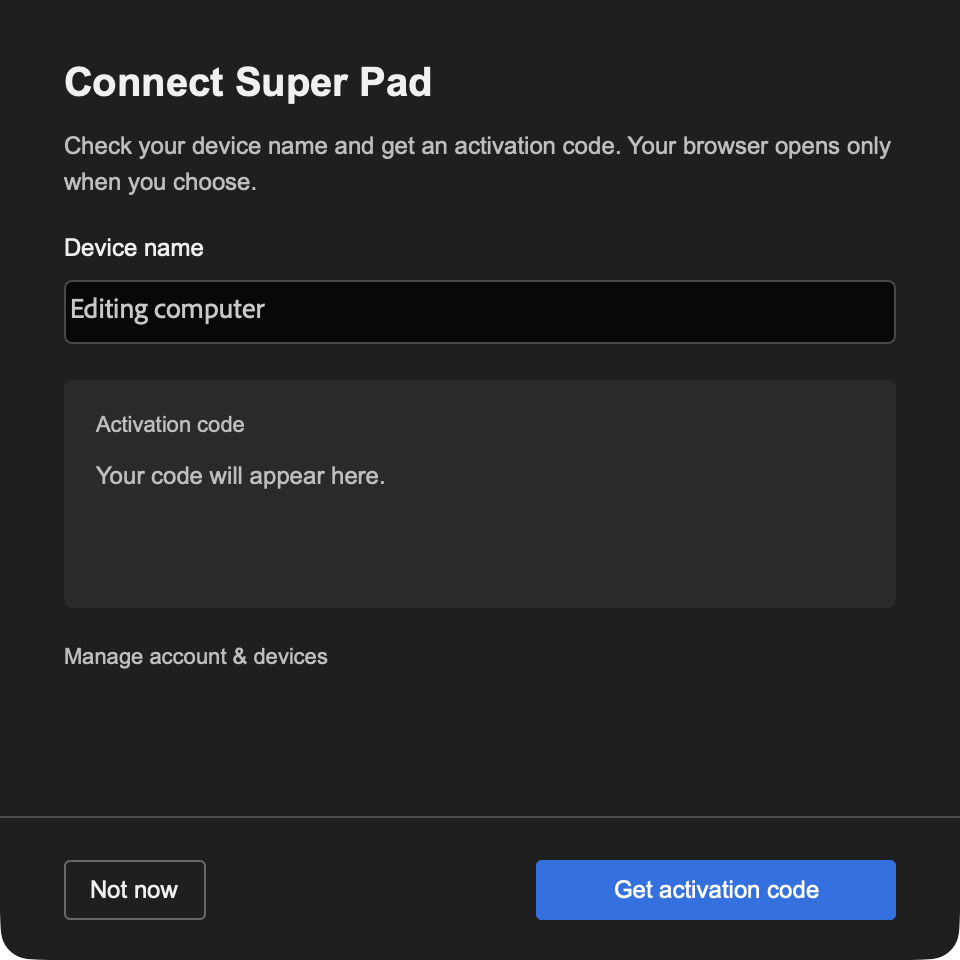
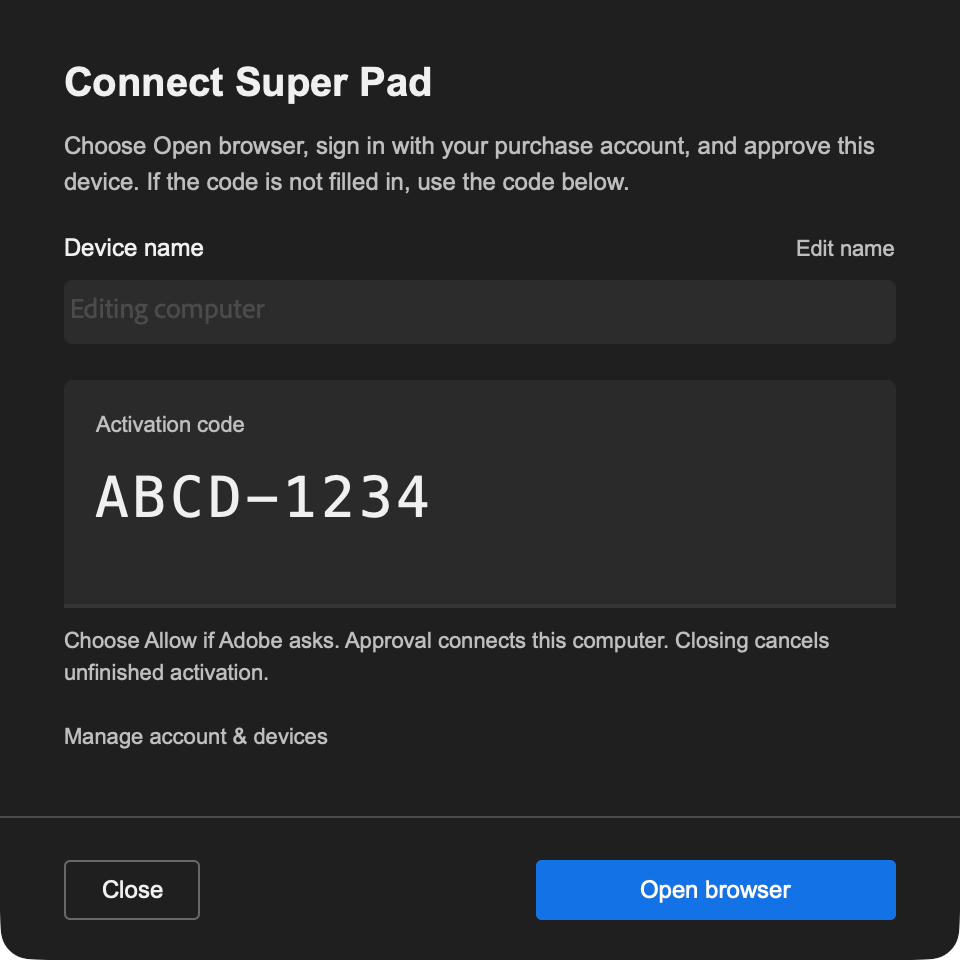
Check the device name in the connection guide, then choose Get activation code. Once the code is ready, choose Open browser to go to the device approval page.
Approve with your purchase account
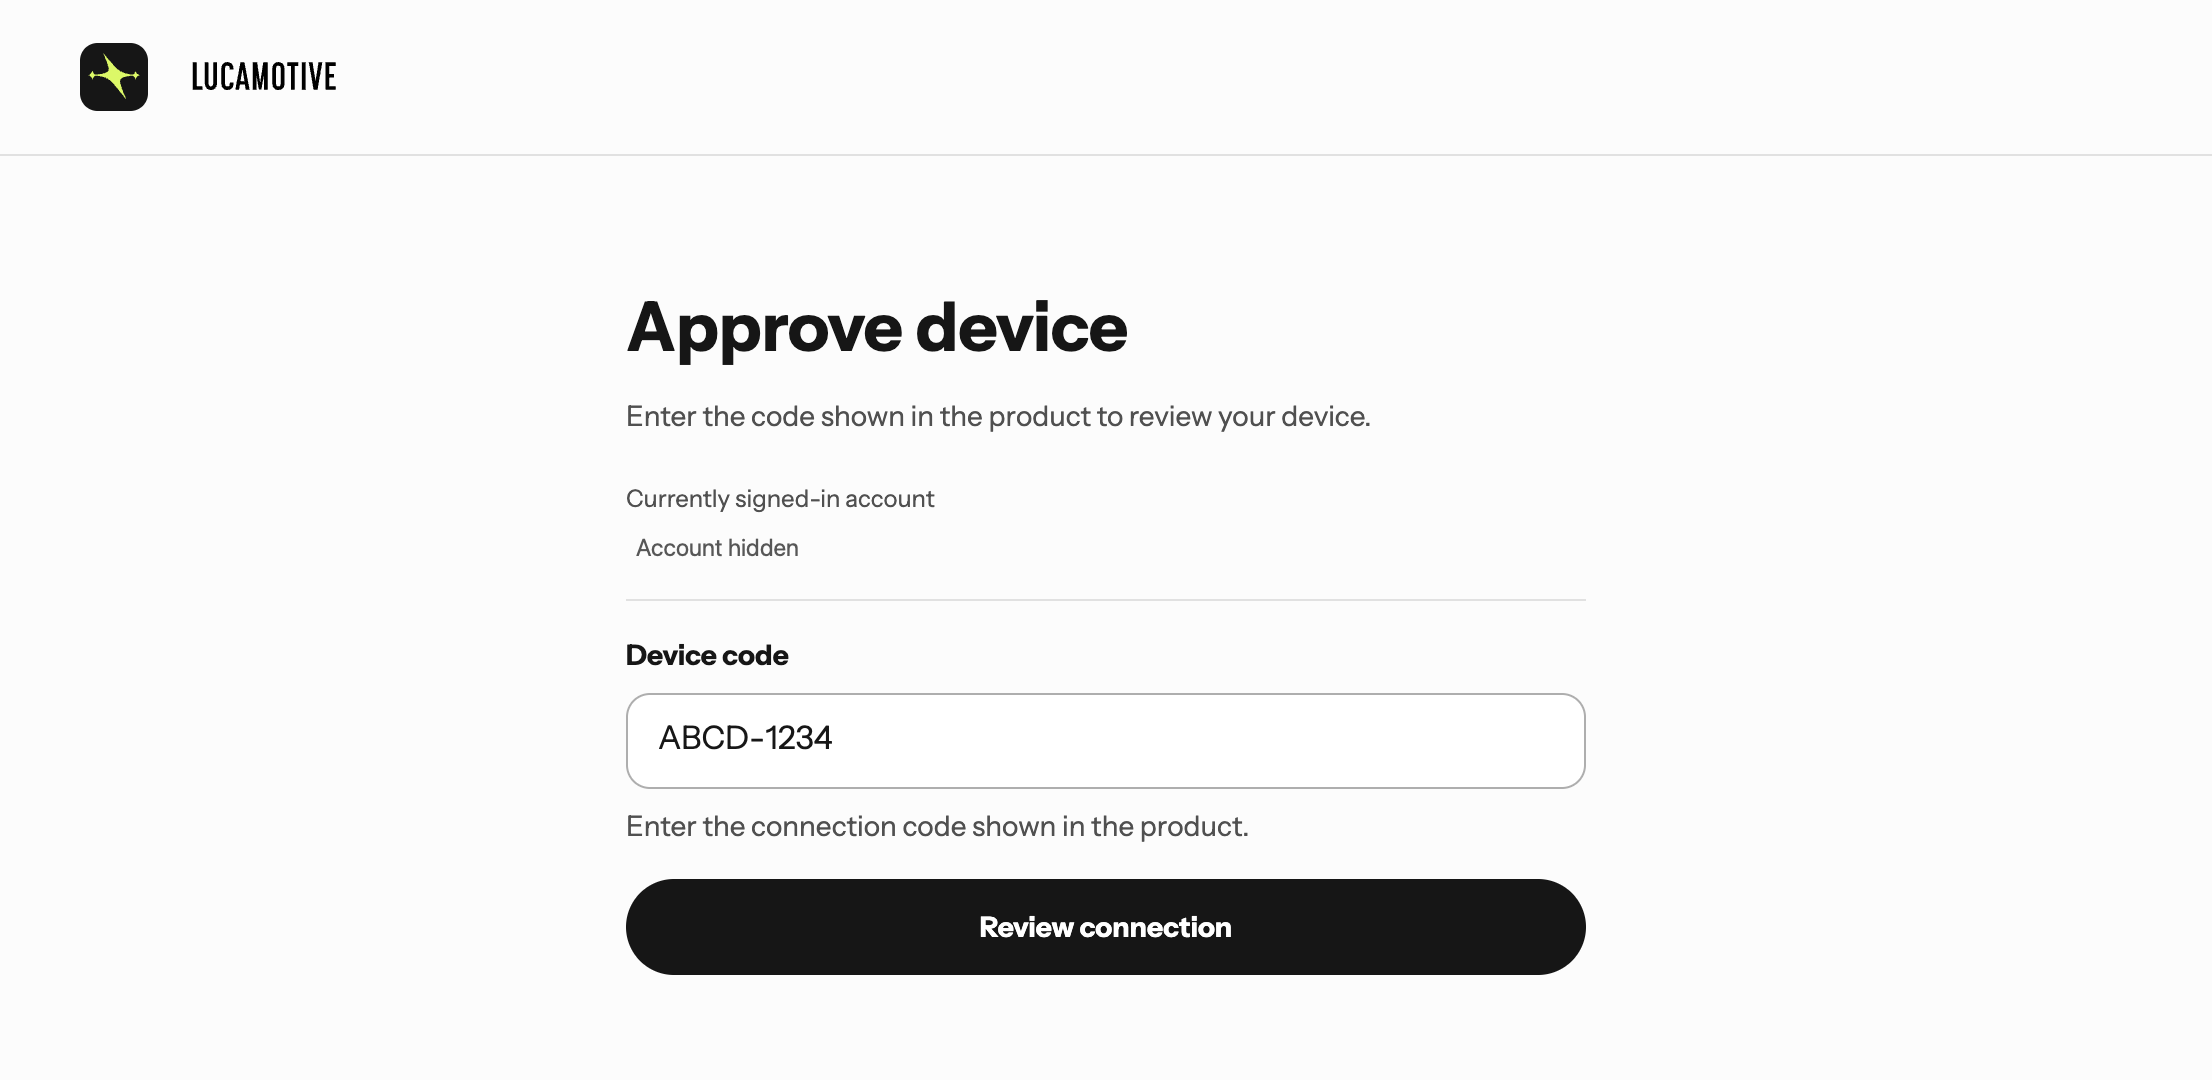
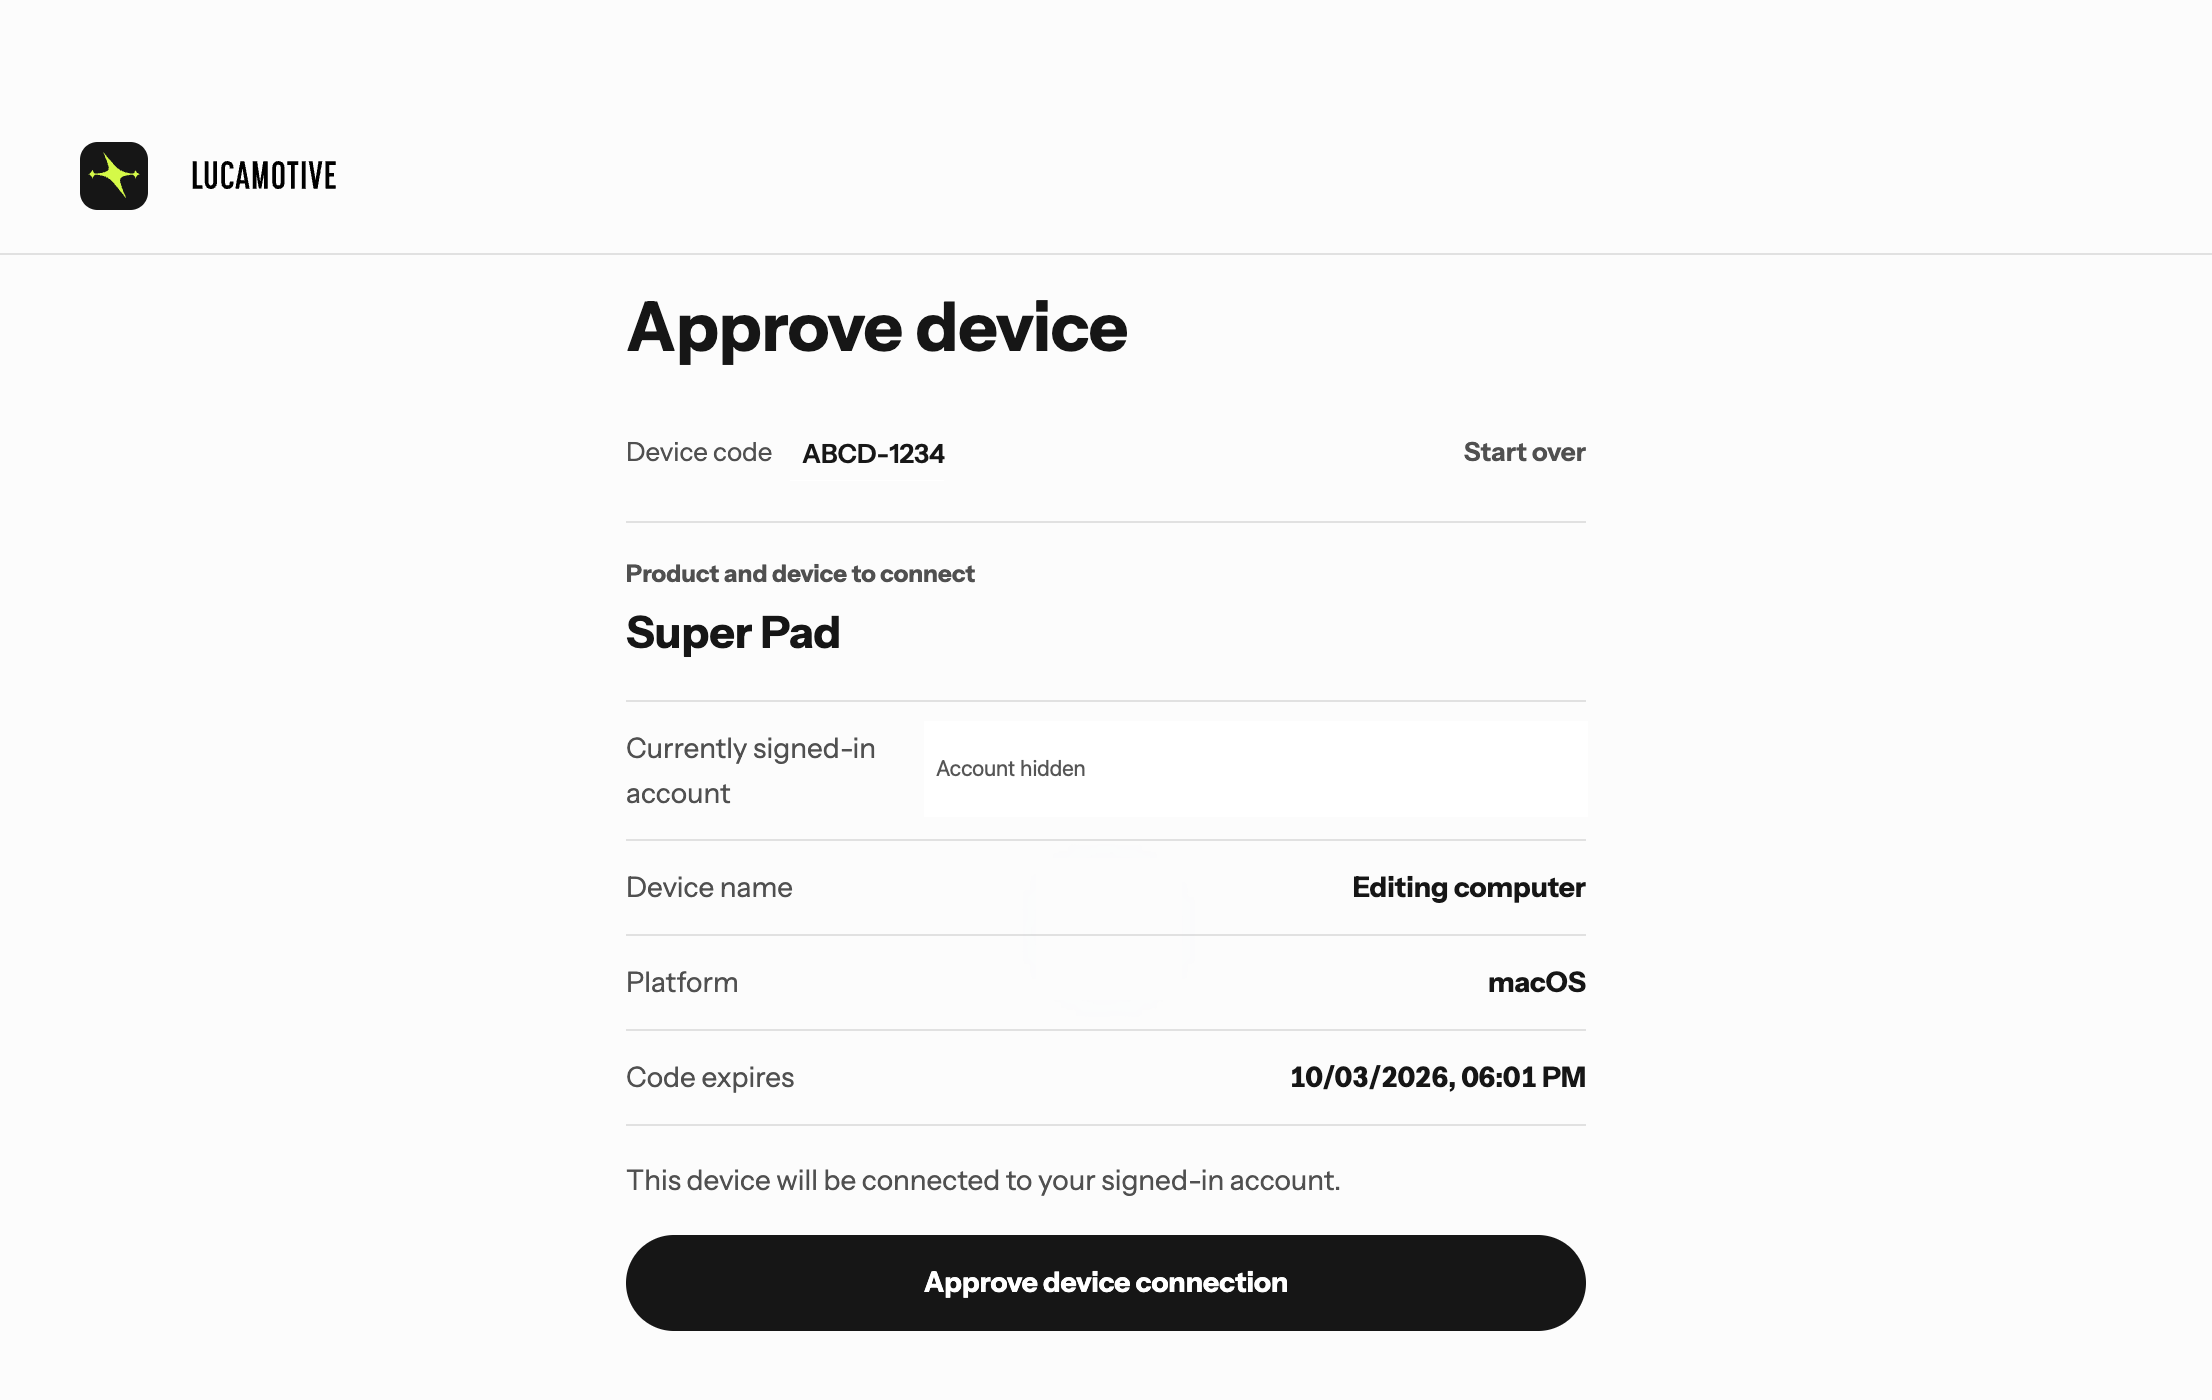
Sign in to your purchase account on LUCAMOTIVE in the browser. Check the account shown on the page. If the code is not filled in automatically, enter the code from Premiere. Check the product and device name, then approve the connection.
Return to Premiere and start
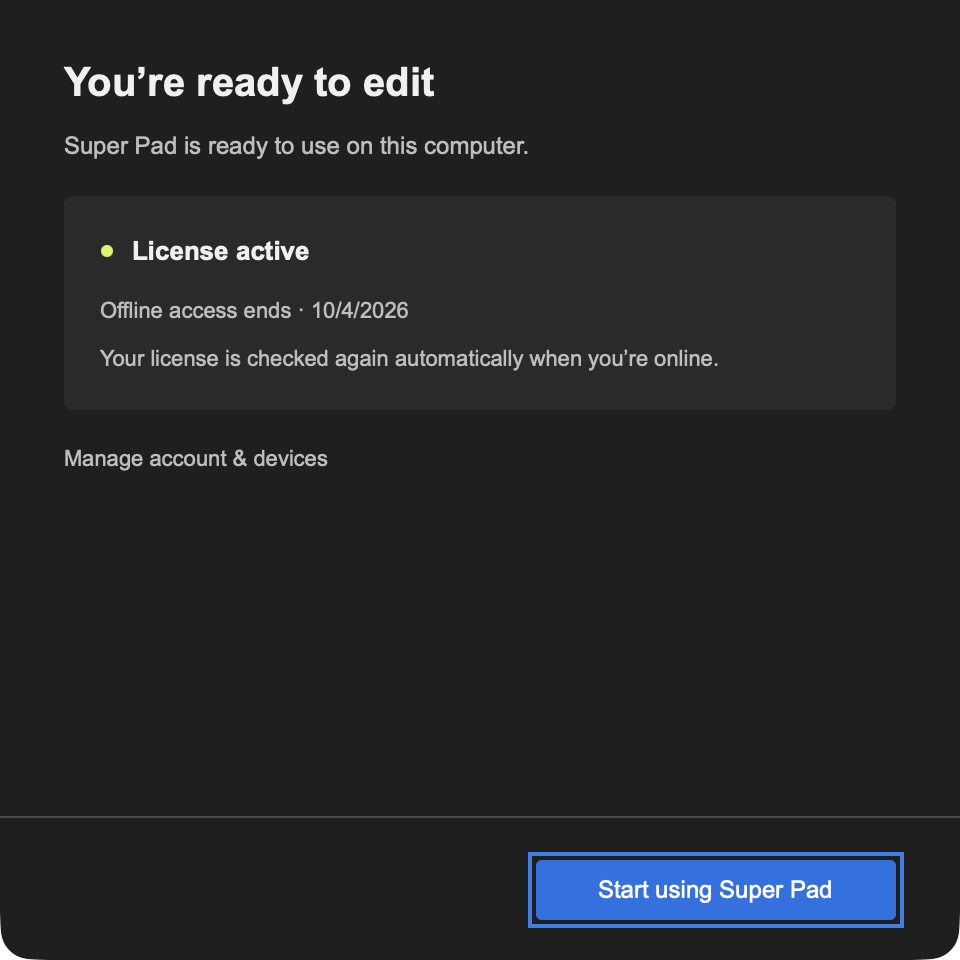
Return to Premiere after approval to see the connection completed. Choose Start using Super Pad to use the panel. Later, open About Super Pad from the panel menu to check the license status.
Panel overview
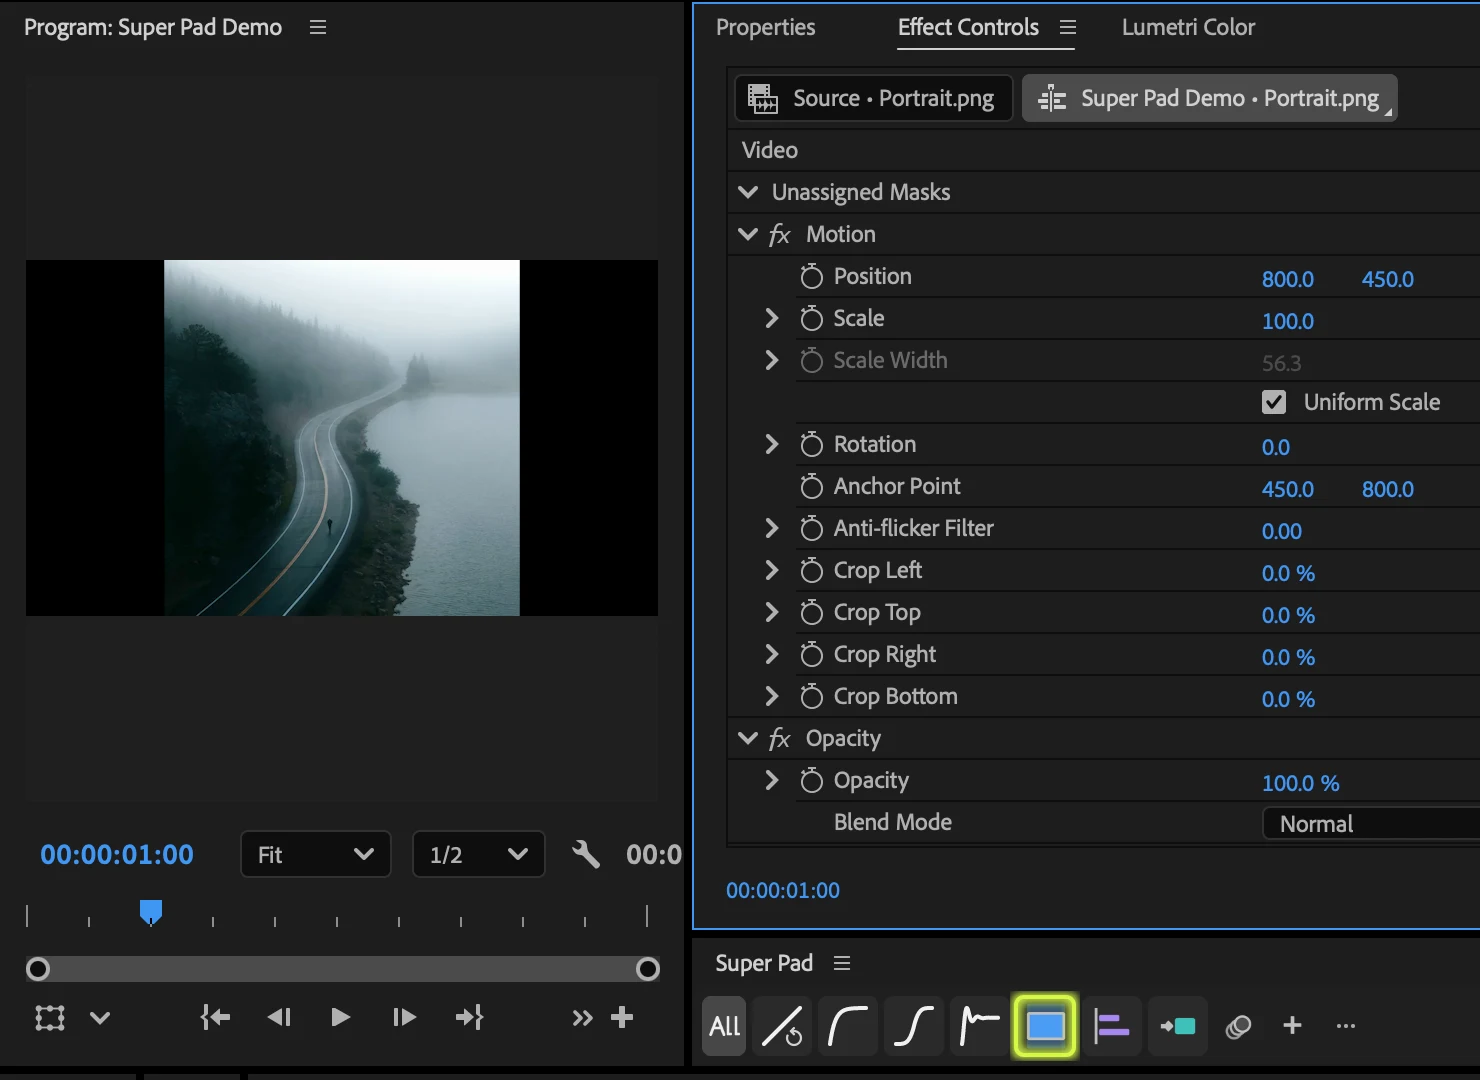
Super Pad is a small tool panel that sits beside your Premiere workspace. The toolbar holds All, your curve and function buttons, Motion Blur, Add (+) and Edit buttons (⋯), in that order.
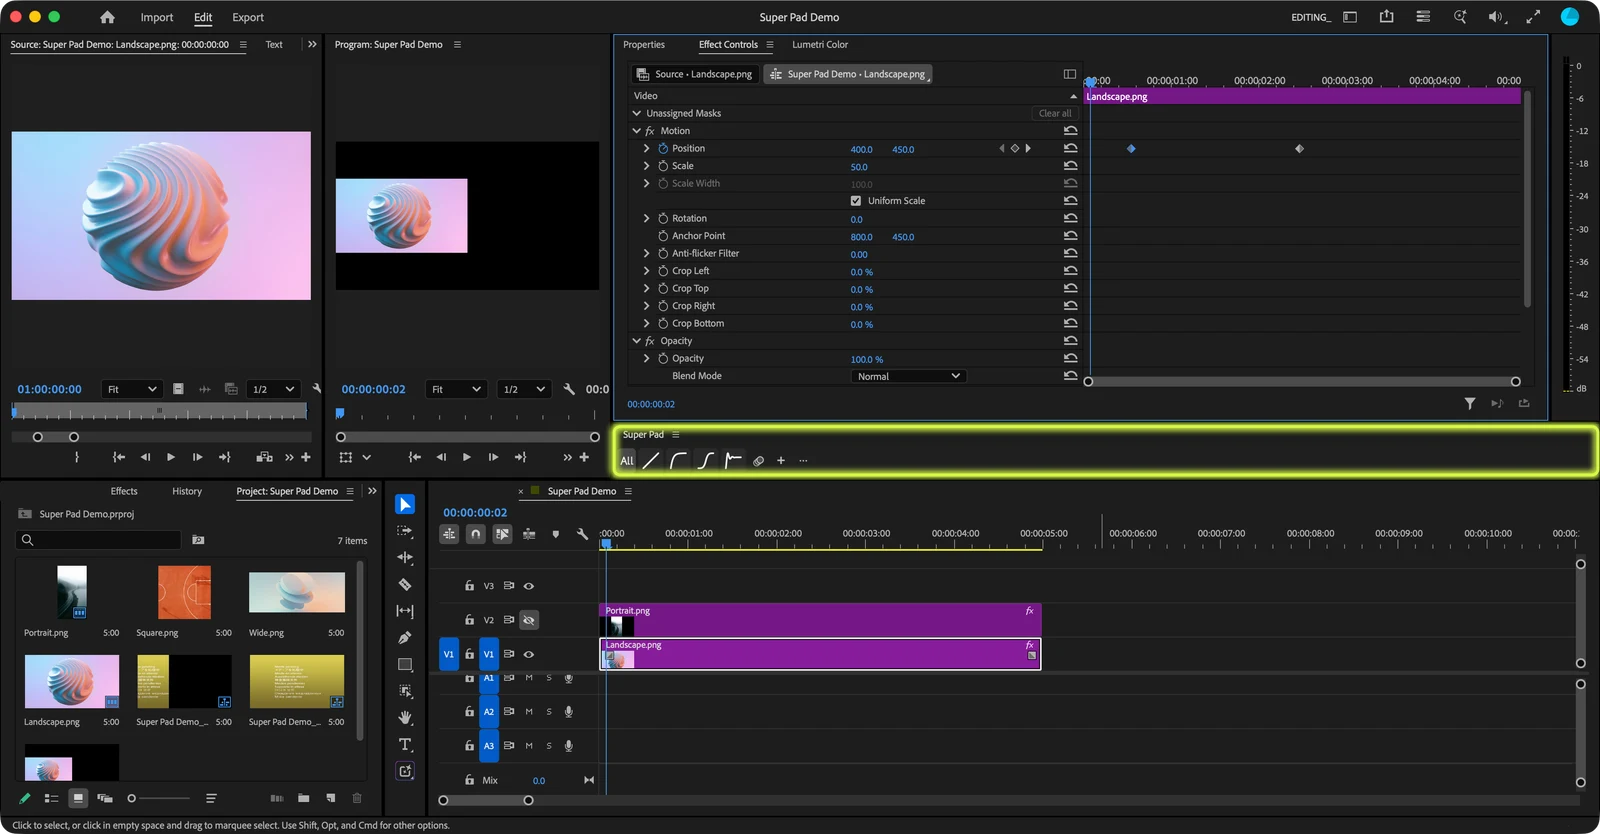

- All: when on, a curve applies to every supported keyframed property of the selected clips. When off, you choose the properties and intervals.
- Curve and function buttons: click to apply right away. Hover over a button to see its name and description.
- Motion Blur: adds motion blur to the clip’s Motion animation.
- Add (+): choose curves and functions to add as buttons.
- Edit buttons (⋯): reorder or remove buttons. Pressing any button for one second also opens edit mode.
Dock the panel wherever you like and shrink it as much as you need. Make the panel tall and the buttons stack from the top. If they don’t fit on one row, they wrap onto several.
Apply curves
Curves change how fast a move travels between two keyframes. A clip moving at a constant speed can ease to a stop or bounce into place.
- Add two or more keyframes to a property such as Position or Scale. The keyframes must use Linear interpolation.
- Select the clip in the timeline. With All on, you can select several clips at once.
- Click a curve button in the toolbar.
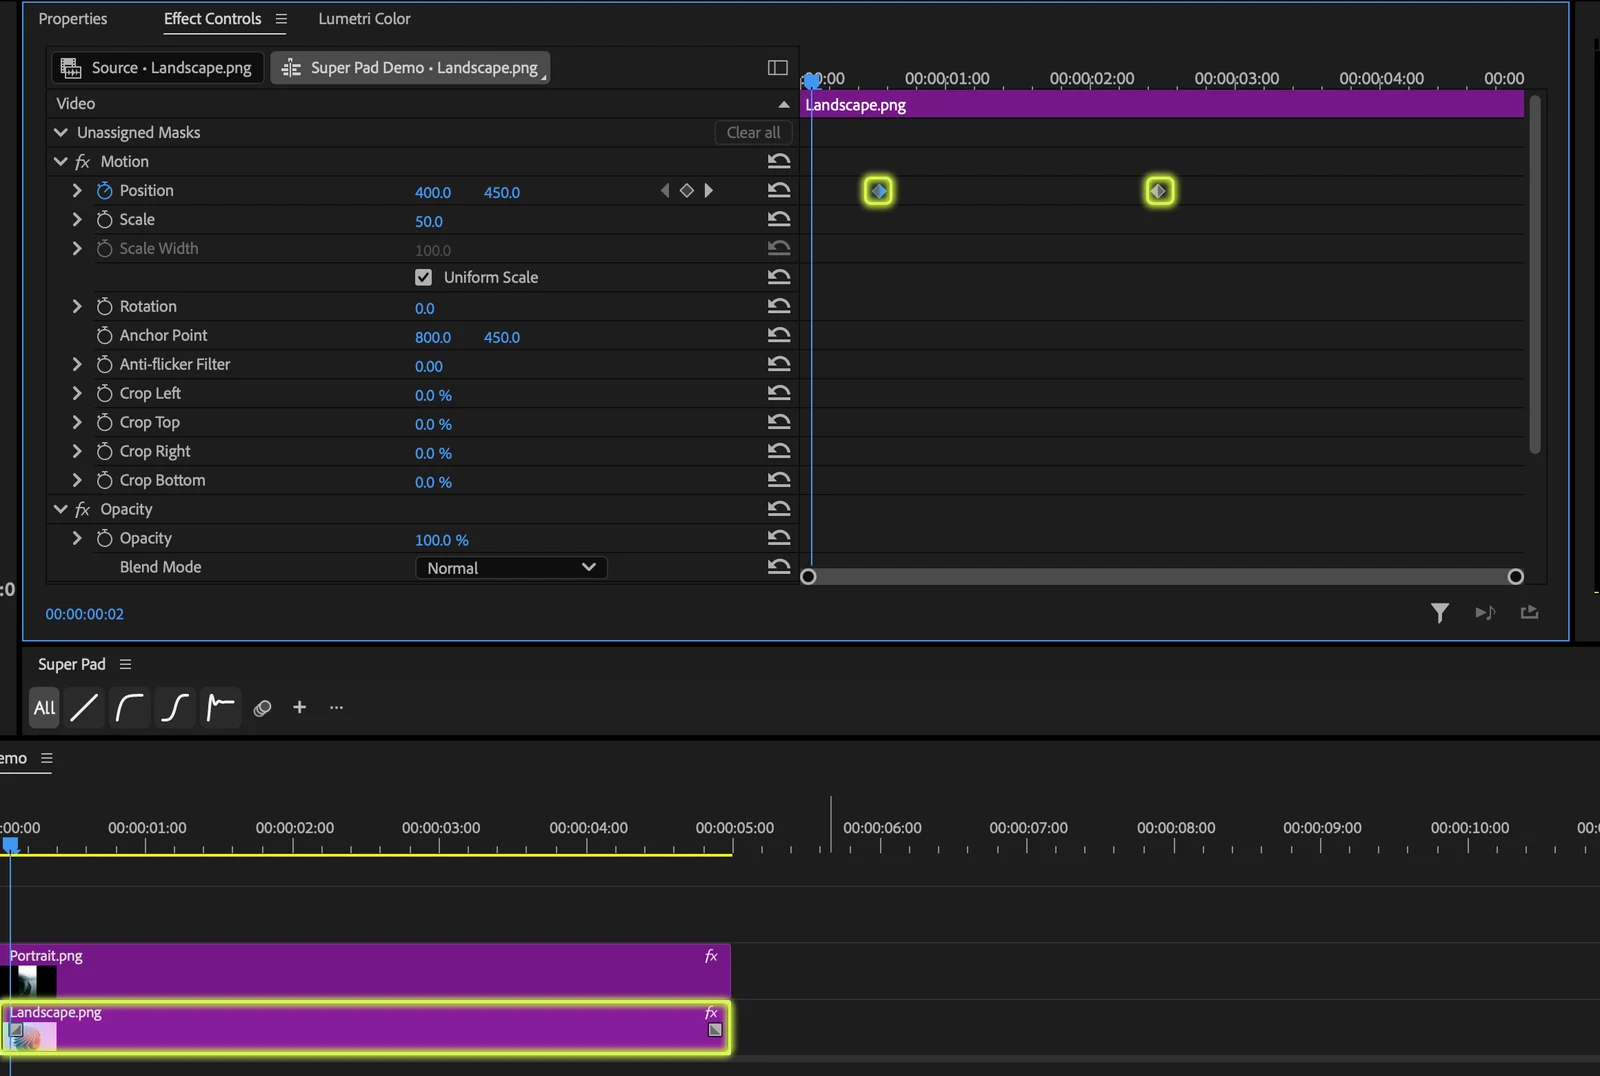
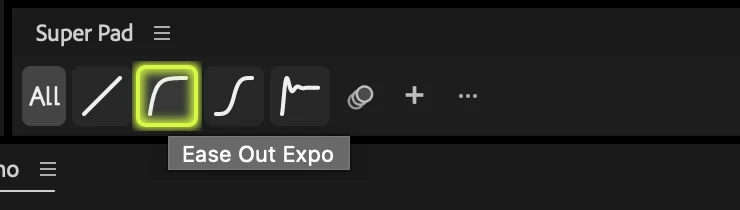
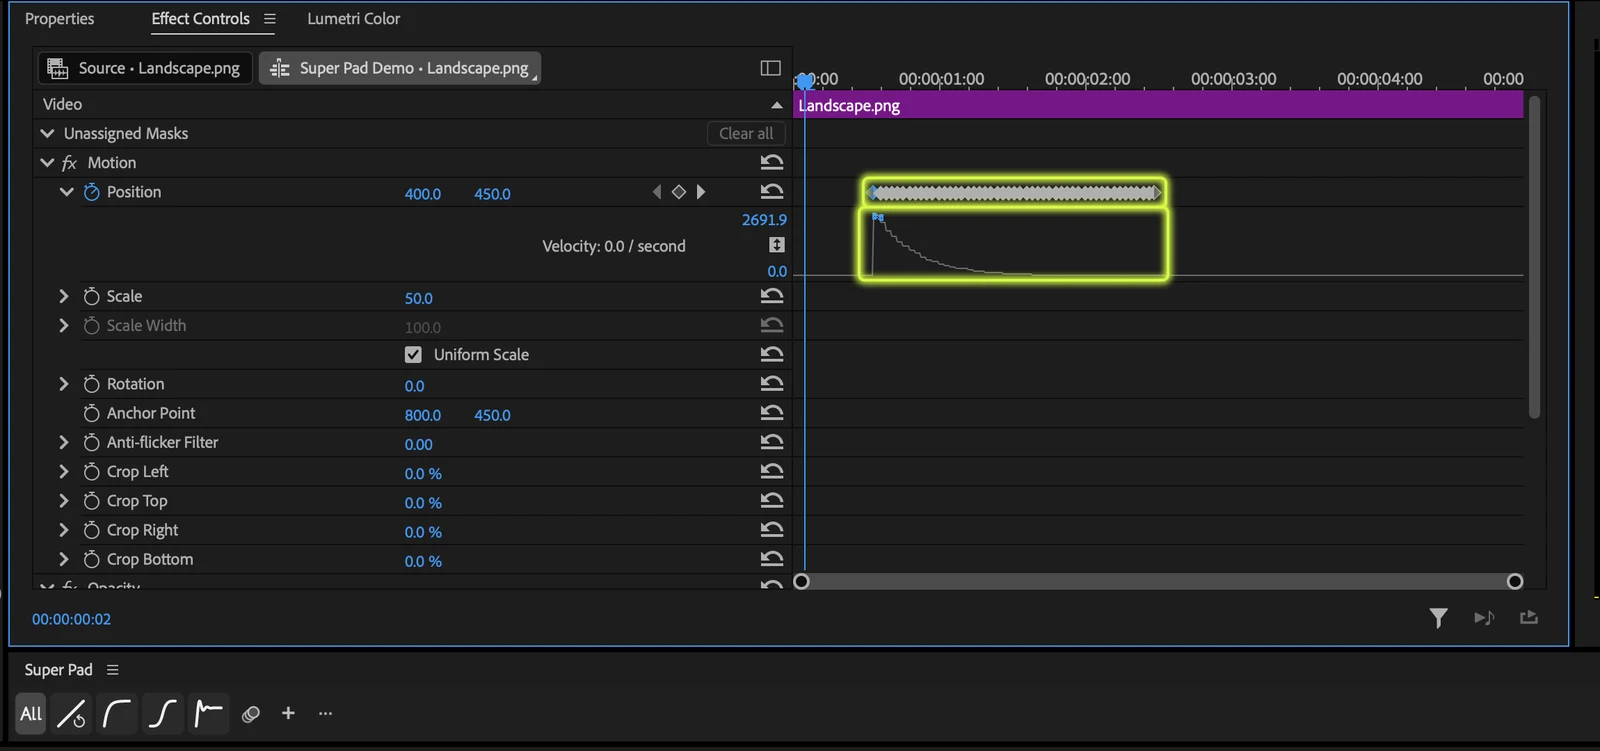
Curves apply to numeric and 2D position properties in Motion and video effects. If you don’t like the result, use Undo in Premiere.
Choosing a curve
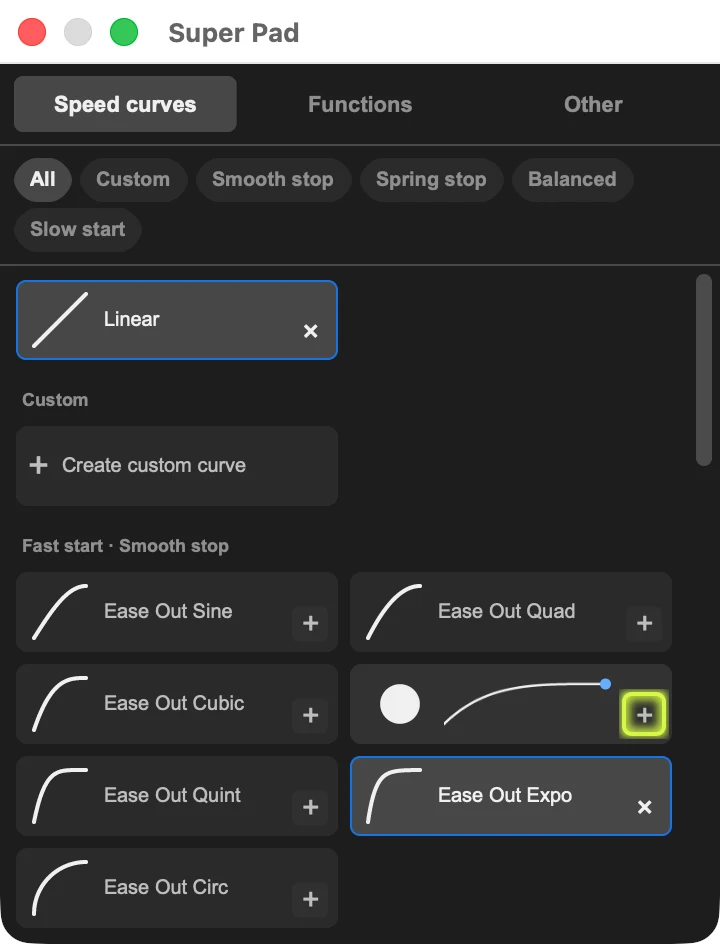
Click + and the Speed curves tab lists curves by type. Pick a type from the chips at the top, and hover over a curve to preview its motion.
- Smooth stop: starts fast and eases to a stop.
- Spring stop: starts fast and springs into place.
- Balanced: starts slowly, speeds up, then eases to a stop.
- Slow start: starts slowly and keeps speeding up.
- Custom: your own custom curves.
Speed-changed clips
Curves also work on clips sped up or slowed down at a constant rate with Speed/Duration. For reversed clips, frame holds or Time Remapping, nest the clip first and apply the curve to the outer nested clip.
Apply to selected intervals
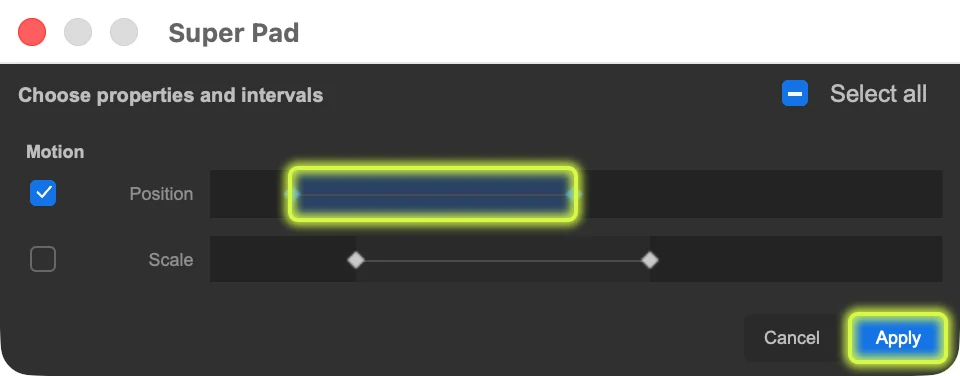
With All off, you can apply a curve to only the properties and keyframe intervals you choose on one clip. Select a single clip and click a curve button to open the property and interval picker. Choose the intervals and click Apply.

Restore with Linear
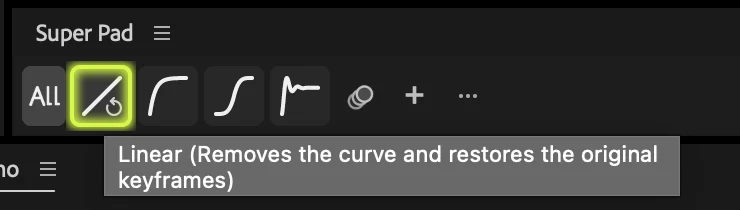
Select a clip with a curve and click Linear to remove the curve and restore the original keyframes. To change a move, restore it with Linear, edit the keyframes, then apply the curve again.
Create custom curves
Can’t find the curve you want? Make your own. Click + and choose Create custom curve in the Speed curves tab.
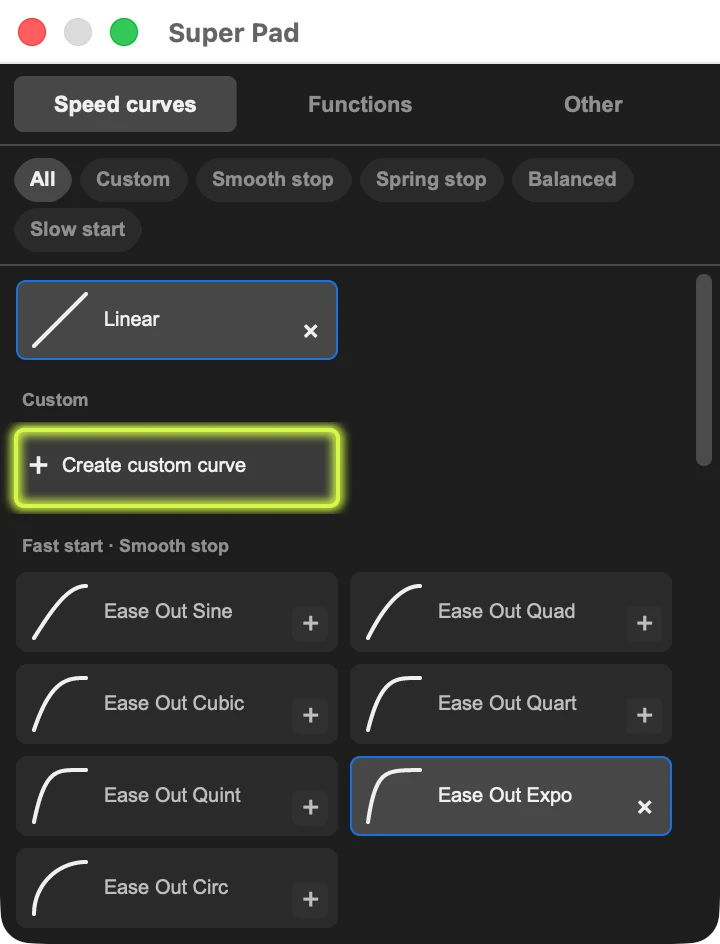
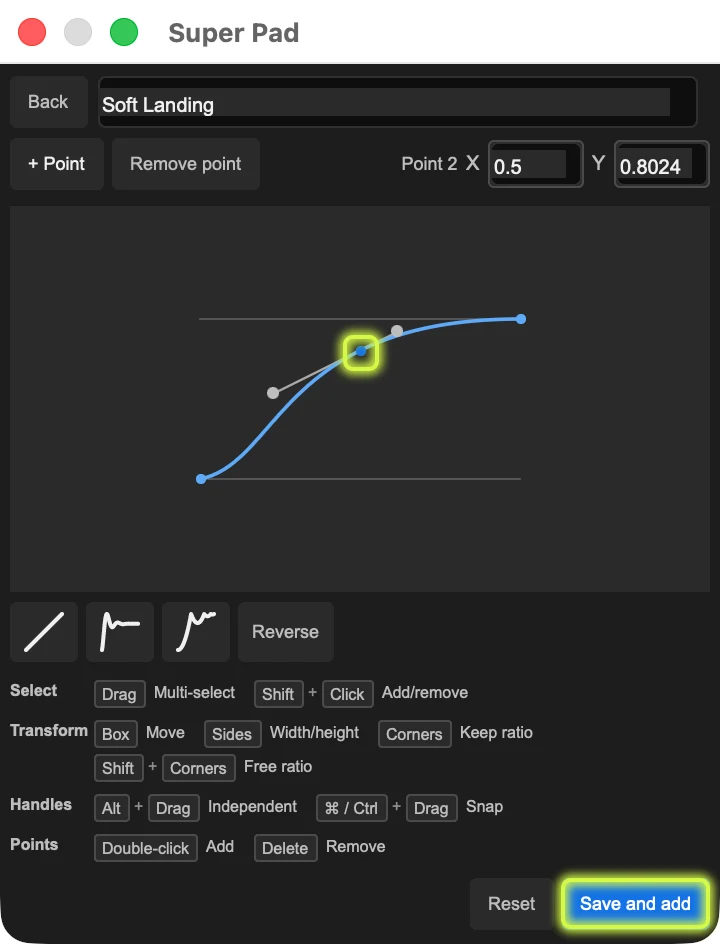
- Drag points and handles to shape the curve. You can also type the selected handle’s values in the X and Y fields at the top.
- Click + Point or double-click the curve to add a point. Remove the selected point with Remove point or the Delete key.
- Use the buttons below the graph to start from a Linear, Ease Out Elastic or Ease Out Bounce shape, and Reverse to flip the curve front to back.
- Name it and click Save and add to save the curve and add it to the toolbar. You can save up to 50 custom curves.
Functions
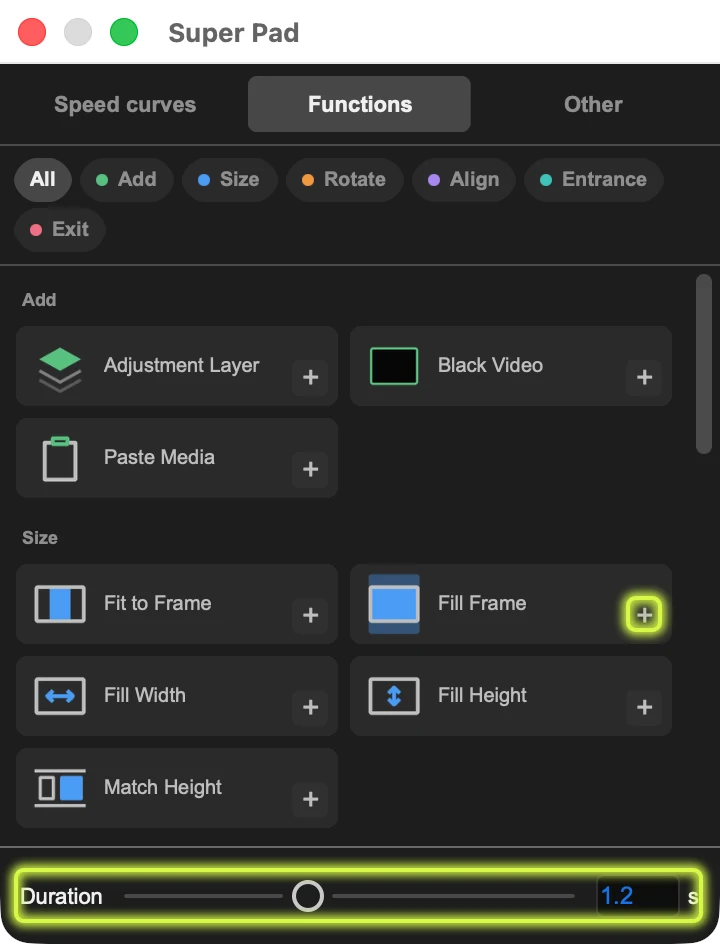
The Functions tab in the + window holds 28 clip functions in six groups. Add the ones you use often as buttons, select clips, then click. Each function can be reversed with a single Undo.
Add
- Adjustment Layer: adds an adjustment layer above the selected clips’ range. With nothing selected, it adds a five-second layer at the playhead.
- Black Video: adds black video the same way.
- Paste Media: adds the first copied image, video or PSD file on a track above the picture. Short videos keep their original length, and sound goes on a separate audio track. Requires Premiere Pro 26.2 or later.
Created items are kept in the Super Pad bin in the Project panel.
Size
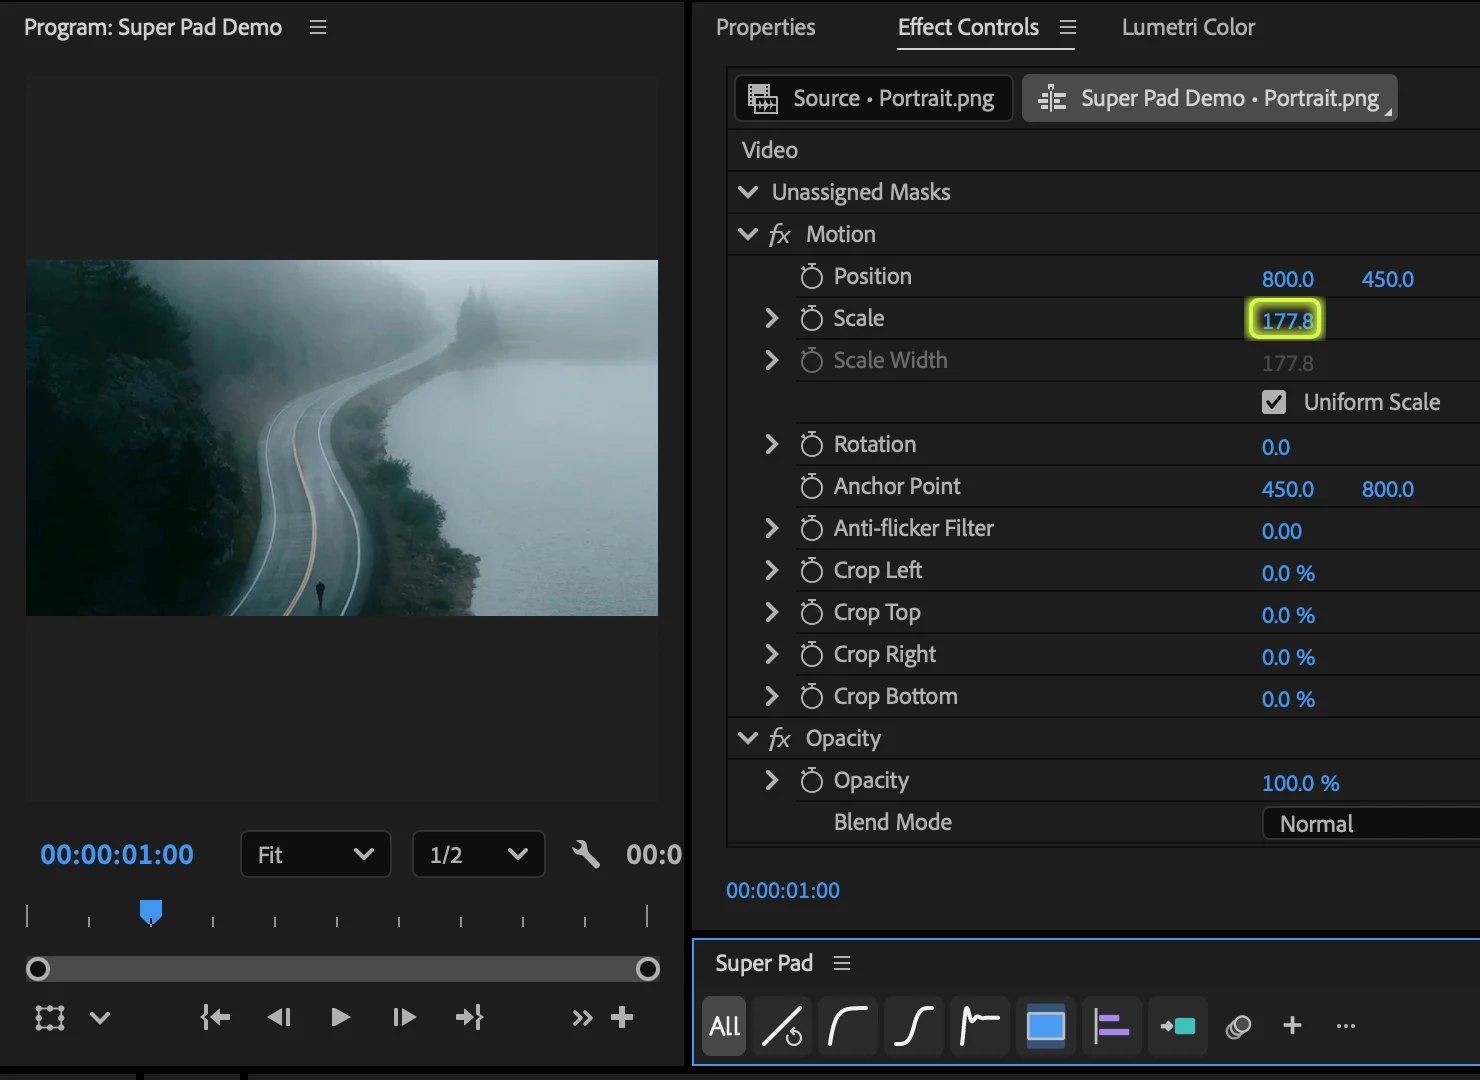
- Fit to Frame: fits the whole image or video inside the frame.
- Fill Frame: scales up to cover the whole frame. Edges outside the frame are cropped.
- Fill Width: matches the image or video width to the frame width.
- Fill Height: matches the image or video height to the frame height.
- Match Height: scales the selected clips so their visible height matches the clip on the lowest track. Select two or more clips.
Rotate
- Rotate Right 90°: adds 90° to Motion Rotation of every selected clip.
- Rotate Left 90°: subtracts 90° from Motion Rotation of every selected clip.
Align
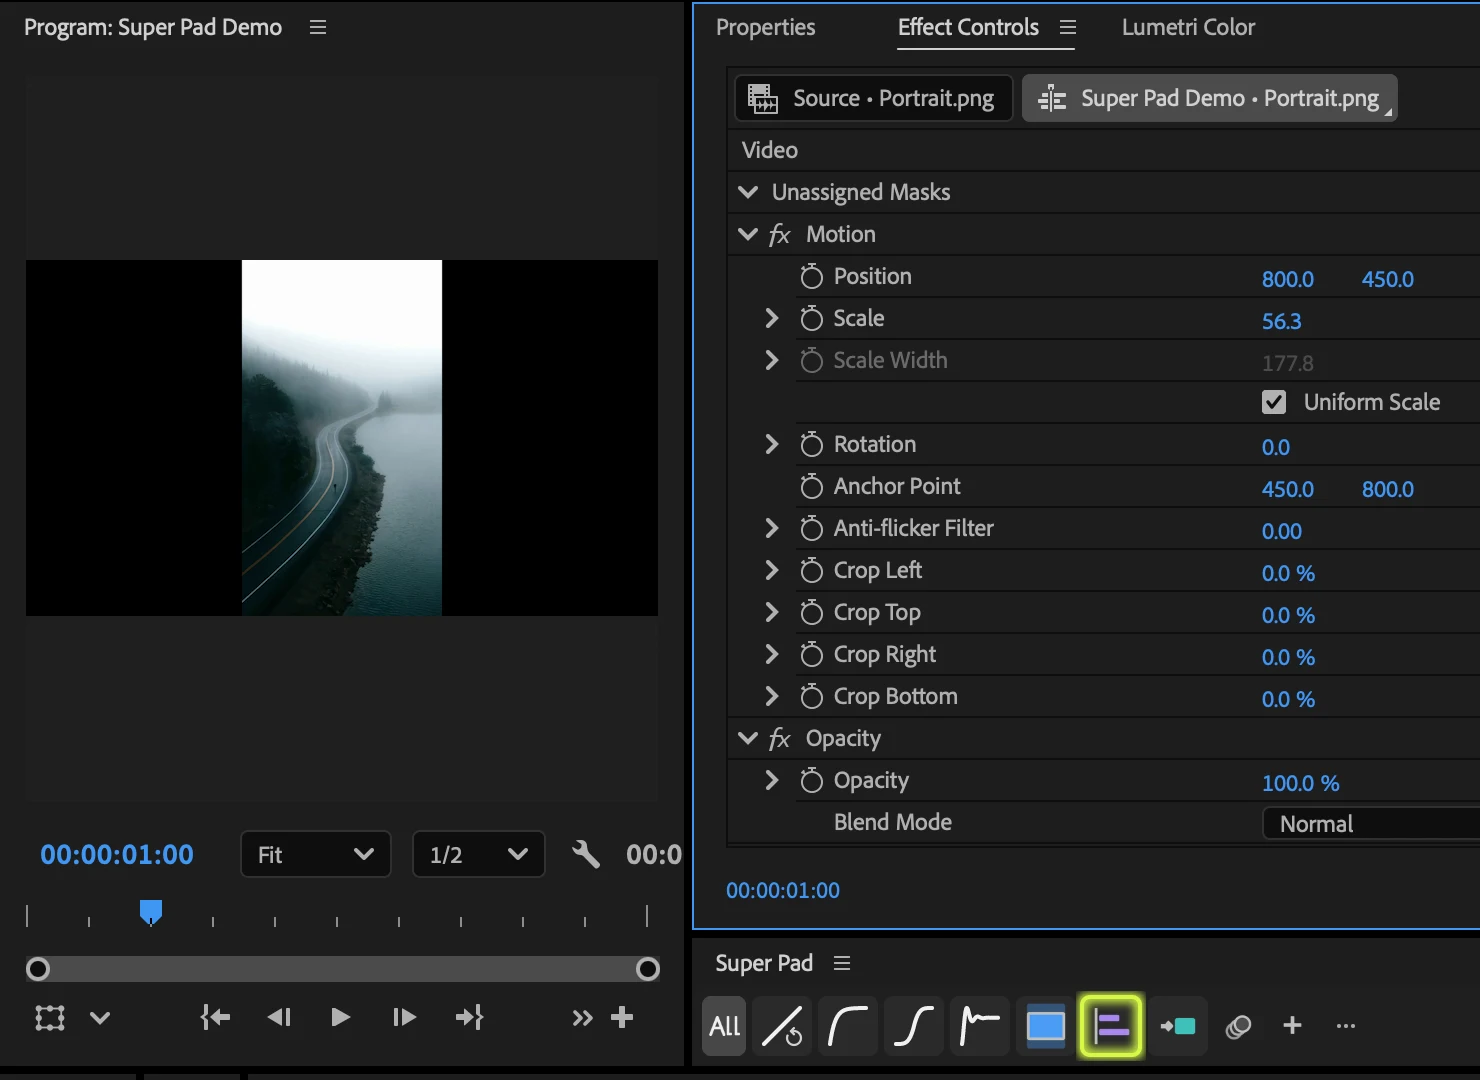
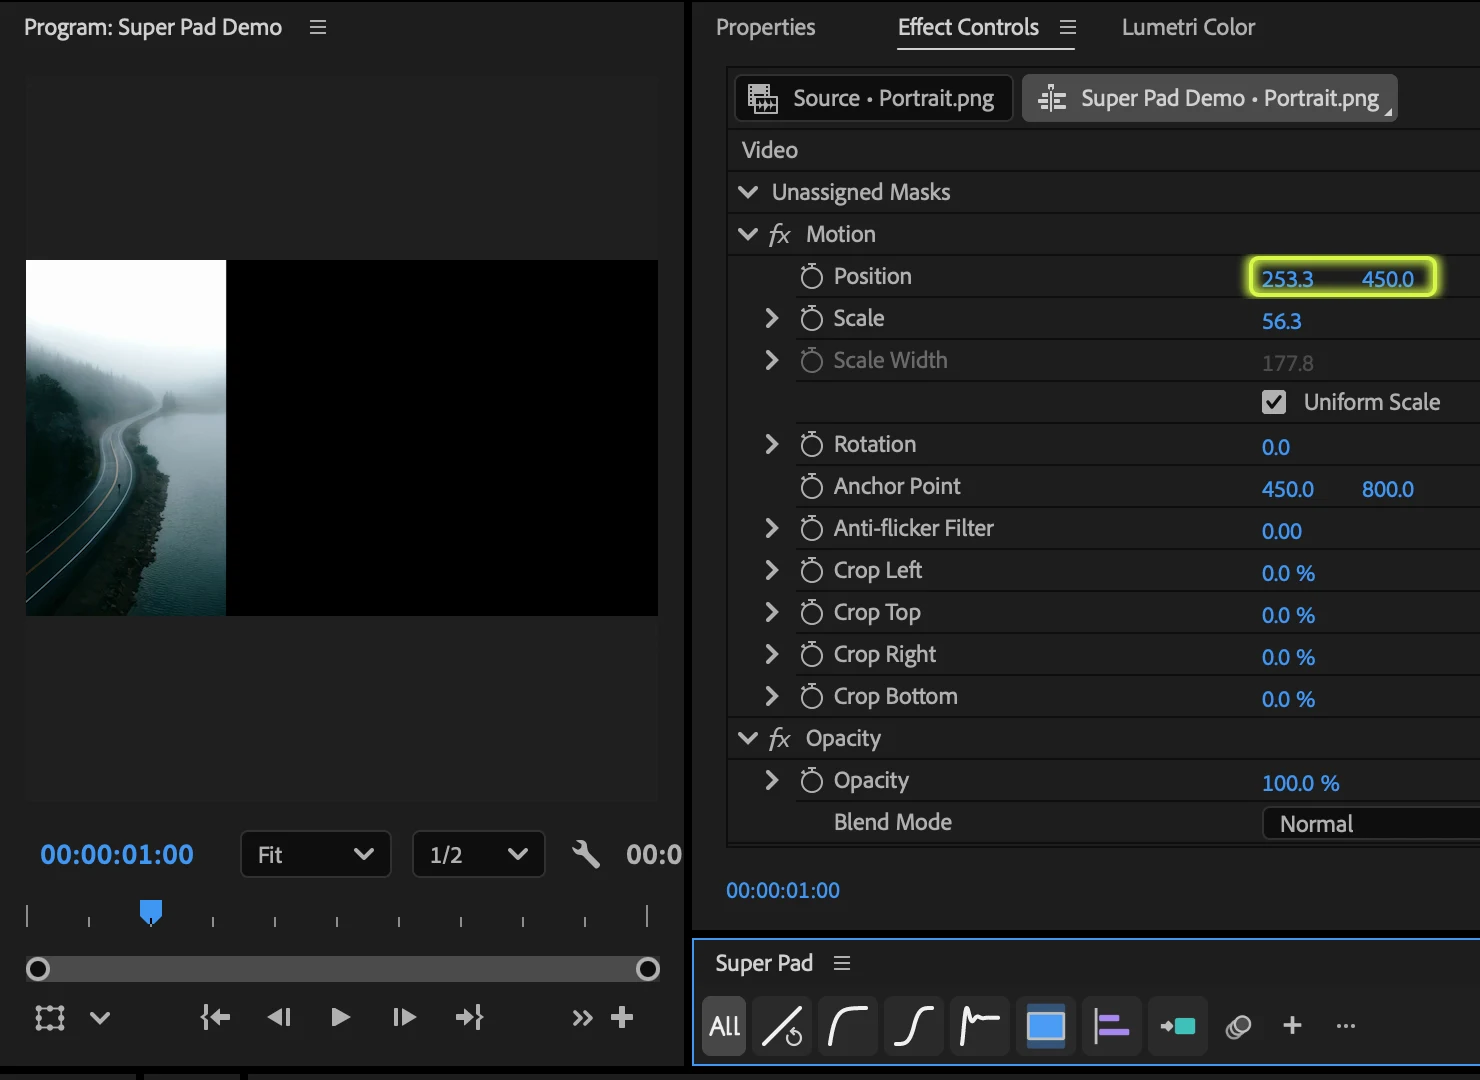
- Align Left, Align Horizontal Center, Align Right: move each selected clip so its visible left edge, center or right edge meets the frame.
- Align Top, Align Vertical Center, Align Bottom: do the same vertically.
Entrance and Exit
- Opacity In, Opacity Out: the clip fades in at its start and fades out at its end.
- Scale In, Scale Out: the clip grows from zero to its current scale to enter, and shrinks back to zero to exit.
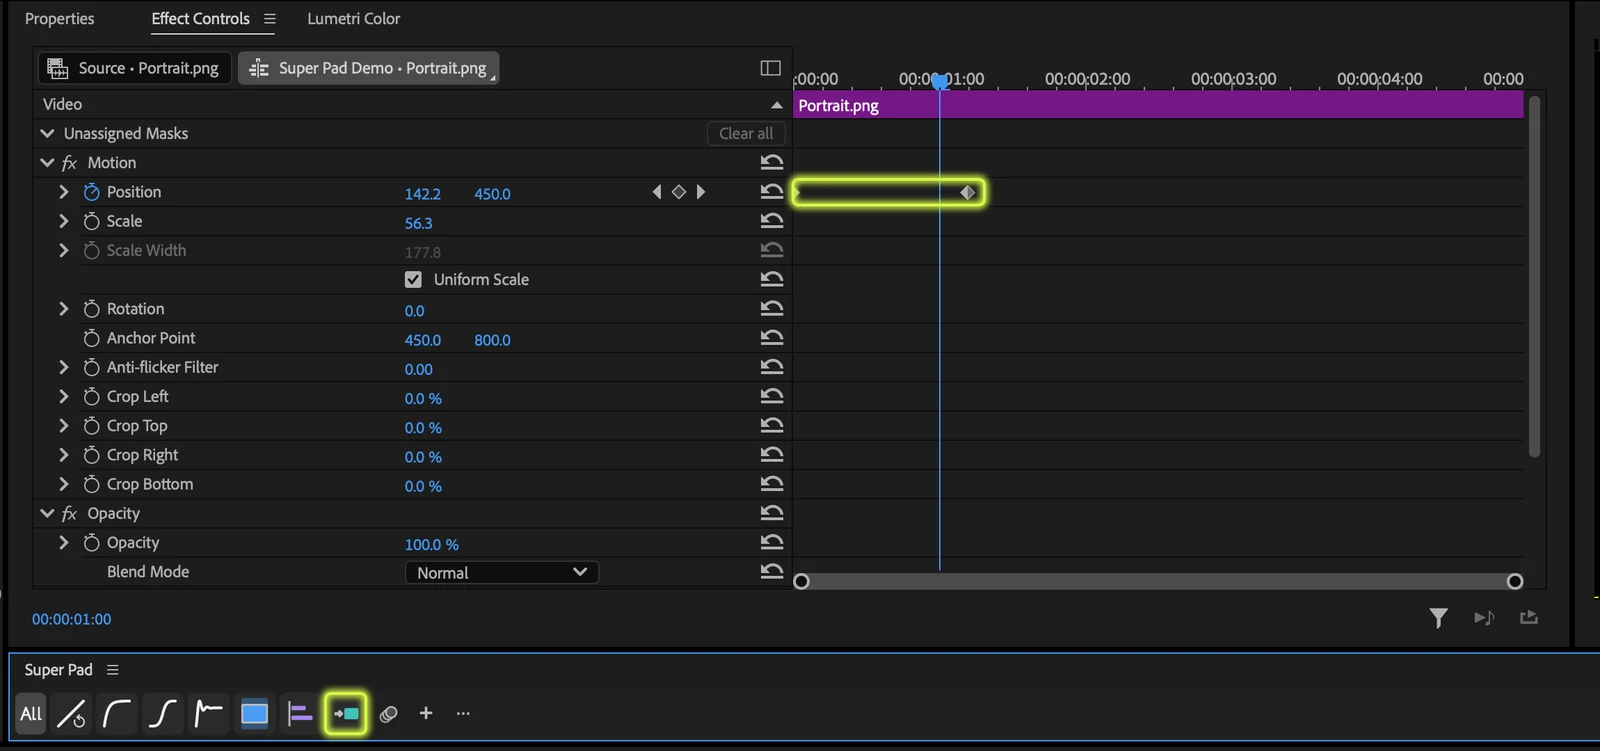
- Slide In from the top, bottom, left or right: the clip enters from outside the frame.
- Slide Out to the top, bottom, left or right: the clip leaves the frame.
Use entrances and exits with a single clip selected. Set the animation length in seconds with Duration at the bottom of the + window.
Motion blur
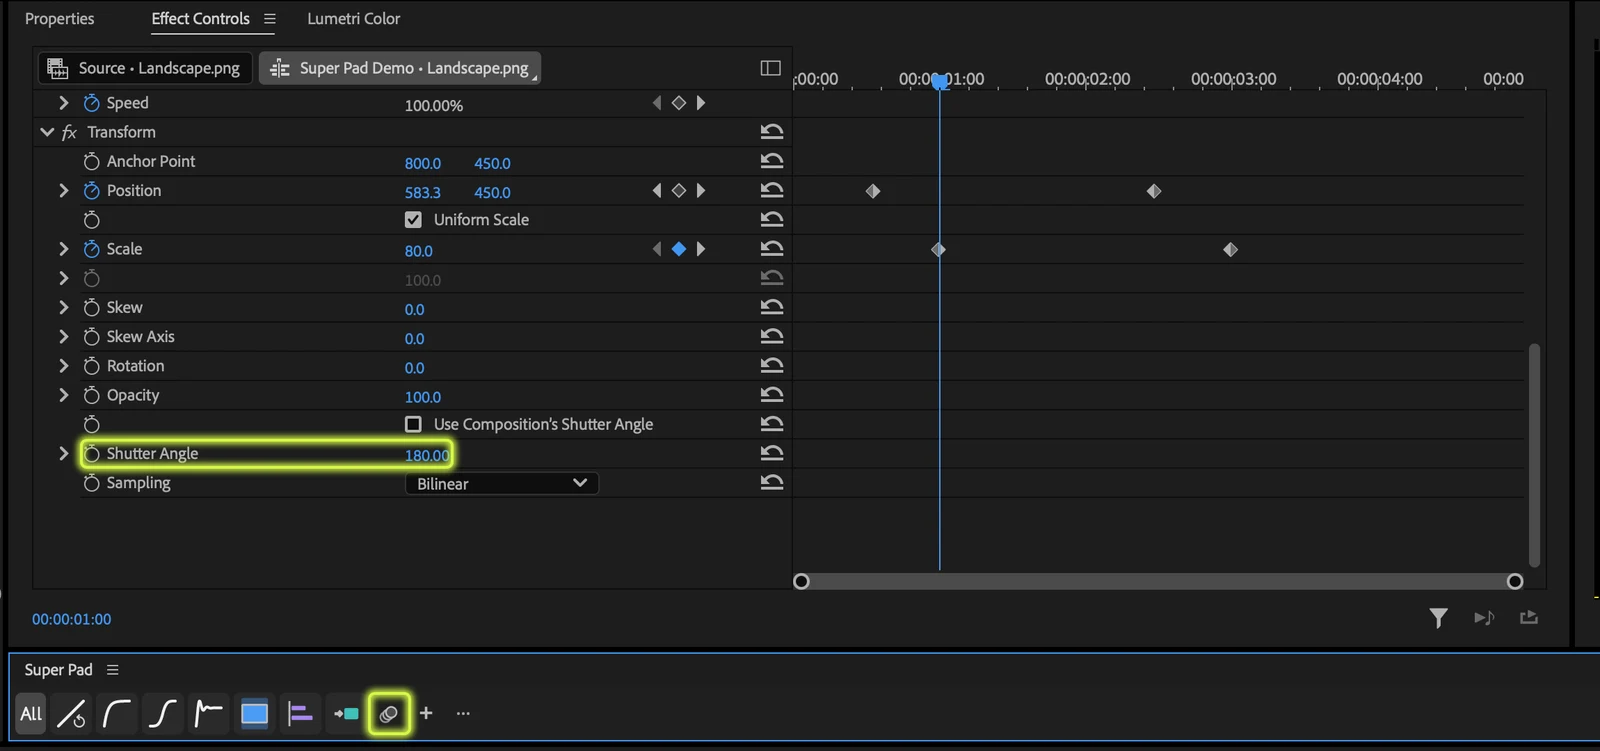
The Motion Blur button moves the clip’s Motion animation into a Transform effect and turns on motion blur with a 180° shutter angle. Animate Motion with linear keyframes, select the clip, then click it. If you applied a curve first, the move transfers exactly as it is.
Edit buttons
Arrange the toolbar the way you work. Click +, then + on a curve or function to add it. Items already added show an X; click it to take them off the toolbar.
Click ⋯ or press any button for one second to open edit mode. Click ⋯ again when you’re done.

- Reorder: drag a button to where you want it.
- Select several: click a button to select it. Hold ⌘ on macOS or Ctrl on Windows and click to add or remove buttons, or Shift-click to select everything in between.
- Move several: drag one selected button and the whole selection moves with it, with a count on the button you’re dragging.
- Remove: click a button’s X, or select it and press Delete.

Dividers and spaces
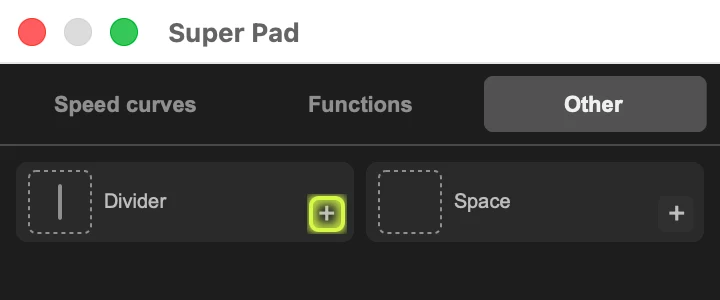
Add a Divider or Space from the Other tab in the + window to split your buttons into groups. You can add as many as you like and drag them like any other button.
Panel menu
Click the menu icon (≡) next to the panel name for these items.
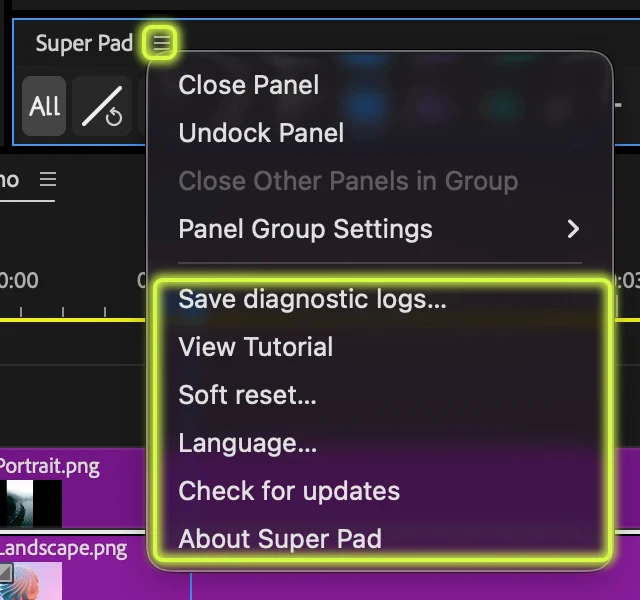
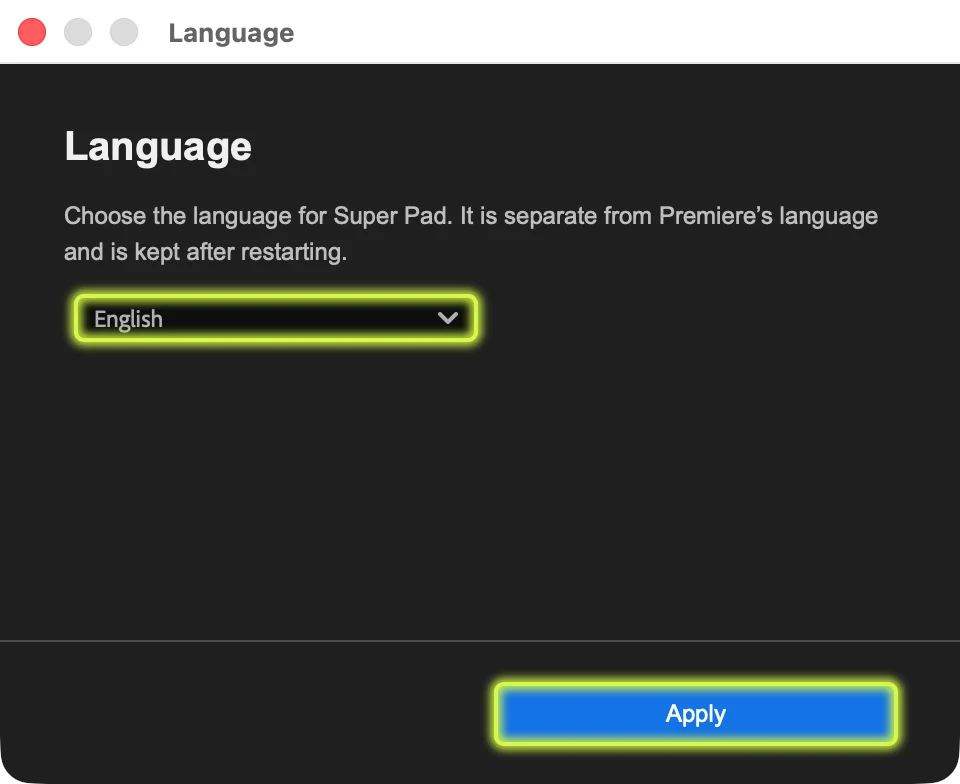
- Language: choose English, Japanese or Korean for the panel. It’s separate from Premiere’s language and stays after you restart. You can also choose it on the tutorial’s welcome screen the first time you open Super Pad.
- View Tutorial: watch the first-run tutorial again.
- Check for updates: see whether a new version is available and open the update page.
- About Super Pad: check the version and license status, and go to Manage account & devices.
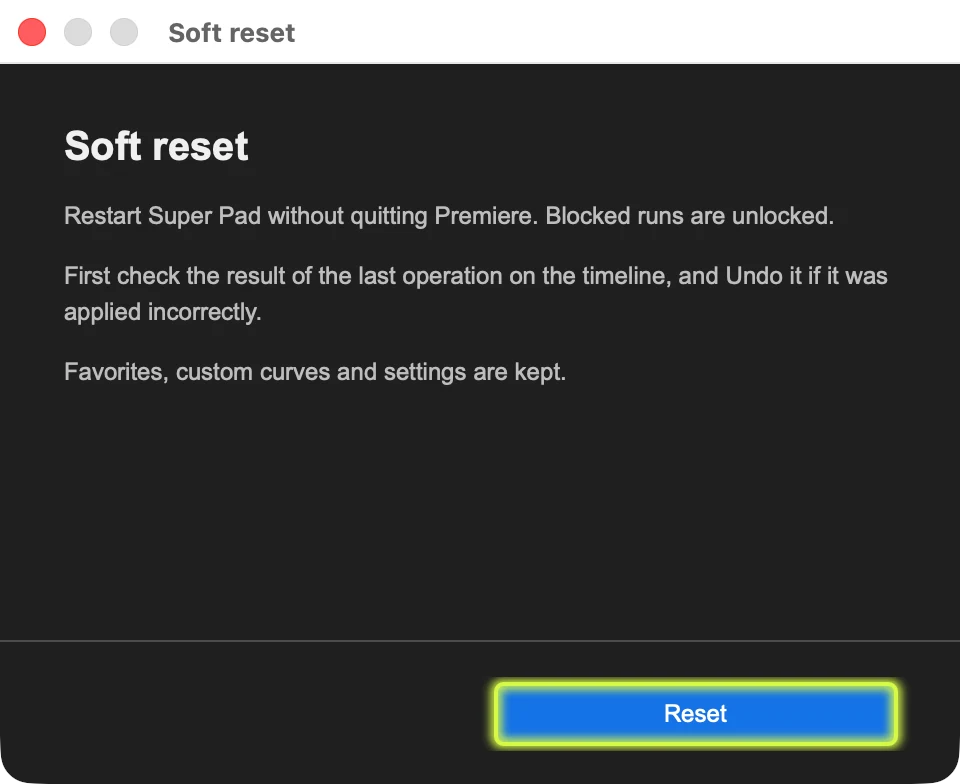
- Soft reset: restart Super Pad without quitting Premiere. Your buttons, custom curves and settings are kept.
- Save diagnostic logs: save recent operation steps and errors as a JSON file. Nothing is sent automatically, so attach the file when you contact support.
To update, download the latest CCX file from My products in your LUCAMOTIVE account and install it. It’s best to save your work and quit Premiere first.
Devices and offline use
A personal license works on up to two devices. If you switch computers or reach the device limit, disconnect the old computer from My products in your LUCAMOTIVE account, then activate on the new one. You can disconnect it from your account even if you no longer have the old computer.
Open My products
Troubleshooting
- If a button doesn’t change the clip, check that the clip is selected and the property has two or more linear keyframes. The message in the panel explains what’s needed.
- If the panel says further runs are blocked, check the last result in the timeline, Undo it if needed, then choose Soft reset in the panel menu.
- If sizing or alignment looks off, turn off Scale to Frame Size for the clip and run it again.
- If the browser does not open, your purchase is missing, or the device limit is reached, find the next steps in the detailed FAQ.
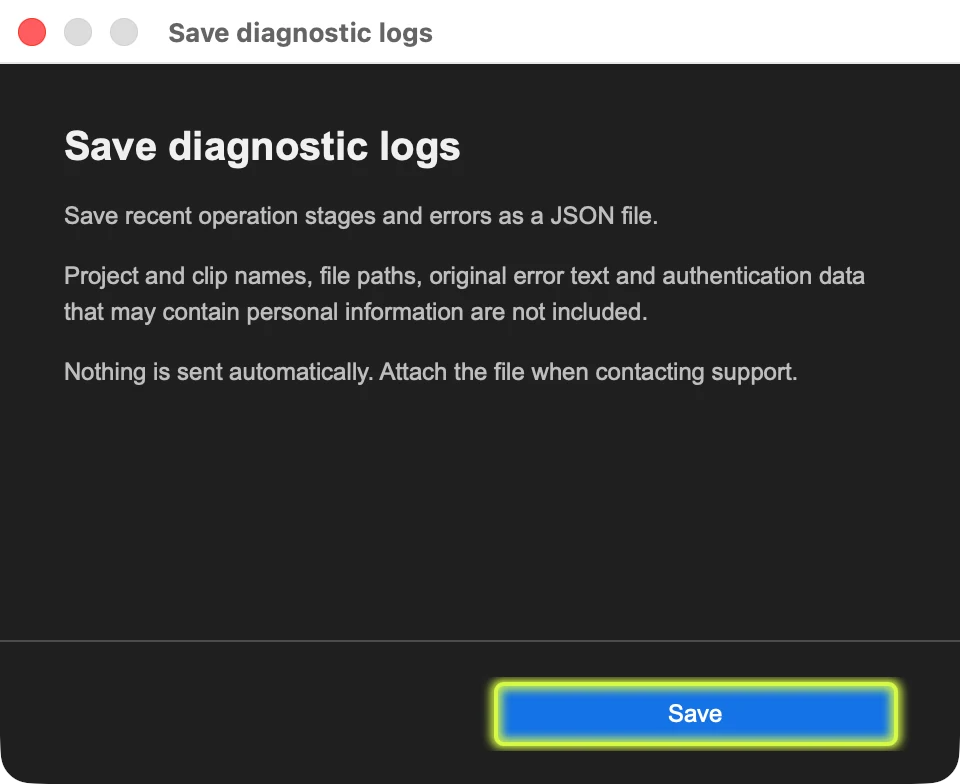
Still stuck? Save the diagnostic logs and send them to support@lucamotive.com with your operating system, Premiere Pro version, Super Pad version and the error message.
Detailed Super Pad FAQInstallation help