

Before you start
You need Premiere Pro 25.6 or later. It runs on 64-bit Windows, and on Macs with Apple silicon (M1 or later) and macOS 14 or later.
Download the installer from My products in your LUCAMOTIVE account. It installs the effect and its panel together.
Open My productsInstall on Windows
- Download the Windows zip file from My products.
- Right-click the zip file, choose Extract All and extract it to a short path such as C:\SuperRetouch. Don’t run it from inside the zip.
- In the extracted folder, double-click Install-Super-Retouch.exe.
- If a security prompt appears, follow When Windows shows a security prompt below.
- When the installation-complete window appears, click OK and open Premiere Pro.
Install-Super-Retouch.exeApplication
Super Retouch Panel.ccxCreative Cloud plugin
Super Retouch 0.12.97
Installed: C:\Program Files\Adobe\Common\Plug-ins\7.0\MediaCore\SuperRetouch
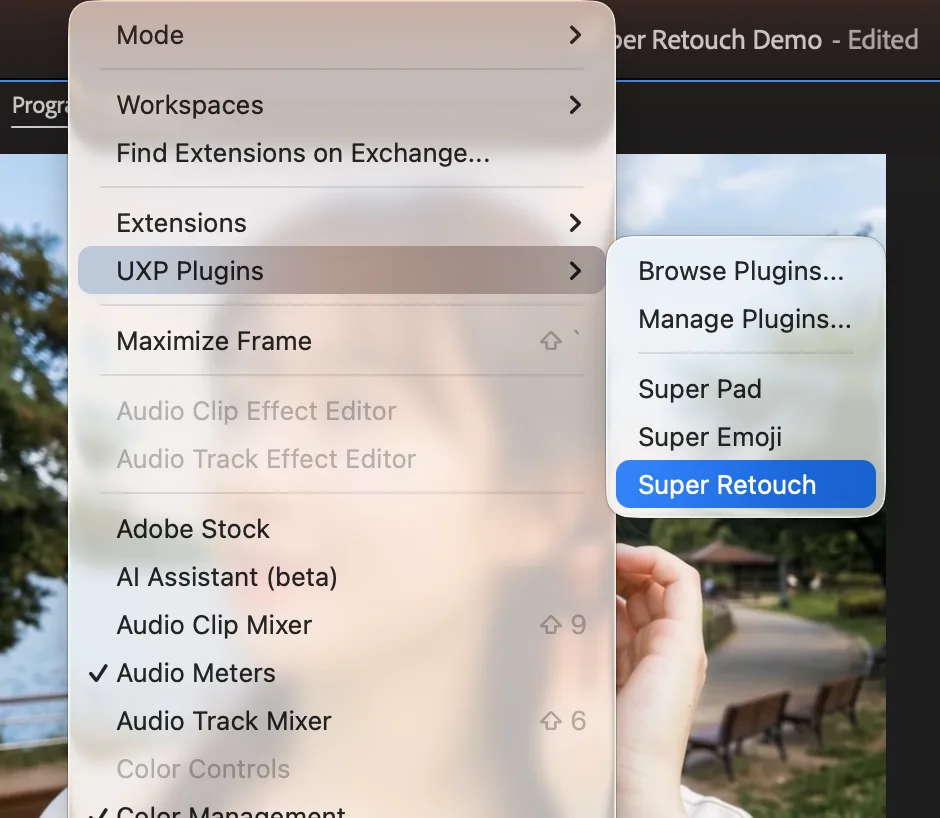
The panel is installed too. Open it from Window › UXP Plugins › Super Retouch in Premiere.
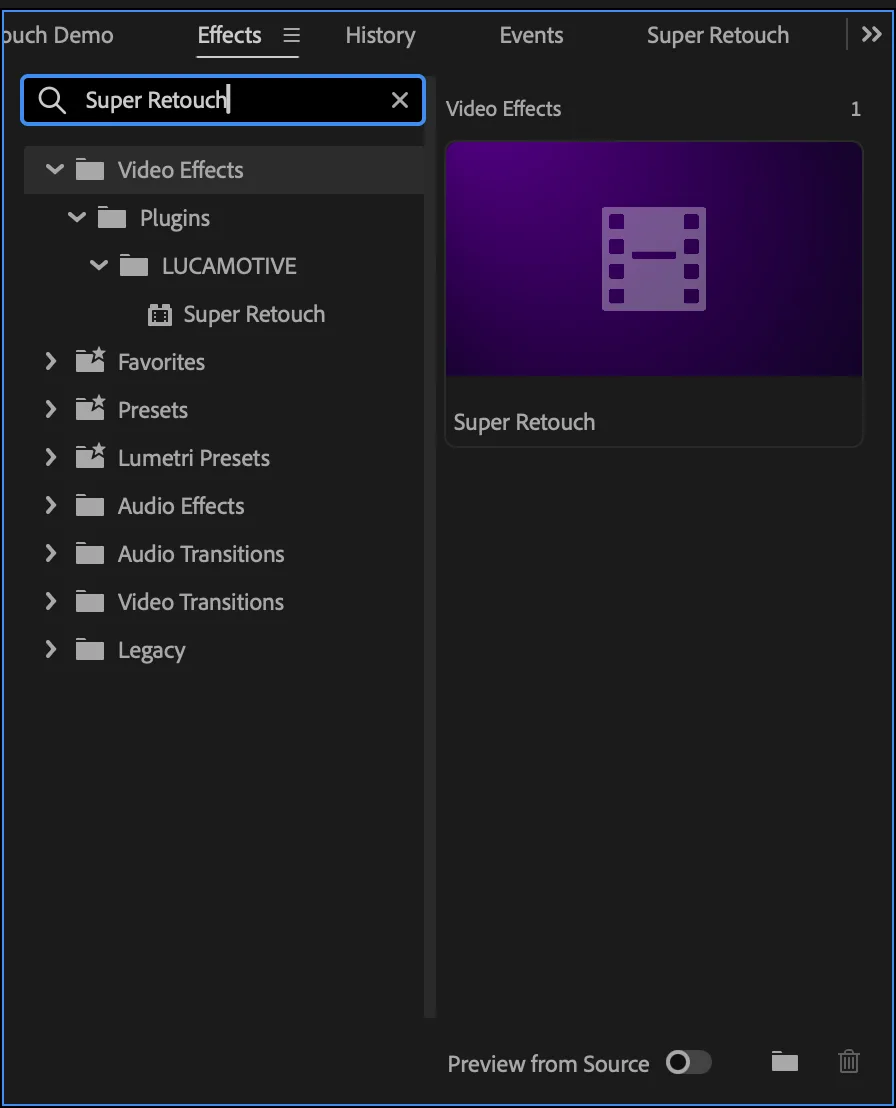
Open Premiere and search for Super Retouch in the Effects panel.
When Windows shows a security prompt
During the open beta, Windows may show a prompt because it doesn’t recognise the program yet. If you downloaded it from your LUCAMOTIVE account, it’s safe to continue as below.
Windows protected your PC
Microsoft Defender SmartScreen prevented an unrecognized app from starting. Running this app might put your PC at risk.
More info
Windows protected your PC
Microsoft Defender SmartScreen prevented an unrecognized app from starting. Running this app might put your PC at risk.
User Account Control
Do you want to allow this app from an unknown publisher to make changes to your device?
Install-Super-Retouch.exe
Show more details
- If “Windows protected your PC” appears, click More info, then Run anyway.
- If “Do you want to allow this app from an unknown publisher to make changes to your device?” appears, click Yes.
- If you’re told administrator rights are needed, run the installer again and click Yes in the confirmation window.
- If your antivirus says it blocked a file, allow it and install again after a minute.
Install on Mac
- Download the Mac pkg file from My products.
- Double-click the pkg file and click Continue as the installer guides you.
- When asked for your Mac password, enter your login password and click Install Software.
- When it finishes, click Close and open Premiere Pro.
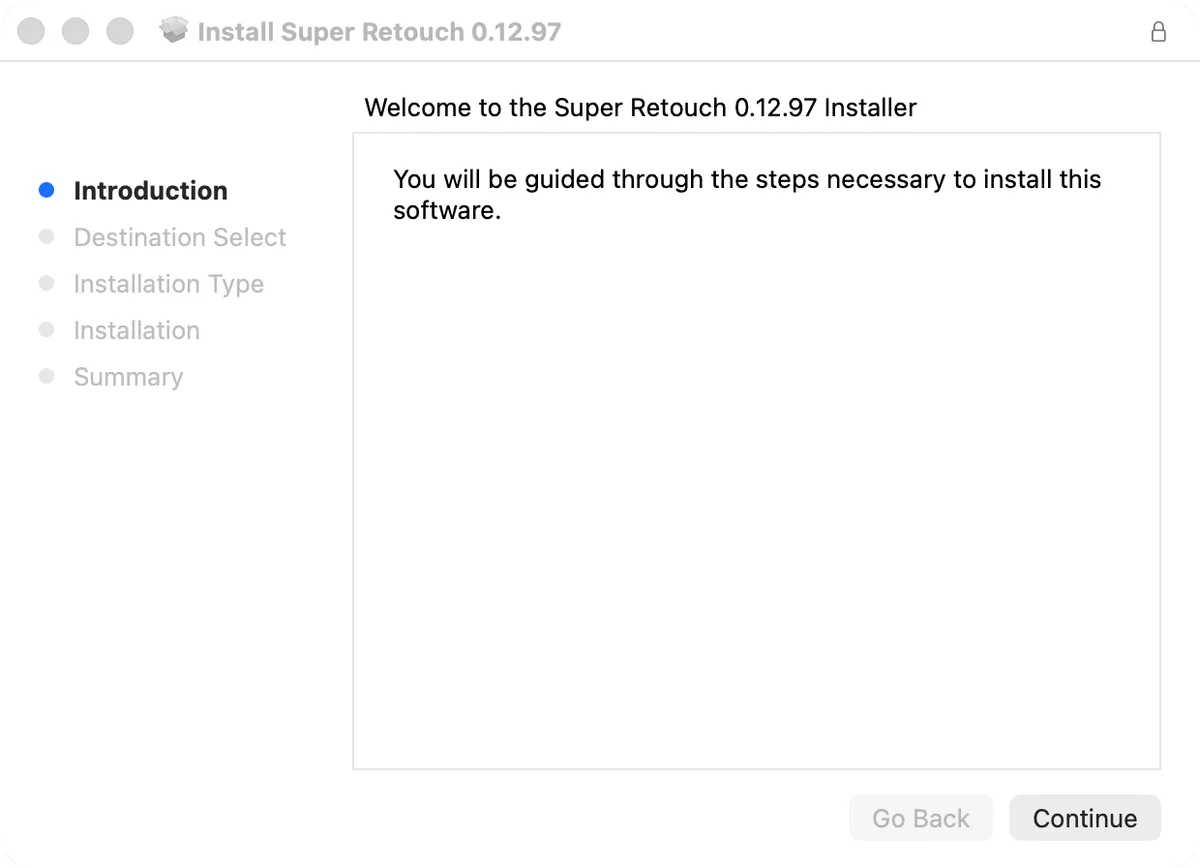
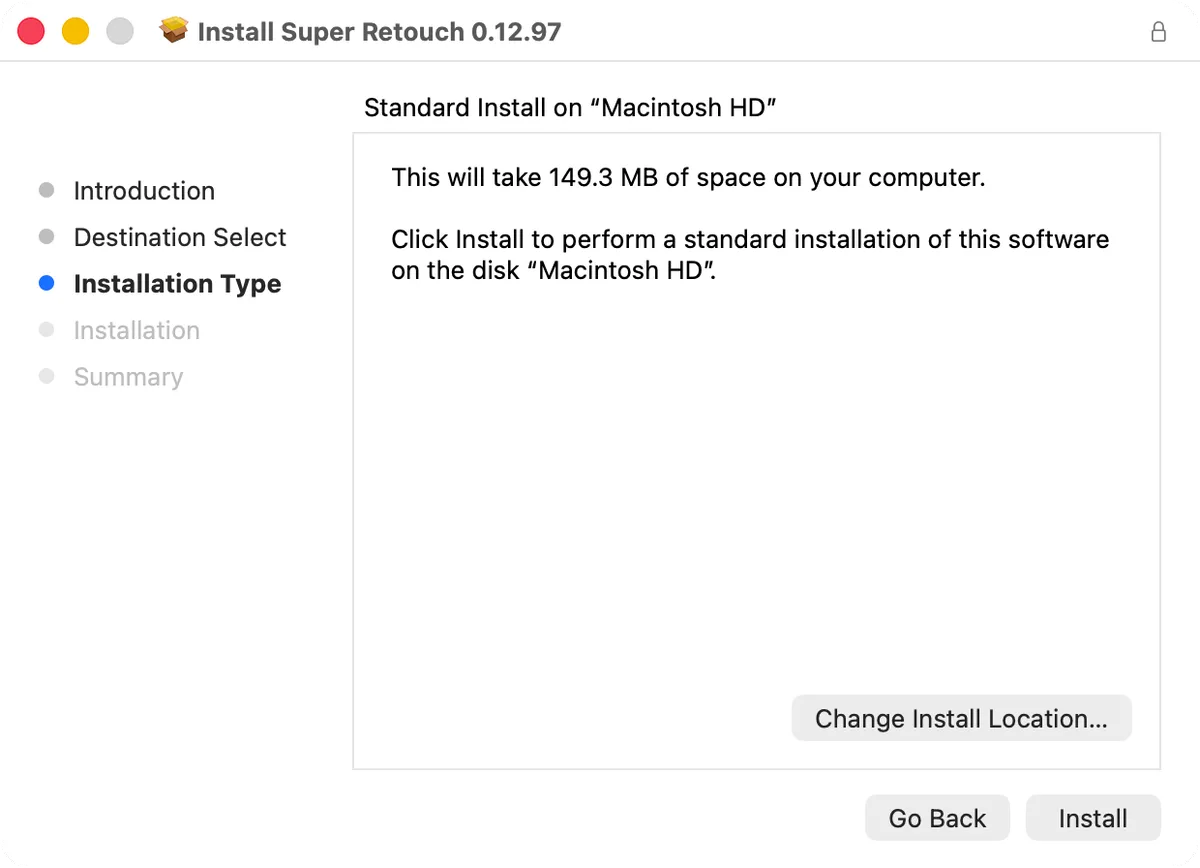
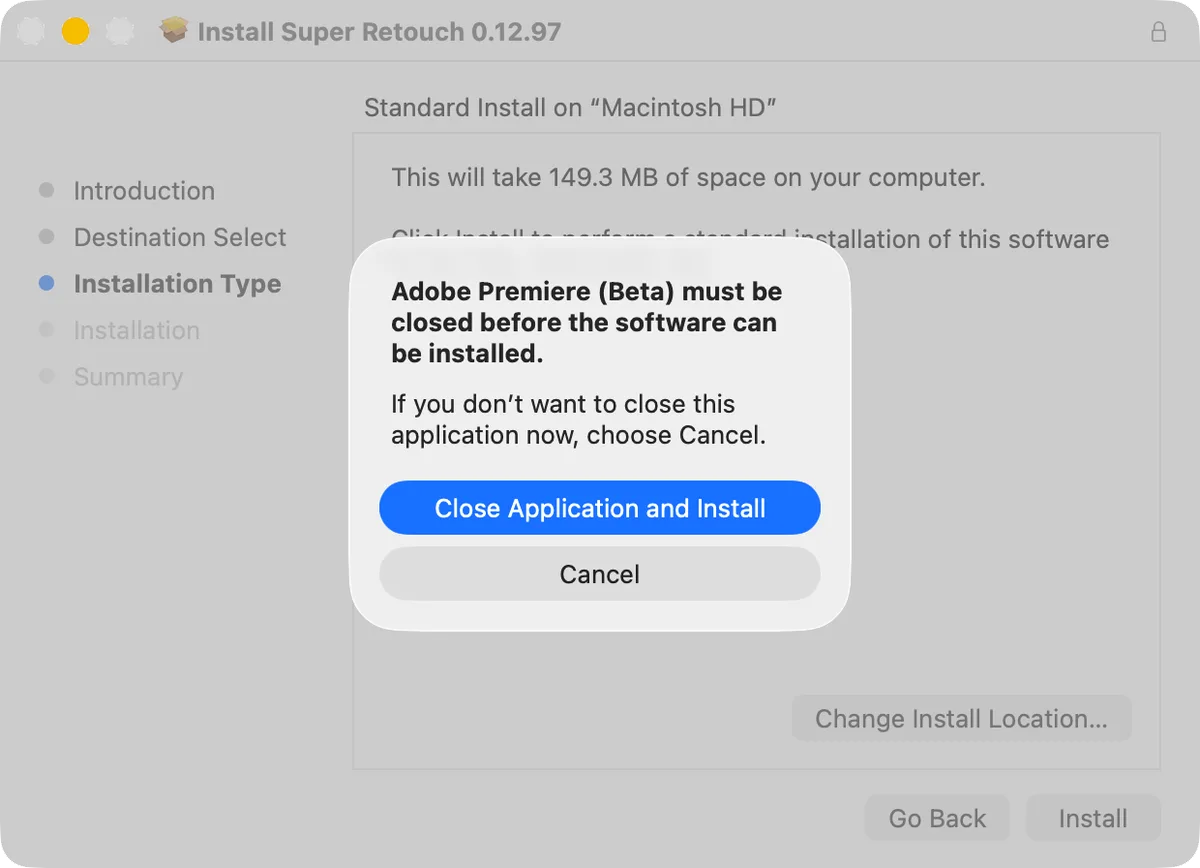
On Mac it installs straight away, with no security settings to change. It can’t be installed on Macs with Intel chips.
Find it in Premiere
In the Effects panel, search for Super Retouch or open Video Effects › Plugins › LUCAMOTIVE, then drag it onto a clip.
Open the panel from Window › UXP Plugins › Super Retouch.
The first time you apply it, it may take a few seconds to load the AI models.
Activate your license
You can preview the retouch before activating, but a small watermark is shown.
- In Effect Controls, click the License button under Super Retouch, then Activate.
- When the browser opens, sign in with the LUCAMOTIVE account you bought with, check the code and device, and approve.
- Back in Premiere, activation is confirmed and the watermark disappears.
Effect Controls
fxMotion
fxOpacity
fxSuper Retouch
StartStart from scratch
Amount100.0
ViewResult
AboutVersion info
LicenseLicense
People
Skin
Super Retouch
This computer is not activated. Until it is, the output shows a watermark.
Super Retouch
The activation page opened in your browser with this code filled in:
QFMZ-7KRT
Check that it matches, then approve. The code is also on the clipboard and expires in 10 minutes. Keep this window open: it shows when the activation is done.
Effect Controls and the license window appear in the same language as Premiere.
One license covers two computers. You don’t need to activate again after updating or reinstalling.
Super Retouch
This computer is activated.
You can also activate the same way from the panel menu (☰) › License…
Retouch with the panel
The panel groups the retouch controls by category in one place. What you change there goes straight into Super Retouch in Effect Controls.
- Open the panel from Window › UXP Plugins › Super Retouch.
- It first opens as a floating window. Drag its name tab next to Effect Controls to dock it; it opens there from then on.
- Select one clip in the timeline. If it has no Super Retouch yet, click Add Super Retouch at the top of the panel.
- Pick a category from the tabs at the top and adjust what you need.
Super Retouch
V1park_portrait_01.mp4Reset all
QuickSkinFaceEyes, nose, mouthMakeupBody
One-click looks
My looks
Frequently used
Each change in the panel is one Undo step (Ctrl+Z on Windows, Cmd+Z on Mac). To set every adjustment back to the start, click Reset all.
Change the panel language
The panel starts in the same language as Premiere. To use another language:
- Click the menu (☰) next to the panel name and choose Language…
- Click a language and the panel reopens in it. Same as Premiere goes back to the default.
Super Retouch
QuickSkinFaceEyes, nose, mouthMakeupBody
Panel language
Only the panel changes. Effect Controls and the license window follow Premiere’s language.
One-click presets
In the Quick tab, click a card under One-click looks to set every adjustment at once. Start from scratch clears the retouch so you can set it yourself. Undo brings back the previous values.
Save the retouch you use often as your own look and apply it in one click.
- Adjust the clip the way you like, then click Save current (+) under My looks.
- Type a name and click Save. A card appears under My looks; click it to apply the same retouch.
- To remove one, open the panel menu (☰) › Manage my looks… and click Delete.
Save as my look
Saves this clip's retouch amounts, skin tone look and lip makeup as a one-click look on this computer.
My look 1
Your looks are stored on this computer. To rename one, save it again under the new name and delete the old one.
Troubleshooting
- If you’re asked to quit apps, save your work, quit Premiere Pro, After Effects and Media Encoder, then install again.
- If it doesn’t appear in the Effects panel, quit Premiere Pro completely and open it again.
- If you’re told the panel wasn’t installed, double-click Super Retouch Panel.ccx to install it. On Windows it’s in the extracted folder.
- If a newer version is already installed, download the latest installer from My products and install that.
Super Retouch 0.12.97
Installed: C:\Program Files\Adobe\Common\Plug-ins\7.0\MediaCore\SuperRetouch
The panel file was not found, so the panel was not installed.
Open Premiere and search for Super Retouch in the Effects panel.
If that doesn’t help, email support@lucamotive.com with your operating system, Premiere Pro version and the error message.
Installation help